Author: Tyler Novak
Table of Contents
Create the Backyard Fire Pit You’ve Always Wanted
That patch of grass in your backyard could be a gathering spot by next weekend instead of just a place you mow. Here’s what it actually takes to build a fire pit that looks good, holds up through winter, and doesn’t cost a fortune.
Check the Rules Before You Dig
Before you buy a single block, call your city or check its website for burn restrictions. Some municipalities require a minimum distance from property lines (often 10 to 25 feet), while others ban open flames entirely during dry seasons. The National Fire Protection Association publishes general guidance on outdoor fire safety, but local rules vary enough that a five-minute phone call to your building department can save you from tearing out a finished project later. If you live in an HOA community, don’t skip this step. Plenty of DIYers have built a beautiful fire pit only to find out it violates a covenant nobody read.
Choosing a Spot That Actually Works
Location matters more than most people expect going in. You’ll want at least 10 feet of clearance from your house, fence, deck railings, and any low-hanging tree branches, and the ground should be as flat as you can find without regrading. Pay attention to which way the wind usually blows in the evening; nobody enjoys smoke rolling straight into their eyes every time they sit down. A spot visible from your kitchen or patio door tends to get used more often simply because it’s easy to glance at and easy to walk to.
Think ahead, too. If you might add a paver patio, string lights, or a small pergola down the road, leave yourself six or seven extra feet of buffer now rather than boxing yourself in.
Picking a Style and Size
Most backyard fire pits fall into one of three camps: circular block pits, square or rectangular pits with a more modern look, and natural stone pits built for a rustic feel. A 36- to 44-inch interior diameter is the sweet spot for most families, big enough for a real fire, small enough that six or eight people can still talk comfortably across it. Circular retaining wall blocks remain the fastest build because they’re designed to interlock without cutting, and a single pallet from a home improvement store typically runs somewhere between $150 and $300 depending on the material.
Square pits take a little more measuring and a miter saw or wet saw for corner cuts, but they pair nicely with a rectangular patio or a modern deck. Natural stone is the slowest option since every piece is a different shape, though the payoff is a pit that looks like it’s been there for decades.
Gathering Your Materials
Before you start digging, get everything on site so you’re not making three trips to the store mid-project.
- Retaining wall blocks or natural stone (roughly 40 to 60 blocks for a 40-inch circular pit), crushed gravel for the base, paver sand, a 36-inch steel fire ring liner, landscape block adhesive, a shovel, a hand tamper, a 4-foot level, a tape measure, and work gloves.
A steel liner isn’t strictly required if you’re using heat-rated blocks, but it protects the masonry from cracking after repeated freeze-thaw cycles, and most liners cost less than $40.
Digging In: The Foundation
Mark your outline with spray paint or a garden hose, then dig down about 6 to 8 inches inside that circle, removing grass, roots, and topsoil as you go. Fill the excavated area with 4 inches of crushed gravel and compact it firmly with a hand tamper, working in thin layers rather than dumping it all in at once. A plate compactor speeds this up considerably if you’re renting one anyway for a nearby patio project.
Check the surface with your level in several directions before moving on. Even a half-inch of slope becomes obvious once you’ve stacked three or four courses of block on top of it, and by then it’s a much bigger fix.
Stacking the Walls
Lay your first course carefully, checking level after every single block since this row sets the tone for everything above it. Stagger the joints on each subsequent course the way you would with a brick wall, which adds real structural strength and gives the finished pit a more finished, less stacked-Lego look. Most stackable retaining wall blocks are designed to sit without mortar, but if you want a permanent installation, run a bead of exterior-rated construction adhesive between the top two or three courses.
Slide the steel fire ring liner into place before you finish the last course. Trying to wedge it in afterward is annoying and occasionally impossible depending on how tight your fit is.
Seating and Comfort
The fire pit itself is only half the project; where people sit determines whether they stay for twenty minutes or two hours. Adirondack chairs remain popular because they’re inexpensive, weatherproof, and comfortable enough to sit in for a while. A simple seating wall built from the same blocks as your pit creates a cohesive look and gives you permanent seating that needs almost no upkeep. Keep chairs at least 3 feet back from the fire ring so everyone stays warm without roasting.
Finishing Touches and Landscaping
Once the pit itself is done, a paver patio around the base cuts down on mud and gives the whole area a finished look; even a simple 10-by-10-foot pad makes a noticeable difference. Solar path lights need no wiring and make the walk back to the house safer after dark. Ornamental grasses or seasonal flowers in planters around the perimeter soften all that hard landscaping, and a few well-placed shrubs can add privacy if your yard backs up to a neighbor. Better Homes & Gardens and Family Handyman both have solid photo galleries if you want ideas before you commit to a layout.
Fire Safety Isn’t Optional
Burn only seasoned firewood unless your pit is built specifically for gas or propane, and skip treated lumber, painted wood, or anything with glue or finish on it, since burning those releases chemicals you don’t want to breathe. Keep a hose or a bucket of water within reach any time there’s a flame going, and never walk away from a fire that’s still burning, even for a few minutes. Kids and pets need supervision around open flames every time, no exceptions. The Consumer Product Safety Commission has additional guidance worth a quick read before your first gathering, especially if this is your first fire pit.
Keeping It Looking Good
Fire pits are low maintenance, but they’re not zero maintenance. Scoop out ash once it’s fully cooled after each use, since letting it pile up chokes off airflow to future fires. Once a year, walk the perimeter and check for blocks that have shifted from frost heave, and reset or re-glue anything that’s moved. If you’re using a steel liner, glance inside for rust every season or two and swap it out once it starts flaking, which usually happens somewhere around year five to eight depending on your climate. A simple weatherproof cover during heavy rain or snow protects both the liner and the surrounding stone.
Building your own fire pit isn’t complicated, but it does reward patience, especially during the foundation stage where a little extra care pays off for years. Get the base right, pick materials that suit your yard, and the rest of the project tends to fall into place on its own. By next month, you could be handing someone a marshmallow stick instead of still thinking about it.
Sources
DIY


Home Services

Weather & Maintenance

Table of Contents
How to Prep Your Home’s Exterior for Spring in a Weekend
Winter leaves a specific kind of accumulated damage on a home’s exterior that’s easy to overlook because it develops gradually and because the cold months don’t invite the kind of outdoor inspection that warmer weather does. A focused weekend of exterior assessment and maintenance in early spring catches the issues that winter created before they develop through the warmer months into problems that cost significantly more to address. Most of what needs doing doesn’t require contractors or specialized skills — it requires time, attention, and the right sequence of tasks to make the weekend efficient rather than scattered.
Start With a Systematic Exterior Inspection
The most productive thing you can do at the beginning of a spring exterior maintenance weekend is walk the perimeter of your home slowly and deliberately before touching anything, with the specific intention of identifying what needs attention rather than immediately starting to clean or fix. A rushed inspection that misses a significant issue and sends you to the hardware store twice is less efficient than twenty minutes of careful observation that produces a complete picture of what the weekend needs to accomplish.
Start at ground level and work upward. Look at where the foundation meets the soil and note any areas where soil has heaped against the siding or foundation wall, which creates moisture intrusion risk and in wood construction creates direct termite access. Check for cracks in the foundation, particularly horizontal cracks that can indicate structural pressure from soil or frost heave, which warrant professional evaluation rather than DIY patching. Look at the condition of any caulking around windows and doors at the foundation level, and note where it has cracked, separated, or gone missing.
Moving up the walls, look for cracked, warped, or missing siding sections, bubbling or peeling paint that indicates moisture intrusion behind the surface, and any discoloration that suggests water tracking down the wall from above. Look at every window from the outside for failed caulk lines, damaged glazing compound, signs of rot in wood frames, and condensation staining on the exterior that suggests the interior seal has failed. Note every issue rather than trying to remember them — a notes app on your phone or a piece of paper creates the task list that makes the rest of the weekend organized.
The roof inspection from ground level using binoculars accomplishes more than most homeowners expect. Look for lifted, missing, or curling shingles, visible damage along the ridge line, any areas where shingles appear darker than the surrounding surface indicating moisture retention, and the condition of the flashing around chimneys, skylights, and roof penetrations. Any active damage should go on the professional assessment list rather than the DIY list.
Gutters and Downspouts: The Weekend’s Highest-Priority Task
Gutter cleaning and inspection is the single most important exterior maintenance task of the spring season, because gutters that are blocked, damaged, or improperly pitched allow water to back up against the fascia and roofline, overflow and saturate the soil against the foundation, and in worst cases allow water intrusion at the roofline that produces interior ceiling and wall damage. All of those consequences are expensive. Cleaning and inspecting gutters takes two to three hours for a typical home and prevents most of them.
Clear all debris from gutters using a gutter scoop or your gloved hands, working toward the downspout opening rather than pushing debris into the downspout where it will create a blockage. After clearing, flush each gutter section with a garden hose from the end away from the downspout, watching for leaks at seams and joints as the water travels toward the downspout. Any seam that leaks should be resealed with gutter sealant once the gutter is dry, which is a simple fix that takes five minutes and prevents the joint from widening over the course of the season.
While the gutters are still wet from flushing, observe the water flow toward the downspout carefully. Any area where water pools rather than flowing indicates that section of gutter has lost its pitch, typically from the weight of debris over winter or from a fastener that has pulled away from the fascia. Gutter pitch should fall approximately a quarter inch per ten feet of run toward the downspout, and correcting a sagging section requires either removing and reinstalling the gutter spike or replacing it with a gutter screw, which holds considerably better in the long term.
Downspout inspection involves confirming that each downspout is clear by flushing from the top with a hose and confirming free flow at the bottom outlet, and checking that the outlet directs water at least four to six feet away from the foundation. Downspout extensions that discharge against the foundation or that have been buried and may have collapsed underground are worth investigating in spring when the evidence of their failure — saturated soil against the foundation, efflorescence on the basement wall — is freshest after the spring thaw.
Siding Cleaning and Repair
Winter deposits a layer of grime, mildew, algae, and organic debris on most home exteriors that’s worth removing in spring both for aesthetic reasons and because the moisture-retaining organic matter it contains accelerates deterioration of paint and siding surfaces when left in place. A pressure washer is the most efficient tool for this task on most siding types, but the technique matters considerably — pressure that’s appropriate for concrete can damage vinyl siding, and directing water upward under laps can force water behind the siding surface.
For vinyl siding, a medium-pressure setting with a wide-angle nozzle, working from top to bottom and directing the spray slightly downward rather than horizontally or upward, cleans effectively without the risk of water intrusion. Stubborn mildew staining on vinyl responds to a solution of one part white vinegar to three parts water applied with a soft brush before rinsing. For wood siding, lower pressure and more careful technique is appropriate, and heavily weathered or peeling painted wood siding that can’t be adequately cleaned without removing paint should go onto the fall painting list with proper surface preparation planned rather than being spot-painted without addressing the underlying condition.
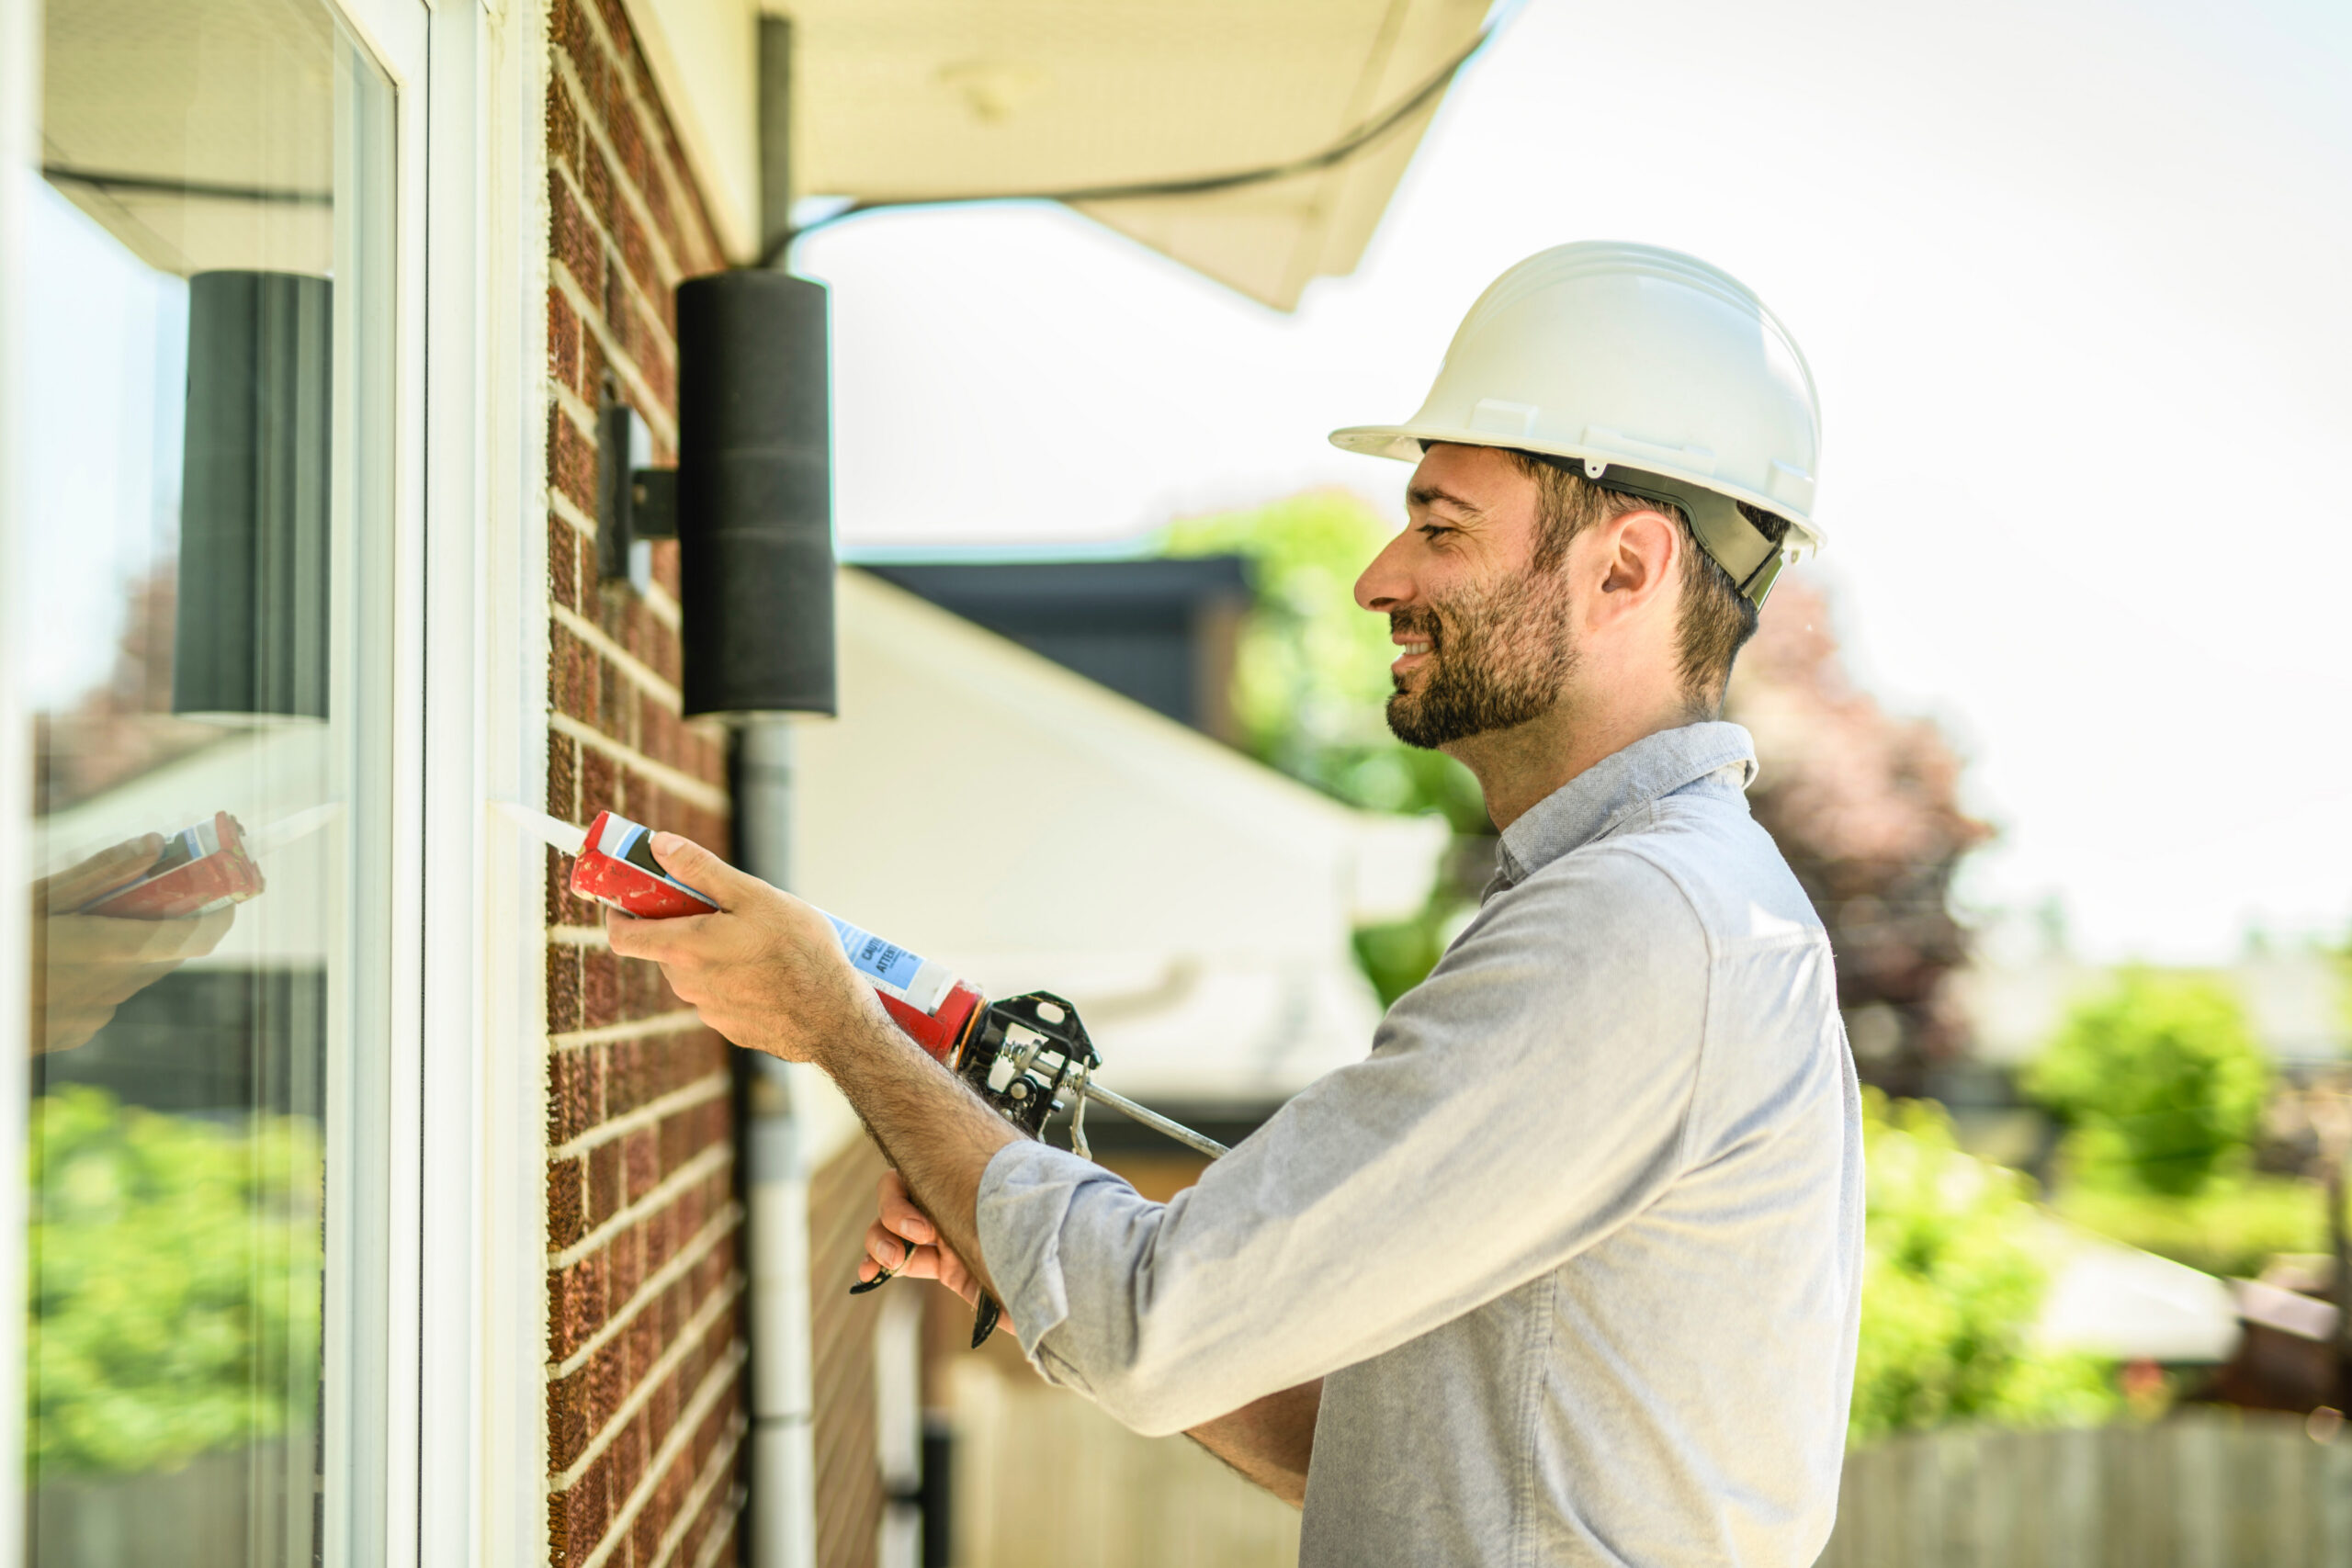
Caulk inspection and repair is the siding work that produces the most value per hour invested, because failed caulk lines around windows, doors, utility penetrations, and transitions between different siding materials are a primary pathway for water intrusion and air infiltration that drives both moisture damage and heating and cooling costs. Any caulk that is cracked, separated from the surface on one side, or has gone hard and brittle should be removed and replaced. Using a utility knife to cut out old caulk down to clean surfaces, allowing the surface to dry completely, and applying a high-quality paintable exterior caulk produces a seal that will last several years rather than the one season that caulking over degraded material typically provides.
Deck, Porch, and Paved Surface Assessment
Wood decks need specific spring attention because winter moisture exposure accelerates the deterioration of any finish protection applied during previous seasons, and because damage that developed over winter is most actionable before the deck is in active use. Walk every square foot of decking looking for soft spots that indicate rot by pressing with your foot and noting any give, popped fasteners that create a trip hazard and a moisture intrusion point, boards that have split or cupped beyond what cosmetic treatment can address, and the condition of the ledger board connection where the deck attaches to the house.
The simple nail-probe test for wood rot involves pushing a nail or ice pick into any wood that looks discolored or slightly soft — sound wood resists penetration, while wood that has begun to rot allows the probe to push in with little resistance. Any structural component that fails this test — posts, beams, ledger board, rim joist — should be assessed by a contractor before the deck is loaded for the season, because structural rot can progress to failure without obvious external evidence.
Concrete driveways, sidewalks, and patios typically show winter damage in the form of new cracking, spalling from freeze-thaw cycles, and joint deterioration. Filling cracks before they expand through the next winter cycle is the basic maintenance that extends concrete life significantly. Concrete crack filler applied to clean, dry cracks using a caulk gun, slightly overfilled and then scraped level after curing, seals the crack against water infiltration that drives further freeze-thaw damage. Large or growing cracks that appear structural rather than cosmetic are worth getting a professional opinion on before committing to repair approaches that may not address the underlying cause.
Grading, Drainage, and Foundation Perimeter
The ground around a home’s foundation should slope away from the foundation at a minimum pitch of one inch per foot for at least six feet of horizontal distance in all directions. Over time, soil settles, landscape plantings grow and create depressions, and the original grading that directed water away from the foundation can invert in specific areas and begin directing water toward it instead. Spring is the easiest time to identify and correct grading problems because the soil is workable, the drainage patterns from winter rain and snowmelt are fresh in evidence, and correcting the grade before the dry season sets in is straightforward with a wheelbarrow and topsoil.
Mulch in foundation plantings that has accumulated against the siding or within inches of the foundation wall should be pulled back to maintain a gap, both because direct mulch-to-siding contact holds moisture against the surface and because it provides concealed access for termites. The visual evidence of termite activity — mud tubes on the foundation wall, damaged wood at grade level, frass near wood members — is most visible in spring after winter inactivity, and identifying it early when the colony is smaller and before summer activity peaks makes treatment more effective.
Window wells on basement windows that have accumulated debris and leaf matter over winter are worth cleaning and inspecting at the same time as the rest of the drainage perimeter, as clogged window wells that hold water against the basement window are a significant water intrusion risk that a thirty-minute cleaning eliminates.
Completing the Weekend With a Maintenance Record
The weekend finishes most productively with a brief written record of what was done, what was observed that needs professional assessment, and what was noted as a project for later in the season. A simple document or note on your phone that captures the inspection findings, the maintenance completed, and the open items creates continuity between this spring’s work and next spring’s starting point, accumulates the pattern of deterioration over multiple years that makes bigger decisions like roof replacement easier to time and justify, and provides documentation that can be relevant to insurance claims and property sale disclosures.
The exterior maintenance that gets done in a focused spring weekend costs almost nothing beyond materials and time, and it consistently prevents the compounding deterioration that turns small seasonal issues into large seasonal repair projects. The relationship between consistent exterior maintenance and long-term ownership costs is as direct and reliable as almost any other maintenance relationship in home ownership, and a productive spring weekend is where most of that value gets generated.
DIY

Home Services
Weather & Maintenance
Table of Contents
Small Backyard Upgrades That Make Outdoor Space Actually Usable
On it!
Small Backyard Upgrades That Make Outdoor Space Actually Usable
There’s a particular kind of frustration that comes with having a backyard you don’t actually use. The space exists, it has potential, and every spring you think about doing something with it — but the combination of unclear starting points, perceived cost, and the sheer open-endedness of outdoor improvement projects means that another season passes with the space functioning as little more than a view from the kitchen window. The gap between a backyard that exists and one that gets used consistently almost never comes down to square footage or budget. It comes down to a small number of specific changes that convert an undefined outdoor area into one that feels intentional, comfortable, and worth spending time in.
The Reason Most Backyards Go Unused
Before addressing specific upgrades, it’s worth understanding why so many backyards with real potential sit functionally empty. The most common reason isn’t lack of space or lack of interest — it’s that the space doesn’t have a clear anchor. An outdoor area without a defined focal point or functional zone reads as unfinished in the same way that a room without furniture does: technically present but not inviting, with no signal about where to sit, what to do, or how to begin using it. The outdoors adds additional barriers that indoor spaces don’t have — exposure to sun, wind, insects, and temperature — and a space that doesn’t address those barriers with even minimal solutions will consistently lose the competition for where to spend time against the climate-controlled interior.
The upgrades that actually change how much a backyard gets used aren’t necessarily the most visually dramatic ones. They’re the ones that remove the specific friction points that make going outside feel like more effort than it’s worth. A space with comfortable seating, manageable sun exposure, some degree of privacy, and adequate lighting for evening use gets used. A space without those things, regardless of how large or potentially attractive it is, doesn’t — and adding a garden or a decorative feature before solving the basic comfort and usability problems produces a high-maintenance space that still doesn’t get used consistently.
Define a Primary Seating Area First
The single most impactful change you can make to an underused backyard is defining a primary seating area — a zone that functions as the outdoor equivalent of a living room, with enough seating to be genuinely usable and enough definition to feel like a destination rather than just a spot in the yard. This doesn’t require a deck, a pergola, or any permanent construction. It requires surface definition and seating, both of which are achievable at modest cost.
An outdoor rug on a patio or even on a lawn area defines a zone visually and underfoot in the same way that a rug defines a seating area within a larger indoor room. Outdoor rugs designed for exterior use are available at a wide range of price points, resist moisture and UV exposure, and convert an ambiguous patch of patio or decking into something that reads clearly as a place to sit. Combined with two to four chairs and a small table, the defined zone creates the basic structure that makes a backyard feel furnished rather than empty. Furniture doesn’t need to be expensive to be functional — resin or metal furniture weathers well, requires minimal maintenance, and is available at price points that make furnishing a basic outdoor seating area achievable well under $300 for most configurations.
For yards without existing hard surfaces, gravel or decomposed granite laid within a defined border — edging stakes and landscape fabric underneath to control weeds — creates an inexpensive ground-level patio surface that drains well, requires minimal maintenance, and provides a stable, defined area for furniture without the cost or permanence of concrete or pavers. A 10-by-12-foot gravel patio can be installed for $100 to $200 in materials depending on local prices, and the project is manageable in a single weekend day with basic tools. This Old House’s gravel patio guide walks through the process clearly enough to make it accessible to anyone comfortable with basic outdoor labor.
Solve the Sun Problem Before Anything Else
Exposure to direct afternoon sun is the single most common reason comfortable outdoor furniture goes unused during the peak months when a backyard should be most enjoyable. A seating area in full afternoon sun in most parts of the country is simply too hot for comfortable extended use between roughly noon and five in the afternoon, which is precisely the window when outdoor entertaining and relaxation would otherwise happen. Addressing sun exposure doesn’t require permanent shade structures, and the solutions available at modest cost are effective enough to transform how usable a sun-exposed space is during peak hours.
A freestanding cantilever umbrella — the type with an offset pole that allows the canopy to extend over a seating area without a center post interfering with furniture arrangement — provides adjustable, repositionable shade that follows the sun’s angle when rotated and can be closed and stored when not needed. Quality cantilever umbrellas that hold up through multiple seasons are available from $150 to $400 depending on size and materials, a price point that’s accessible for most households and that pays for itself quickly in terms of how much more usable the covered area becomes. For a more permanent and less expensive solution, a shade sail — a tensioned fabric triangle or rectangle suspended between anchor points — provides consistent overhead coverage at a cost of $50 to $150 depending on size, and can be attached to existing fence posts, the house exterior, or freestanding poles set in ground anchors.
For spaces where afternoon western sun hits a seating area directly, a privacy screen or outdoor curtain panel on the sun-facing side provides both shade and visual enclosure that makes the space feel more sheltered without blocking air circulation. Outdoor curtain panels designed for UV and moisture exposure are available inexpensively and can be hung from a simple tension rod or cable system between two posts, creating a soft enclosure that dramatically changes the feel of an exposed patio.
Privacy Screens That Don’t Require a New Fence
The sense of being observed or exposed is one of the most consistent barriers to genuinely relaxing in an outdoor space, particularly in urban and suburban settings where neighboring yards, windows, and sightlines are close and unavoidable. Full fence replacement to address privacy is expensive and in many jurisdictions requires permits, but there are several lower-cost approaches that provide meaningful visual privacy for a defined seating area without replacing or modifying existing fence lines.
Lattice panels attached to an existing fence or freestanding on post supports create a partial visual barrier that can be combined with climbing plants for a natural, gradually improving privacy screen at very low initial cost. Bamboo or reed privacy screens, available in rolls at garden centers and home improvement stores, can be attached directly to chain-link or open wood fences to convert a see-through barrier into a solid visual screen for $30 to $80 per panel depending on size. These weather over time and eventually require replacement, but their low initial cost and immediate effectiveness make them one of the most practical privacy solutions for renters or for people uncertain about their long-term plans for the space.
Tall container plants — ornamental grasses, bamboo in large pots, or fast-growing shrubs in substantial planters — positioned along sightlines create a living privacy screen that improves over time and adds genuine visual interest to a space while serving a functional purpose. A row of three or four large ornamental grasses in substantial containers along a property line provides meaningful screening at eye level while seated, costs $100 to $200 in plants and containers, and requires far less commitment and expense than fence construction. The Spruce’s privacy plant guides identify the fastest-growing and most effective options for different climate zones, which is worth consulting before purchasing to ensure the plants you select will actually perform as expected in your specific conditions.
Lighting for Evening Use
A backyard without usable evening lighting is effectively a space that’s only available for half the hours in which you’d want to use it, and the addition of outdoor lighting is one of the upgrades most consistently cited as transformative by homeowners who make it. The visual quality of outdoor lighting in the evening is also what converts a backyard from functional to genuinely pleasant — the warm, low-level lighting that works best outdoors creates an atmosphere that overhead or harsh lighting never achieves, and it does so most effectively when it comes from multiple lower sources rather than a single bright fixture.
String lights are the most accessible and versatile outdoor lighting option available, and their reputation as merely decorative understates how effectively they provide genuine functional illumination for a defined outdoor area when positioned well. Strung overhead between two attachment points above a seating area, they provide warm ambient light that makes the space usable after dark while creating the kind of enclosed, comfortable atmosphere that makes an outdoor area feel like a room rather than a yard. Solar-powered string lights eliminate wiring entirely for installations where running electrical is impractical, though corded options connected to an outdoor outlet via a weatherproof extension cord provide more consistent brightness across varying light conditions.
Path lighting along walkways and garden edges defines the boundaries of outdoor spaces after dark and improves safety on steps and level changes simultaneously. Solar path lights require no wiring, are available for $2 to $10 per fixture, and install by pushing a stake into the ground — a project that takes minutes per light and instantly improves the finished quality of an outdoor space at minimal cost. For steps specifically, low-voltage LED step lights that install into the riser face of a deck or stair provide both safety and aesthetic definition that dramatically improves the nighttime appearance of a deck or raised patio, and many are available in solar-powered versions that require no electrical connection.
Surface and Ground Improvements That Cost Less Than Expected
The ground surface of a backyard has a larger effect on how the space feels and functions than most people give it credit for before they’ve experienced the difference. Bare dirt is unusable in wet conditions and unpleasant in dry ones. A patchy, weedy lawn requires maintenance effort without providing the clean, finished look that makes a space feel worth using. Hard surfaces that have heaved, cracked, or become uneven create both an unsightly and a mildly hazardous environment. Addressing the ground surface of the primary use area is often the change that most directly converts a space from avoided to used, and the options for doing so range from very inexpensive to moderately costly depending on the scale and permanence desired.
For existing concrete or patio surfaces that are in poor cosmetic condition but structurally sound, a concrete resurfacer applied with a squeegee and trowel converts a stained, worn surface into a clean, even one for $50 to $100 in materials for a typical patio area. For wooden decking that has weathered and grayed, a deck cleaner followed by a semi-transparent stain or sealer restores both appearance and weather resistance for $80 to $150 in products and a day of work, producing results that make an aging deck look well-maintained rather than neglected.
Artificial turf has come down dramatically in both cost and quality in recent years, and for small defined areas — a play zone for children, a patch between paving, or a small lawn area where growing and maintaining real grass is impractical — it provides a consistently green, low-maintenance surface that requires neither watering nor mowing. For a small backyard area of 100 to 200 square feet, artificial turf installed as a DIY project using products from Home Depot or similar retailers is achievable for $200 to $500 depending on the quality selected, producing a surface that performs reliably regardless of weather or season and that immediately improves the finished quality of a backyard that previously had a problematic lawn area.
Adding One Feature That Makes the Space Distinctly Yours
Beyond the functional baseline of comfortable seating, shade, privacy, and lighting, the upgrade that most consistently converts a backyard from one that’s usable into one that’s genuinely enjoyed is the addition of a single feature that makes the space feel personally meaningful rather than generically furnished. This is highly individual — for some households it’s a fire pit that extends outdoor use into cool evenings and creates a natural gathering point; for others it’s a water feature whose sound masks neighborhood noise and creates a specific atmosphere; for others it’s a raised garden bed that provides both activity and harvest. The specific choice matters less than the principle: a space that has one thing in it that you specifically wanted and that provides something you actively seek out has a fundamentally different relationship with the people who live there than one that’s simply set up adequately.
A propane or wood-burning fire pit is one of the most popular single additions to a backyard seating area, and with good reason — it extends comfortable outdoor use into temperatures that would otherwise drive people inside, creates a natural focal point that organizes seating around it, and produces the particular kind of relaxed social atmosphere that few other additions generate. Portable fire pits that require no installation and can be repositioned as needed are available from $50 to $200 depending on size and material, and in most jurisdictions don’t require permits when used within manufacturer guidelines. A single worthwhile addition, chosen for what it specifically adds to how your household uses outdoor space, is consistently worth more than a collection of generic upgrades that check boxes without creating anything you specifically wanted.
Sources:
https://www.bhg.com/gardening/landscaping-projects/landscape-basics/budget-backyard-ideas/
https://www.thisoldhouse.com/yards/21014698/how-to-build-a-gravel-patio
https://www.thespruce.com/best-plants-for-privacy-4767537
https://www.homedepot.com/b/Outdoors-Patio-Furniture/N-5yc1vZbx9v
DIY
Home Services
Weather & Maintenance
Table of Contents
How to Create a More Restful Bedroom Without Replacing Furniture
The bedroom is the room most people are least satisfied with and least likely to invest in thoughtfully, partly because the cost of furniture replacement feels prohibitive and partly because it’s a private space that doesn’t get the social scrutiny that living rooms and kitchens do. The result is that most bedrooms are functional in the narrow sense — they contain a bed and a place to put clothes — without being genuinely restful in the way that sleep research and environmental psychology suggest a bedroom should be. The good news is that the factors that most reliably determine whether a bedroom feels restorative have very little to do with the furniture itself, and almost everything to do with lighting, layout, textiles, and the sensory environment — all of which can be changed meaningfully without spending much or replacing anything large.
Why Most Bedrooms Don’t Actually Support Rest
Before addressing specific changes, it’s worth understanding why the average bedroom underperforms as a sleep environment, because the reasons aren’t obvious and addressing symptoms without understanding causes produces short-lived improvements. The human sleep system is regulated primarily by circadian rhythms driven by light exposure, and the modern bedroom works against those rhythms in multiple ways simultaneously. Overhead lighting that mimics daylight suppresses melatonin production in the evening hours when it should be rising. Screens — televisions, phones, tablets — emit blue-spectrum light that is particularly effective at signaling the brain to stay alert. Temperature regulation is often neglected despite being one of the most powerful levers available for sleep quality. And the visual environment of most bedrooms — piles of laundry, visible work items, general clutter — creates low-level cognitive activation that competes with the mental downshift that sleep requires.
Research from the National Sleep Foundation consistently identifies the bedroom environment as one of the most modifiable factors in sleep quality, with lighting, temperature, and noise ranking as the three highest-impact variables within the environment itself. All three are addressable without replacing a single piece of furniture, and addressing them systematically produces improvements that most people notice within days rather than weeks.
Lighting Is the Highest-Leverage Change You Can Make
Of all the environmental factors that affect how restful a bedroom feels and how well you sleep in it, lighting has the strongest evidence base and the most immediate impact — and it’s also the category most people have never deliberately optimized. Most bedrooms rely on a single overhead fixture as the primary light source, which creates a harsh, evenly distributed light that’s appropriate for task completion but actively counterproductive for winding down in the evening hours. Overhead lighting positioned above and behind your field of vision as you lie in bed is precisely the type of bright, high-angle light that suppresses melatonin most effectively, which means the standard bedroom lighting setup is working directly against the body’s preparation for sleep.
The solution isn’t complicated or expensive: replacing overhead lighting as the primary evening light source with lower-positioned, warmer alternatives transforms the evening experience in a bedroom without changing anything structurally. Bedside lamps with warm-spectrum bulbs — specifically bulbs in the 2700K to 3000K color temperature range, labeled as “soft white” or “warm white” — produce light that is far less disruptive to melatonin production than the cool-white or daylight bulbs that come standard in many fixtures. Smart bulbs from brands like Philips Hue or LIFX allow color temperature to shift automatically toward warmer tones in the evening hours without any manual adjustment, which is particularly useful for people whose evening routines don’t include a consistent wind-down moment where they’d remember to switch light sources manually.
Dimmer switches are among the highest-return low-cost upgrades available for a bedroom, converting a fixed-output overhead fixture into a variable one that can be turned down significantly in the hours before sleep. Installation requires basic electrical comfort and typically costs $15 to $30 in parts, or slightly more for a smart dimmer that can be controlled by voice or schedule. The combination of a dimmer switch for overhead lighting and warm-spectrum bedside lamps at lower positions creates a layered lighting environment that can shift from functional to genuinely sleep-supportive as the evening progresses — a change that costs under $100 to implement and produces results that furniture replacement rarely matches.
Blackout curtains or liners deserve specific attention for anyone whose bedroom receives morning light early or is exposed to streetlights or exterior lighting at night. Light exposure during sleep — even at relatively low levels — disrupts sleep architecture in ways that affect how rested you feel regardless of total sleep duration. Blackout curtains are available at a wide range of price points, and blackout liners that attach to existing curtains offer an even more affordable option that works with window treatments already in place. The darkness they create is one of the single most impactful changes available for sleep quality in a bedroom that currently receives significant light intrusion.
Layout Changes That Cost Nothing
The physical arrangement of furniture in a bedroom has measurable effects on how restful the space feels, and most bedrooms are arranged around convenience of initial setup rather than deliberate attention to how the layout affects daily experience. Two layout principles consistently produce improvements in how a bedroom feels: bed placement relative to the door, and the removal of work or stimulation-associated items from the visual field as seen from the bed.
Positioning the bed so that the door is visible from a lying position — but not directly in the path of the door’s swing — creates a subconscious sense of security that reduces the low-level vigilance the nervous system maintains when the entry point to a room is behind or out of sight. This is sometimes described in terms of feng shui but has a more straightforward neurological basis: the brain maintains a lower-level alertness when it can’t monitor the room’s entry point, which competes subtly with the relaxation that sleep requires. In many bedrooms, moving the bed to achieve this positioning is possible without any new furniture and sometimes produces a noticeably different feel immediately.
Removing or obscuring items that are mentally associated with work, obligation, or stimulation from the visual field as seen from the bed is equally important and costs nothing beyond the effort of moving things. A desk with a visible monitor, a pile of work papers, exercise equipment, laundry waiting to be put away, or even a visible closet full of clothing all register as cognitive demands to a brain trying to disengage. Moving a desk so it’s not visible from the bed, putting a screen to sleep or turning it to face away, or simply closing closet doors before bed removes these activation triggers from the visual environment at the moment they’re most counterproductive.
Textiles and Temperature as Sensory Environment
The tactile and thermal environment of a bedroom operates below conscious attention for most people, which means its effects on sleep quality and restfulness are felt without being attributed to their actual cause. Bedding that’s too warm, too cool, too scratchy, or simply unpleasant to the touch creates low-level physical discomfort that disrupts sleep continuity even when it doesn’t fully wake you. The body temperature drop that initiates and maintains sleep is one of the most well-documented mechanisms in sleep science, and a sleep environment that works with rather than against that temperature regulation produces measurably better sleep outcomes.
Natural fiber bedding — cotton, linen, and bamboo-derived fabrics — manages moisture and temperature more effectively than synthetic alternatives, which tend to trap heat and moisture in ways that disrupt the body’s natural thermoregulation during sleep. This doesn’t require replacing an entire bedding set at once: starting with pillowcases, which have the most direct contact with skin during sleep and the highest impact on perceived comfort, allows a gradual transition toward better sleep textiles without significant upfront investment. Wirecutter’s bedding reviews consistently identify mid-range cotton and linen options as outperforming both budget synthetics and premium alternatives for most sleepers on the combination of temperature regulation and tactile comfort.
Room temperature is the most powerful single physical variable in the sleep environment, and it’s one that many people either can’t control or haven’t optimized. Sleep research consistently identifies a bedroom temperature between 60 and 67 degrees Fahrenheit as optimal for most adults, a range that feels slightly cool when awake but supports the core body temperature drop that deep sleep requires. For people who sleep with a partner whose temperature preferences differ, a dual-zone mattress topper or separate blanket layers rather than a shared duvet allows independent temperature management without replacing the mattress or any other furniture. For people in climates or buildings where thermostat control is limited, a bedroom fan — even a simple box fan — creates both a modest cooling effect and the white noise benefit discussed in acoustic treatments, making it one of the higher-return single purchases available for overall bedroom restfulness.
Scent and Sensory Details That Complete the Environment
The sensory environment of a bedroom extends beyond what’s visible and audible to what’s perceptible through smell and touch — two channels that are closely linked to the nervous system’s relaxation response and that most bedroom redesigns ignore entirely. Scent has a direct pathway to the limbic system, the part of the brain that regulates emotion and arousal, which is why certain scents reliably trigger relaxation responses with a speed and consistency that other sensory inputs don’t. Lavender is the most extensively studied of the sleep-associated scents, with research cited by Johns Hopkins Medicine showing consistent effects on relaxation and sleep quality across multiple study designs. A simple lavender sachet near the pillow, a diffuser with lavender essential oil run for thirty minutes before bed, or a linen spray applied to pillowcases costs very little and requires no permanent change to the room.
Reducing sensory clutter — the visual, auditory, and olfactory noise of a room that hasn’t been deliberately curated — is the final layer of a restful bedroom environment and the one that ties together everything else. A bedroom that’s visually simplified, acoustically softened, lit warmly and dimly in the evening, thermally comfortable, and pleasantly scented creates a sensory environment that signals clearly and consistently to the nervous system that this is a place for rest rather than activity. That signal is what most bedrooms currently fail to send, not because they lack good furniture but because the sensory environment they create is indistinguishable from the rest of the home — stimulating, complex, and associated with wakefulness rather than with the particular quality of calm that good sleep requires.
Sources:
DIY
Home Services
Weather & Maintenance
Table of Contents
- Why Window Treatments Matter More Than You Think
- Curtains That Do More Than Block Light
- Shades and Blinds for Flexible Control
- Window Films as a Low-Cost Upgrade
- Layering Treatments for Better Performance
- Strategic Placement Makes a Bigger Difference Than Price
- Privacy Without Blocking Natural Light
- Reducing Drafts and Improving Comfort
- Designing for Long-Term Flexibility
- Small Upgrades That Deliver Immediate Results
- Creating a More Comfortable and Efficient Home
Budget-Friendly Window Treatments That Improve Privacy and Energy Efficiency
Windows do more than bring in natural light—they also impact privacy, comfort, and energy costs. The right window treatments can make a noticeable difference without requiring a major investment. With a few strategic choices, it’s possible to create a space that feels more secure, comfortable, and efficient year-round.
Why Window Treatments Matter More Than You Think
Many homeowners focus on insulation, appliances, or HVAC systems when thinking about energy efficiency. Windows, however, are one of the biggest sources of heat loss in winter and heat gain in summer. At the same time, they’re often the weakest point when it comes to privacy.
Budget-friendly window treatments help address both issues at once. They create a barrier that limits temperature transfer while also controlling visibility from the outside. The result is a home that feels more comfortable and secure without increasing utility costs or relying on constant adjustments.
Curtains That Do More Than Block Light
Curtains are one of the most accessible and versatile options for improving both privacy and energy efficiency. While many people choose them for style, the material and structure of curtains play a much bigger role in performance.
Thermal or insulated curtains are designed with multiple layers that help reduce heat transfer. In colder months, they keep warm air inside. In warmer months, they block heat from entering. Even standard curtains can provide some benefit when they’re thick enough and properly installed.
Length and placement matter more than most people expect. Curtains that extend beyond the window frame and reach close to the floor create a better seal, reducing air movement around the edges. Hanging them slightly higher and wider than the window can also make the space feel larger while improving coverage.
Shades and Blinds for Flexible Control
Shades and blinds offer a different kind of functionality. Instead of simply covering a window, they allow for adjustable light and privacy throughout the day.
Cellular shades, also known as honeycomb shades, are particularly effective for energy efficiency. Their design traps air in pockets, creating an insulating layer between the window and the room. This makes them a strong option for anyone looking to reduce heating and cooling costs without replacing windows.
Roller shades and Roman shades provide a cleaner look while still offering privacy. While they may not insulate as effectively as cellular options, they can still reduce glare and limit heat gain when used consistently.
Blinds, especially those made from wood or faux wood, allow for precise control over light and visibility. Tilting the slats can let in natural light while maintaining privacy, which is useful in spaces that face the street or neighboring homes.
Window Films as a Low-Cost Upgrade
Window films are often overlooked, but they can be one of the most cost-effective ways to improve both privacy and energy efficiency. These adhesive films are applied directly to the glass and come in a variety of finishes.
Frosted or decorative films provide privacy by obscuring the view from outside while still allowing light to pass through. This makes them ideal for bathrooms, entryways, or street-facing windows where full coverage isn’t always necessary.
Reflective or tinted films can reduce heat gain by blocking a portion of the sun’s rays. This helps keep indoor temperatures more stable, especially during warmer months. Some films also offer UV protection, which can prevent fading of furniture and flooring over time.
Installation is typically straightforward, making this a practical weekend project with immediate benefits.
Layering Treatments for Better Performance
One of the most effective strategies for improving both privacy and energy efficiency is layering different types of window treatments. Instead of relying on a single solution, combining curtains with shades or films creates a more adaptable system.
For example, pairing cellular shades with blackout curtains allows for maximum insulation and light control. During the day, the shades can filter light while maintaining privacy. At night, the curtains add an extra layer of insulation and complete coverage.
Layering also gives you more flexibility. You can adjust each component based on the time of day, weather, or activity, creating a more responsive living environment.
Strategic Placement Makes a Bigger Difference Than Price
It’s easy to assume that better results require more expensive materials, but placement often has a greater impact than cost. Even budget-friendly treatments can perform well when installed thoughtfully.
South- and west-facing windows tend to receive the most sunlight, making them key areas for heat control. Using more insulating or reflective treatments in these locations can significantly reduce indoor temperatures during warmer months.
North-facing windows, on the other hand, may benefit more from treatments that retain heat during colder seasons. Understanding how sunlight interacts with your home allows you to prioritize where to invest your time and resources.
Here’s a simple comparison of common window treatment options and their benefits:
| Treatment Type | Privacy Level | Energy Efficiency | Cost Range | Best Use Case |
|---|---|---|---|---|
| Curtains (thermal) | High | High | Low to moderate | Bedrooms, living rooms |
| Cellular shades | Medium to high | Very high | Moderate | Whole-home use |
| Roller shades | Medium | Moderate | Low | Kitchens, offices |
| Blinds (wood/faux) | Medium | Low to moderate | Low to moderate | Living areas |
| Window films | Medium to high | Moderate | Low | Bathrooms, street-facing windows |
This comparison shows that you don’t need to rely on a single solution. Mixing and matching based on each room’s needs often delivers the best results.
Privacy Without Blocking Natural Light
One of the biggest challenges with window treatments is balancing privacy with natural light. Heavy coverings can make a space feel closed off, while lighter options may not provide enough coverage.
Sheer curtains combined with blinds or shades offer a practical middle ground. During the day, sheer fabrics diffuse light while limiting visibility from outside. In the evening, closing the blinds or shades adds the privacy needed after dark.
Top-down, bottom-up shades are another effective option. They allow you to lower the top portion of the shade while keeping the bottom covered, letting in light without exposing the entire window.
These approaches help maintain a bright, open feel while still addressing privacy concerns.
Reducing Drafts and Improving Comfort
Drafty windows can make a home feel uncomfortable, even when the heating system is working properly. Window treatments can help minimize this issue by creating an additional barrier against air movement.
Heavier curtains and well-fitted shades reduce the amount of cold air entering the room. Sealing gaps around the window frame with simple weatherstripping can enhance this effect, making treatments even more effective.
The result is a more stable indoor temperature and fewer noticeable cold spots near windows. Over time, this can also reduce the workload on your heating system, contributing to lower energy use.
Designing for Long-Term Flexibility
Window treatments shouldn’t feel like a one-time decision. As seasons change and needs evolve, your setup should be able to adapt without requiring a complete overhaul.
Neutral colors and simple designs make it easier to update or layer treatments over time. Investing in adjustable hardware, such as extendable curtain rods, also provides more flexibility for future changes.
This approach allows you to start with budget-friendly options and gradually refine your setup as needed. It’s a practical way to improve your home without committing to expensive upgrades upfront.
Small Upgrades That Deliver Immediate Results
If you’re looking to improve privacy and energy efficiency quickly, a few targeted changes can make a noticeable difference:
- Install thermal curtains in rooms where temperature fluctuations are most noticeable
- Apply frosted or reflective window film to street-facing or high-sunlight windows
- Add cellular shades to improve insulation without blocking natural light completely
- Adjust curtain placement to extend beyond the window frame for better coverage
- Use layered treatments to create flexibility for different times of day
These upgrades are relatively simple, but they can significantly improve comfort and usability.
Creating a More Comfortable and Efficient Home
Window treatments are often seen as decorative, but they play a much larger role in how a home functions. By choosing options that balance privacy, light control, and insulation, you can create a space that feels more comfortable throughout the year.
The key is to focus on how each room is used and where improvements will have the most impact. With the right combination of treatments and placement strategies, even a modest budget can deliver meaningful results.
DIY
Home Services
Weather & Maintenance
Table of Contents
- Why Multi-Age Living Spaces Require a Different Approach
- Zoning Without Walls: Creating Purpose in Open Spaces
- Furniture That Works Overtime
- Lighting That Adapts to Every Generation
- Safety Without Sacrificing Style
- Storage That Keeps Everyone Sane
- Designing for Changing Mobility Needs
- Technology That Enhances Shared Living
- Managing Noise and Privacy in Shared Areas
- Making the Space Feel Like Home for Everyone
- Where This Leads: Planning for Long-Term Living
- Practical Upgrades That Make an Immediate Difference
- Bringing It All Together
How to Make Shared Family Spaces Work for Multiple Ages: Smart Design for Multigenerational Living
Shared family spaces are doing more heavy lifting than ever. Living rooms, dens, and open-plan areas now need to support toddlers, teens, working adults, and aging relatives—all at once. Getting this balance right isn’t about perfection; it’s about creating flexible environments that evolve with the people who use them.
Why Multi-Age Living Spaces Require a Different Approach
Designing for one lifestyle is straightforward. Designing for multiple generations means anticipating conflicting needs, mobility differences, noise tolerance, and even emotional comfort. A toddler might need safe, soft play zones, while an older adult may prioritize stability, lighting, and easy navigation. Meanwhile, adults often want a space that still feels cohesive and visually calm.
The real shift is moving away from static design. Instead of thinking about a living room as a fixed layout, it helps to treat it as a dynamic system. Furniture, lighting, and even storage should adapt throughout the day. Morning routines, afternoon play, and evening relaxation all require different setups, and your space should reflect that rhythm without constant frustration.
Zoning Without Walls: Creating Purpose in Open Spaces
One of the most effective strategies for shared spaces is subtle zoning. Instead of dividing rooms with walls, you define areas through furniture placement, rugs, lighting, and visual cues. This allows multiple activities to happen simultaneously without the room feeling chaotic.
A reading corner for older adults might include supportive seating, task lighting, and a side table for essentials. Nearby, a low, soft rug can define a kid-friendly play zone. The key is to avoid rigid separations. You want visual boundaries that suggest purpose while still maintaining openness.
The trick is consistency in design language. Even if zones serve different age groups, using similar colors, textures, or materials helps everything feel unified. Without that cohesion, the space can quickly feel cluttered or disjointed.
Furniture That Works Overtime
In a multi-age household, furniture should earn its place. Pieces that serve multiple functions reduce clutter and make transitions between activities smoother. Think beyond traditional sofas and coffee tables.
Ottomans with hidden storage can hold toys during the day and act as extra seating at night. Adjustable-height tables can transition from a kid-friendly activity surface to an adult workspace. Recliners designed with ergonomic support can benefit both older adults and anyone looking for comfort after a long day.
Durability is just as important as flexibility. Materials should withstand spills, wear, and frequent use without constant maintenance. Performance fabrics, rounded edges, and stable bases aren’t just practical—they reduce stress for everyone using the space.
Lighting That Adapts to Every Generation
Lighting is often overlooked, but it plays a major role in making shared spaces functional for all ages. What works for a teenager scrolling on a phone won’t work for an older adult who needs stronger illumination to read comfortably.
Layered lighting is essential. Overhead fixtures provide general visibility, but they should be paired with task lighting and ambient sources. Floor lamps near seating areas, under-cabinet lights, and dimmable bulbs allow you to adjust brightness based on time of day and activity.
Natural light should also be part of the equation. Keeping window areas unobstructed and using light-filtering curtains can make the room feel more inviting while supporting better visibility. For aging eyes, reducing glare is just as important as increasing brightness.
Safety Without Sacrificing Style
Safety features don’t have to make a space feel clinical. In fact, many modern design solutions integrate safety seamlessly into everyday aesthetics.
Rounded furniture edges reduce injury risk for kids while making movement easier for older adults. Non-slip rugs with proper backing prevent falls without compromising style. Stable seating with armrests can blend into a contemporary design while offering necessary support.
Electrical safety also plays a role. Managing cords, using outlet covers where needed, and ensuring pathways remain clear all contribute to a safer environment. These small adjustments can significantly reduce risk without altering the overall look of the space.
Storage That Keeps Everyone Sane
Clutter is one of the biggest challenges in shared family spaces. When multiple age groups use the same area, belongings can quickly pile up, leading to frustration and inefficiency.
The goal is accessible, intuitive storage. Kids should be able to reach and return their toys without assistance. Adults need quick access to everyday items, and older family members benefit from storage that doesn’t require bending or stretching.
A mix of open and closed storage works best. Open shelves can display frequently used items, while closed cabinets keep visual clutter under control. Labeling or organizing by category can also make it easier for everyone to maintain the space without constant reminders.
Designing for Changing Mobility Needs
Mobility needs can change over time, especially in multigenerational households. Planning ahead ensures your space remains functional without requiring major renovations later.
Clear pathways are essential. Furniture should be arranged to allow easy movement, whether someone is carrying a child, using a walker, or simply navigating the room at night. Avoid tight corners and unnecessary obstacles.
Seating height and firmness also matter. Chairs that are too low or too soft can be difficult for older adults to use. Choosing options that offer support while still being comfortable for younger users creates a more inclusive environment.
Here’s a simple comparison of design features that support different age groups:
| Feature | Kids | Adults | Aging Family Members |
|---|---|---|---|
| Seating | Soft, low, durable | Comfortable, stylish | Firm, supportive, easy to stand |
| Lighting | Bright, playful | Adjustable | High-contrast, glare-free |
| Flooring | Soft, slip-resistant | Durable | Non-slip, even surfaces |
| Storage | Low, accessible | Functional | Easy reach, minimal bending |
| Layout | Open, flexible | Organized | Clear pathways |
This kind of overlap shows that you don’t need separate rooms for each age group—you just need thoughtful integration.
Technology That Enhances Shared Living
Technology can quietly improve how shared spaces function. Smart lighting systems allow you to adjust brightness and color temperature with minimal effort. Voice-controlled assistants can help older adults manage devices without navigating complicated interfaces.
For families with kids, parental controls and shared entertainment systems can create boundaries while still encouraging group activities. Charging stations built into furniture or tucked into corners can reduce clutter and keep devices organized.
The goal isn’t to overload the space with tech. Instead, focus on tools that simplify everyday routines and reduce friction between different users.
Managing Noise and Privacy in Shared Areas
Noise is one of the most common pain points in multi-age households. Kids playing, adults working, and older family members resting can create conflicting needs within the same space.
Soft materials help absorb sound. Rugs, upholstered furniture, and curtains can reduce echo and make the room feel calmer. Strategic placement of these elements can create quieter zones without requiring physical barriers.
Headphones and personal audio devices also play a role, especially for teens and adults. For older adults, quieter corners with comfortable seating can provide a sense of retreat even within a shared space.
Privacy doesn’t always mean separation. It can be as simple as having a consistent spot where someone can read, relax, or focus without interruption.
Making the Space Feel Like Home for Everyone
Beyond functionality, shared spaces need to feel emotionally comfortable. Each family member should see some reflection of themselves in the environment.
This doesn’t mean turning the room into a mix of competing styles. Instead, incorporate subtle personal touches—family photos, meaningful objects, or shared artwork—that create a sense of belonging.
Color choices can also influence mood. Neutral bases with layered accents allow you to update the space over time without major changes. This flexibility is especially useful as family needs evolve.
Where This Leads: Planning for Long-Term Living
Designing a shared family space isn’t just about solving current challenges. It’s about setting up a home that can adapt over time. As kids grow, adults shift routines, and older family members require more support, your space should evolve without constant redesign.
This often leads to broader considerations like home layout, accessibility upgrades, or even future remodeling plans. Starting with shared spaces gives you a foundation to build on, making larger transitions feel more manageable.
A More Sustainable Way to Live Together
When shared spaces work well, they reduce daily stress and improve how families interact. People can coexist without constantly negotiating for space, and routines become more fluid.
The real value lies in flexibility. A well-designed living area doesn’t lock you into one way of living—it gives you options. And in a multigenerational household, having options is what keeps everything running smoothly.
Practical Upgrades That Make an Immediate Difference
Sometimes, small changes can have a big impact. If you’re looking to improve a shared space without a full redesign, focus on adjustments that increase usability right away:
- Swap out harsh overhead lighting for layered, adjustable options to better support different activities and vision needs
- Rearrange furniture to create clearer pathways and more defined zones without adding walls
- Introduce multi-functional pieces like storage ottomans or nesting tables to reduce clutter
- Replace slippery rugs with non-slip alternatives to improve safety for all ages
- Add accessible storage solutions that allow everyone to participate in keeping the space organized
These upgrades don’t require a major investment, but they can significantly improve how the space functions day to day.
Bringing It All Together
Shared family spaces are no longer one-size-fits-all. They need to support a wide range of needs without feeling overcrowded or overly complex. By focusing on flexibility, safety, and thoughtful design, it’s possible to create a living area that works for everyone—from toddlers to older adults.
The key is to think beyond immediate needs and design with change in mind. When your space can adapt as your family evolves, you’re not just solving today’s challenges—you’re preparing for what comes next.
DIY
Home Services
Weather & Maintenance
Table of Contents
- Why “Guest-Ready” Starts With Design, Not Cleaning
- Choosing Low-Maintenance Finishes That Hide Wear and Tear
- Layout Strategies That Minimize Visual Clutter
- Smart Storage That Keeps Everyday Items Out of Sight
- Creating Quick-Reset Zones for High-Traffic Areas
- Furniture Choices That Reduce Cleaning Effort
- Lighting That Enhances Cleanliness Without Highlighting Imperfections
- A Simple System for Maintaining a Guest-Ready Space
- Balancing Style and Practicality for Long-Term Results
- Designing a Home That Works in the Background
- Sources
Designing a Guest-Ready Home Without Constant Cleaning: Smart Layout and Low-Maintenance Solutions
Keeping your home ready for guests doesn’t have to mean constant cleaning or last-minute stress. The key is designing your space in a way that naturally stays tidy and easy to maintain. With the right materials, layout choices, and storage strategies, you can create a home that looks put together without requiring daily effort.
Why “Guest-Ready” Starts With Design, Not Cleaning
Most people approach guest readiness as a cleaning problem. In reality, it’s a design issue. If your home requires frequent resets just to look presentable, the setup is working against you.
A well-designed space minimizes visible clutter, hides everyday mess, and makes quick resets simple. Instead of constantly managing your environment, your environment supports you. This shift reduces both time spent cleaning and the mental load of keeping things in order.
Choosing Low-Maintenance Finishes That Hide Wear and Tear
Surfaces play a major role in how clean your home appears. Some materials show every fingerprint, smudge, or speck of dust, while others naturally conceal them.
Matte finishes are generally more forgiving than glossy ones. For example, matte countertops and cabinetry tend to hide smudges better than high-shine surfaces. Similarly, textured materials can disguise minor imperfections and reduce the need for frequent wiping.
Flooring is another key factor. Patterns and mid-tone colors are better at masking dirt than very light or very dark floors. Hardwood with visible grain, luxury vinyl plank, or patterned tile can maintain a clean appearance longer between cleanings.
Here’s a comparison of common finishes and their maintenance impact:
| Surface Type | Maintenance Level | What It Hides Well | Best Use Case |
|---|---|---|---|
| Matte countertops | Low | Smudges, fingerprints | Kitchens, bathrooms |
| Glossy finishes | High | Very little | Accent features |
| Textured flooring | Low | Dirt, small debris | High-traffic areas |
| Dark solid floors | Medium–High | Minor stains | Low-traffic areas |
| Mid-tone wood floors | Low | Dust, wear patterns | Living spaces |
Choosing finishes that naturally stay presentable reduces how often you feel the need to clean.
Layout Strategies That Minimize Visual Clutter
A cluttered layout can make even a clean home feel messy. The goal is to create a flow that keeps surfaces clear and distractions minimal.
Open surfaces are important, but they need boundaries. Instead of filling every available space, leave intentional gaps. This makes the room feel calmer and reduces the visual impact of any items that are left out.
Furniture placement also matters. If pathways are tight or awkward, items tend to accumulate in those areas. Creating clear, easy-to-navigate walkways helps prevent clutter from forming in the first place.
Another effective strategy is to limit how many functions each space serves. When a single area is used for too many activities, it becomes harder to keep organized. Defining clear zones within a room can help maintain order without constant effort.
Smart Storage That Keeps Everyday Items Out of Sight
Storage is one of the most powerful tools for maintaining a guest-ready home. The key is making it both accessible and discreet.
Closed storage, such as cabinets, baskets, or storage benches, allows you to quickly hide everyday items without needing to organize them perfectly. This is especially useful in living rooms and entryways where clutter tends to build up.
At the same time, storage should be convenient. If it’s difficult to access, you’re less likely to use it. Items should have a “drop zone” near where they’re naturally used.
A well-designed storage system balances visibility and concealment. Frequently used items should be easy to grab, while less attractive or bulkier items can be tucked away.
Creating Quick-Reset Zones for High-Traffic Areas
Certain areas of your home experience more activity and are more likely to get messy. Instead of trying to keep everything perfect, focus on making these areas easy to reset.
A quick-reset zone is designed so that tidying up takes just a few minutes. This might include a living room with a storage ottoman for blankets, or an entryway with hooks and a small basket for daily essentials.
The goal is not to eliminate mess, but to make it easy to manage. When everything has a place and that place is easy to access, cleanup becomes less of a task and more of a quick habit.
Furniture Choices That Reduce Cleaning Effort
The type of furniture you choose can either simplify or complicate your cleaning routine. Some materials and designs require constant upkeep, while others are more forgiving.
Performance fabrics are a practical option for sofas and chairs. They resist stains and are easier to clean, making them ideal for homes that see frequent use.
Furniture with raised legs can also make a difference. It allows for easier cleaning underneath and creates a lighter, more open look. In contrast, bulky furniture that sits directly on the floor can trap dust and make cleaning more difficult.
Multi-functional furniture, like storage benches or nesting tables, can help reduce clutter while maintaining flexibility in your space.
Lighting That Enhances Cleanliness Without Highlighting Imperfections
Lighting can dramatically affect how clean your home appears. Harsh, direct lighting can emphasize dust and imperfections, while softer, layered lighting creates a more balanced look.
Ambient lighting provides overall illumination, while accent lighting can highlight specific areas without drawing attention to minor flaws. Table lamps, floor lamps, and wall sconces can create a more inviting atmosphere compared to a single overhead light.
Natural light is also important, but it should be managed thoughtfully. Sheer curtains or blinds can diffuse sunlight, reducing glare and making the space feel more comfortable.
A Simple System for Maintaining a Guest-Ready Space
Even with the best design, some level of upkeep is still necessary. The difference is that a well-designed home requires less effort to maintain.
A simple system can help keep things consistent without feeling overwhelming:
- Do a 5–10 minute reset at the end of the day
- Return items to their designated storage zones
- Wipe down high-use surfaces as needed
- Keep a small set of cleaning supplies easily accessible
This approach focuses on consistency rather than intensity. Small, regular actions prevent mess from building up and reduce the need for deep cleaning sessions.
Balancing Style and Practicality for Long-Term Results
It’s easy to focus on aesthetics when designing your home, but practicality is what makes those choices sustainable. A space that looks good but is difficult to maintain will quickly become frustrating.
The best results come from blending style with function. Choose materials, layouts, and furniture that support your daily life while still reflecting your personal taste.
Over time, these decisions create a home that feels both comfortable and manageable. Instead of constantly preparing for guests, your space is already ready.
Designing a Home That Works in the Background
A truly guest-ready home doesn’t require constant attention. It works in the background, quietly supporting your routines and minimizing effort.
By focusing on low-maintenance finishes, thoughtful layouts, and practical storage, you can create a space that stays presentable with minimal upkeep. This not only saves time but also reduces the mental load of keeping everything in order.
The result is a home that feels calm, functional, and ready for whatever the day brings, including unexpected guests.
Sources
National Association of Home Builders – Interior Design and Material Trends
American Cleaning Institute – Cleaning Efficiency and Home Maintenance Habits
U.S. Department of Energy – Residential Lighting Design
Consumer Reports – Furniture Materials and Durability Insights
Harvard Joint Center for Housing Studies – Housing Design and Livability
DIY
Home Services
Weather & Maintenance

Table of Contents
- Why Floors Have an Outsized Impact on Your Home’s Look
- Area Rugs That Camouflage Damage and Add Structure
- Peel-and-Stick Flooring for Budget-Friendly Transformation
- Refinishing Tricks That Stretch the Life of Hardwood
- Smart Paint Solutions for Subfloors and Concrete
- Visual Illusions That Make Floors Look Better Than They Are
- Mixing Materials for Intentional Contrast
- When to Refresh vs. Replace
- Pulling It All Together
Affordable Flooring Fixes That Hide Wear and Tear Without a Full Remodel
Worn floors can make an entire home feel older than it really is. Scratches, stains, fading, and scuffs draw the eye down and shrink the space visually. The good news is you do not need a full flooring replacement to refresh the look and feel of your home.
Affordable flooring fixes can hide wear and tear, stretch the life of what you already have, and make rooms feel cleaner and more intentional. With the right mix of rugs, peel-and-stick upgrades, refinishing tricks, and visual illusions, you can dramatically improve your floors without draining your budget.
Why Floors Have an Outsized Impact on Your Home’s Look
Floors cover more square footage than almost any other surface in your home. When they look worn, everything else feels tired too. Even well-styled furniture and fresh paint cannot fully distract from scratched hardwood or stained carpet.
Buyers and renters notice flooring immediately. It influences how large, bright, and clean a space feels. That is why strategic fixes can deliver a strong visual return without the cost of total replacement.
Instead of thinking in terms of “new floors or nothing,” focus on targeted upgrades that redirect attention and minimize visible damage.
Area Rugs That Camouflage Damage and Add Structure
Area rugs are one of the easiest ways to hide worn flooring. The key is to use them strategically, not randomly.
Large rugs anchor a room and conceal high-traffic wear patterns. If your hardwood floors are scratched near the sofa or under the dining table, choose a rug big enough to extend beyond the furniture. Small rugs that float in the middle of a room can actually make damage more noticeable by drawing attention to the exposed edges.
Patterned rugs are especially effective for hiding imperfections. Subtle variations in color and texture disguise stains and discoloration better than solid colors.
Here is a quick comparison of rug styles for hiding wear:
| Rug Type | Best For | Wear-Hiding Power |
|---|---|---|
| Solid light color | Brightening dark rooms | Low |
| Solid dark color | Covering stains | Moderate |
| Patterned neutral | Hiding scratches and fading | High |
| Vintage or distressed | Masking heavy traffic wear | Very High |
Layering rugs can also help. A large neutral base with a smaller patterned rug on top adds dimension while covering more square footage. This works especially well in living rooms and bedrooms where replacing flooring would be costly.
When chosen carefully, rugs do more than hide damage. They define zones, soften sound, and make a room feel intentionally designed.
Peel-and-Stick Flooring for Budget-Friendly Transformation
Peel-and-stick flooring has improved dramatically in recent years. Today’s options include realistic wood-look planks, stone patterns, and even textured finishes. For renters or homeowners on a tight budget, this can be a powerful way to disguise worn floors.
Peel-and-stick vinyl planks can be installed directly over many existing surfaces, including old vinyl, laminate, and even some hardwood. They are especially useful in small spaces like bathrooms, laundry rooms, and entryways where damage tends to be concentrated.
If full coverage feels overwhelming, consider using peel-and-stick tiles in defined areas. For example, creating a faux tile entry zone over worn hardwood can turn a problem area into a design feature.
Peel-and-stick also works well for stair risers. Covering just the risers with patterned adhesive tiles can shift focus away from scuffed treads and add personality at the same time.
While this option requires some prep work, it costs far less than professional installation and can often be completed in a weekend.
Refinishing Tricks That Stretch the Life of Hardwood
Hardwood floors are durable, but they show wear over time. Full sanding and refinishing can be expensive, but there are lower-cost alternatives that still make a visible difference.
One option is screening and recoating. This process lightly abrades the surface and applies a fresh coat of finish without sanding down to bare wood. It can revive dull floors and reduce the appearance of minor scratches.
For deeper scratches, targeted touch-up kits can help blend damaged areas. Wood markers, stain pens, and fill sticks are inexpensive and surprisingly effective when used carefully.
Another underrated trick is deep cleaning followed by polishing. Built-up grime often exaggerates the look of scratches. A thorough cleaning with a wood-safe solution, followed by a quality polish, can restore shine and make floors look newer.
Refinishing does not always mean starting from scratch. Sometimes it means refreshing what is already there so wear becomes less noticeable.
Smart Paint Solutions for Subfloors and Concrete
If you are dealing with old plywood subfloors, worn concrete, or outdated tile in low-visibility areas, paint can be a surprisingly strong solution.
Floor-specific paints and epoxy coatings are designed to withstand foot traffic. In basements, garages, and even laundry rooms, a fresh coat can unify the look of the space and cover stains.
Painted floors can also work in bedrooms or creative spaces. A solid neutral color makes the room feel cohesive. Stenciled patterns can mimic tile at a fraction of the cost.
The key is proper preparation. Cleaning, sanding, and priming ensure durability. While painted floors may not be right for every space, they can buy time before a major renovation.
Visual Illusions That Make Floors Look Better Than They Are
Sometimes the goal is not to hide every flaw but to shift focus elsewhere. Visual illusions can minimize the impact of worn floors.
Long curtains that hang close to the floor draw the eye upward. Larger furniture pieces reduce the amount of visible floor space, making imperfections less noticeable. Strategic lighting can also help. Bright, even lighting reduces harsh shadows that highlight scratches.
Furniture placement matters more than many people realize. Positioning sofas, consoles, and shelving units over heavily worn zones creates balance. This approach works particularly well in open-concept spaces where replacing flooring would require a large investment.
Mirrors can amplify light and visually expand the room, pulling attention away from minor floor damage. When the room feels larger and brighter overall, small imperfections fade into the background.
Mixing Materials for Intentional Contrast
If one area of flooring is heavily damaged, consider leaning into contrast rather than trying to match everything perfectly.
For example, adding a peel-and-stick tile section in front of a kitchen sink can look intentional if it complements nearby finishes. Transition strips can separate materials cleanly and create defined zones.
Here is a breakdown of common budget-friendly material mixes:
| Combination | Best Use Case | Cost Level |
|---|---|---|
| Hardwood plus large area rug | Living rooms and bedrooms | Low |
| Old vinyl plus peel-and-stick plank | Kitchens and laundry rooms | Low-Medium |
| Concrete plus painted area section | Basements and garages | Low |
| Mixed tile entry plus wood interior | High-traffic entryways | Medium |
By framing changes as design choices rather than cover-ups, you create a cohesive look that feels planned.
When to Refresh vs. Replace
Affordable flooring fixes are ideal when structural integrity is still intact. If boards are warped, tiles are cracked, or moisture damage is present, replacement may be necessary.
However, many floors that look worn are still solid underneath. Surface scratches, fading, and cosmetic stains often do not require a full tear-out.
If you are planning to sell within a few years, strategic upgrades can improve visual appeal without overinvesting. If you are staying long term, budget-friendly fixes allow you to prioritize other improvements while maintaining a comfortable home.
The goal is to align your spending with your timeline. A $500 refresh that buys you five more years can make more sense than a $10,000 replacement right now.
Pulling It All Together
Floors take a daily beating, and wear is inevitable. That does not mean you have to live with a space that feels tired or outdated.
Rugs can camouflage high-traffic zones. Peel-and-stick flooring can transform small areas. Refinishing tricks can revive hardwood. Paint and visual illusions can shift attention and brighten the room.
Affordable fixes are not about pretending damage does not exist. They are about redirecting focus, extending the life of your materials, and making thoughtful improvements that fit your budget.
When you approach flooring strategically, you can create a home that feels cleaner, larger, and more intentional without committing to a full remodel. Over time, these smart updates can free up resources for bigger goals while keeping your living space comfortable and inviting.
DIY
Home Services
Weather & Maintenance
Table of Contents
Smarter Home Security Starts Now in 2026
Your home should be the safest and smartest place in your life, not the easiest target on the block. In 2026, upgrading your smart home security is not just about adding gadgets, it is about creating a confident, connected space that protects what matters most and gives you total peace of mind.
What’s Actually Changed and Why It Matters Now
Ten years ago, a home security system meant a keypad, a siren, and a monitoring center that called you after something bad had already happened. That reactive model hasn’t just been updated. It’s been replaced. Today’s systems don’t wait. They watch, learn, and respond before a situation turns into a crisis.
The shift happened fast. Cheaper sensors and genuinely capable AI pushed smart security out of the luxury tier and into mainstream homes. According to Security.org’s annual review of home security systems, consumers in 2025 and into 2026 are prioritizing DIY installation, flexible monitoring options, and deep integration with platforms they already use. That’s a meaningful signal. People don’t want a separate security ecosystem bolted onto their home. They want protection woven into it.
If you haven’t reassessed your setup recently, there’s a real chance you’re running hardware and habits that belong to a different era.
AI That Actually Earns Its Name
The phrase “AI-powered” gets slapped onto everything these days. In home security, though, it genuinely means something now. Modern cameras don’t just detect motion. They classify it. A squirrel crossing your driveway, your teenager pulling in at midnight, and an unfamiliar person lingering near your side gate all trigger different responses. That distinction matters enormously when you’re trying to avoid alert fatigue.
Brands like Ring have spent years refining how motion events are filtered and surfaced to users, and the difference between 2020-era detection and what’s available now is stark. Fewer false alarms. Faster relevant alerts. More context in the notification itself so you’re not opening an app blind.
What’s newer and genuinely impressive is behavioral pattern recognition. Your system can learn that the house is empty by 8:15 every weekday morning. If a door opens at 10 a.m. on a Tuesday, that’s not just a motion event. It’s an anomaly, and your system knows the difference. Some platforms are even pulling in neighborhood-level crime data to adjust sensitivity dynamically, not just react to what’s happening on your property but anticipate what might be drifting toward it.
Building a System That Works as a Team
The biggest mistake homeowners make is buying devices without thinking about how they’ll talk to each other. A smart doorbell that doesn’t communicate with your exterior lights isn’t a security system. It’s a camera with a subscription fee. Real protection in 2026 comes from components that trigger each other automatically.
Think about what a well-integrated response looks like at 2 a.m. when a motion sensor fires at your back gate. Exterior lights flood on immediately. Cameras begin recording and push a clip to your phone. Smart locks confirm they’re engaged. You get one notification with relevant footage, not six separate pings from unconnected devices. That layered, automated response is what actually deters someone, and it only happens when the pieces are genuinely integrated, not just sharing the same app.
Compatibility with major platforms has become a legitimate deciding factor when choosing a system. The Cybersecurity and Infrastructure Security Agency has consistently emphasized that as home networks grow more complex, secure configuration and device management become just as critical as the hardware itself. Buying devices that receive regular firmware updates and support strong authentication isn’t optional anymore. It’s the baseline.
The Digital Front Door Is Real
Here’s the part people underestimate: your Wi-Fi network is part of your security system whether you’ve configured it that way or not. A camera with weak credentials or an unpatched router isn’t protecting your home. It’s offering a window into it. Hackers don’t need to pick your lock if they can access your camera feed from across the world.
Two-factor authentication on every security-related app. Unique passwords that you haven’t reused somewhere else. A router that’s less than four years old with automatic updates enabled. These aren’t advanced steps. They’re table stakes in 2026. Consumer Reports has tested DIY security systems for hacking vulnerabilities, and it’s worth an hour of your time to work through it.
Network segmentation deserves a mention too. Most modern routers let you create a separate network specifically for smart devices, meaning your security cameras and smart locks live on a different subnet than your laptop and phone. If a device gets compromised, the blast radius stays small.
Monitoring: The Hybrid Model Wins
The professional-versus-DIY monitoring debate has mostly resolved itself. The answer is: it depends on your life, and ideally you want both options available.
Self-monitoring has gotten genuinely good. Real-time clips, AI-filtered alerts, and instant push notifications mean a lot of homeowners can assess a situation and respond appropriately within seconds. If you’re someone who’s always near your phone and wants full control, self-monitoring is a reasonable primary strategy.
But it has gaps. What happens when you’re on a three-hour flight with your phone off? Or you’re in a meeting and miss three alerts in a row? Professional monitoring fills exactly that gap. A human reviews the situation and contacts emergency services if you don’t respond. Several platforms now offer on-demand professional monitoring that you can activate for specific periods, like a two-week vacation, without committing to a long-term contract. That flexibility is new, and it’s worth paying attention to when you’re shopping.
Don’t Forget What Isn’t a Burglar
A burst pipe at 3 a.m. can do more financial damage than a break-in. So can a slow carbon monoxide leak, a kitchen fire that starts while you’re asleep, or a basement flood from a water heater that’s been failing quietly for weeks. Smart home security in 2026 isn’t just about keeping people out. It’s about knowing what’s happening inside your home in real time, across all kinds of threats.
Water sensors under sinks and behind appliances cost almost nothing and can catch a leak before it becomes a $15,000 remediation job. Smart smoke and CO detectors that send alerts to your phone, even when you’re traveling, give emergency services a faster window to respond. Integrating these environmental sensors into your existing security platform means one dashboard, one app, and one place to assess what’s happening. That’s the version of smart home security that actually protects your household comprehensively.
Automation Is Your Cheapest Deterrent
Opportunistic burglars are looking for easy targets. An occupied-looking house is rarely one. Automation lets you fake presence convincingly even when you’re nowhere near home. Lights cycling on different schedules each evening, blinds opening and closing, exterior lights responding to motion. It’s not sophisticated deception. It’s just enough unpredictability to make someone choose a different house.
Geofencing has become one of the most useful and underused features in modern security setups. Your system can arm automatically when your phone leaves a defined radius around your home, and disarm when you return, with no manual input required. Pair that with a smart garage that opens as you pull in and a lock that disengages when it recognizes you’re home, and you’ve eliminated one of the most consistent human errors in home security: forgetting to arm the system in the first place.
Making the Upgrade Without Overthinking It
The good news is that getting this right doesn’t require a complete overhaul or a professional installation crew. Most quality systems in 2026 are genuinely DIY-friendly, with battery-powered sensors, adhesive mounts, and setup flows that walk you through placement recommendations. Renters can build robust setups without drilling a single hole.
Start with a practical audit. Walk your property and identify the actual weak points: the side gate with no visibility, the back door that faces away from the street, the driveway that’s dark after 8 p.m. Then build toward those gaps rather than buying a bundle and hoping it covers everything. A targeted setup with well-chosen components almost always outperforms a sprawling one assembled without a plan.
The systems worth investing in are the ones built on open platforms with consistent software support, the kind of infrastructure the NIST Cybersecurity Framework encourages individuals and organizations alike to prioritize. Proprietary ecosystems can lock you into hardware cycles that don’t age well. Open ones grow with you.
2026 is a genuinely good time to upgrade. The technology is mature, the prices are reasonable, and the gap between a well-protected home and a vulnerable one has never been easier to close. Don’t wait for a reason to care about this. Build the system now, while it’s a choice instead of a response.
Sources
DIY
Home Services
Weather & Maintenance
Table of Contents
- The Real Cost of Doing Nothing
- Why an Emergency Fund Alone Won't Cut It
- Home Warranties vs. Homeowners Insurance: A Distinction Worth Understanding
- Preventive Maintenance Is Still the Foundation
- Technology Has Changed the Early Warning Game
- What Today's Real Estate Market Is Telling Us
- Building a Protection Plan That Actually Works
- Sources
How Smart Homeowners Are Preparing for Unexpected Repairs in 2026
In 2026, confident homeowners are taking control of their finances and their futures by planning ahead for the unexpected. Instead of fearing surprise repair bills, they’re putting smart protections in place now so they can handle whatever their home throws their way with ease.
The Real Cost of Doing Nothing
Here’s the thing most homeowners don’t fully reckon with until it’s too late: home systems don’t announce their retirement plans. Your HVAC compressor won’t give you any warning. According to HomeAdvisor’s cost data, a full HVAC replacement runs anywhere from $5,000 to $12,000 depending on the system and home size. Water heaters fall between $900 and $3,000. A refrigerator or dishwasher can easily cost over $1,000 to replace. None of these are freak occurrences. They’re just homeownership math, and the longer you own a home, the more certain the bill becomes.
What makes this genuinely stressful is not the repair itself. It’s the timing. These things tend to break during heat waves, hard freezes, or the same month the car needs new brakes. That’s not bad luck. That’s the nature of mechanical systems under stress. Planning around that reality is what separates homeowners who stay financially stable from those who don’t.
Why an Emergency Fund Alone Won’t Cut It
Financial planners typically recommend keeping three to six months of expenses in reserve. That’s still good advice. But it was never designed to absorb a $9,000 HVAC replacement, a plumbing leak that ruins hardwood floors, and a failing electrical panel all within the same calendar year. That scenario happens more often than anyone wants to admit as homes age past the 10 and 15 year marks.
The smarter move isn’t choosing between savings and a protection plan. It’s layering them. Think of it the way you’d think about car insurance: you don’t skip coverage just because you’re a careful driver. You carry it because mechanical things fail regardless of how well you treat them. Home warranties work on similar logic. They convert unpredictable, potentially devastating repair costs into predictable monthly premiums and flat service fees. As American Home Shield describes it, you pay a defined service call fee when something breaks and the warranty covers repair or replacement of covered systems. The financial shock is gone. What’s left is just a process.
Home Warranties vs. Homeowners Insurance: A Distinction Worth Understanding
A lot of homeowners conflate these two, and it costs them. Homeowners insurance is built for catastrophic external events like a tree through your roof, a fire, or theft. It doesn’t care that your 12-year-old water heater finally gave out from normal use. That’s not a covered event. That’s wear and tear, which is precisely what a home warranty is designed for.
Coverage varies significantly between providers and plan tiers, so reading the actual contract matters. The fine print on exclusions, coverage caps, and maintenance requirements can make or break a claim. Before signing, homeowners should know which systems and appliances are included, what the per-incident coverage cap is, whether pre-existing conditions are excluded, and how the contractor dispatch process works in their area. Third-party review platforms like ConsumerAffairs are genuinely useful here. Real claims experiences from real customers reveal patterns that marketing pages won’t.
Preventive Maintenance Is Still the Foundation
No warranty covers negligence, and frankly, it shouldn’t have to. Routine maintenance is still the first and most important layer of any protection strategy. Annual HVAC servicing, water heater flushing, roof inspections, and checking plumbing connections under sinks are not optional extras for detail-oriented homeowners. They’re the baseline. The U.S. Department of Energy is direct about this: regular HVAC maintenance meaningfully improves efficiency and reduces the likelihood of premature failure. A unit that’s serviced annually simply lasts longer than one that isn’t.
The practical upside is twofold. You extend the life of expensive equipment, and you stay in compliance with warranty terms that typically require documented maintenance. That second point is worth taking seriously because skipped service records can become a reason for claim denial. Keep your receipts. It takes five minutes and has saved homeowners thousands.
Technology Has Changed the Early Warning Game
Smart home sensors have quietly become one of the most cost-effective tools in a homeowner’s arsenal. Water leak detectors placed near water heaters, washing machines, and under-sink plumbing can alert you via your phone the moment moisture is detected, long before it’s soaked into subfloor or drywall. Smart thermostats flag irregular HVAC performance that might signal a failing component. These aren’t luxury items anymore. Most run between $15 and $50 and connect directly to your phone.
The combination of early detection and warranty coverage is particularly powerful. The sensor tells you something’s wrong. The warranty means it won’t cost you $8,000 to fix it. That’s a meaningful shift in how homeownership feels day to day, and it tilts the balance toward control rather than dread.
What Today’s Real Estate Market Is Telling Us
Tight inventory has pushed buyers toward older homes they might have passed on in a softer market. That’s not inherently a problem, but it does mean more homeowners are taking on properties where major systems are already 8, 10, or 15 years into their lifespan. The National Association of Realtors has noted that home warranty coverage has become a more common part of buyer negotiations, with both buyers and sellers using it to reduce friction at closing.
But here’s what’s shifting. Smart homeowners aren’t just using warranties as a closing-table courtesy anymore. They’re renewing and maintaining them long after the first year, because that’s actually when things start breaking. The first year in a home is often quiet. Year eight, nine, ten is when the HVAC compressor goes, when the water heater finally fails, when the electrical panel starts showing its age. Coverage that lapses before those years is coverage that missed the point.
Building a Protection Plan That Actually Works
The homeowners who handle unexpected repairs without financial crisis aren’t lucky. They’ve built a system with multiple layers that each handle a different category of risk. Preventive maintenance reduces how often things break. Smart sensors reduce how bad the damage gets when something does go wrong. An emergency fund handles the gaps. A home warranty handles the major system and appliance failures that would otherwise wipe out that fund in a single check.
The audit is the right starting point for anyone who hasn’t done this yet. Walk through your home and note the age of your HVAC system, water heater, roof, major appliances, and electrical panel. Cross-reference typical lifespans: most HVAC systems run 15 to 20 years, water heaters 8 to 12, roofs 20 to 30 depending on material. What’s coming due in the next three to five years? That’s your exposure. From there, you can build coverage that targets those specific risks rather than buying protection you don’t need while leaving real gaps unaddressed.
Preparation isn’t about pessimism. It’s about not letting a broken water heater become a financial emergency. The homeowners who’ve figured that out aren’t losing sleep over strange noises in the walls, and that peace of mind turns out to be worth a lot more than any single repair bill.