Author: Tyler Novak
Table of Contents
- Hidden Costs of Ignoring Pest Problems
- Preserving the Value of Your Home
- Health-Related Savings
- Food Waste and Pantry Protection
- Energy Efficiency and Maintenance Savings
- The Business Case for Pest Control
- DIY vs. Professional Pest Control: Where the Real Savings Lie
- How Preventative Pest Control Pays Off
- A Simple Cost-Benefit Breakdown
- Conclusion: A Smart Financial Strategy
Why Pest Control Actually Saves You Money: More Than You’d Think
When people think of pest control, they often imagine it as just another household expense. But the reality is that investing in pest prevention and treatment can actually protect your wallet in ways you might not expect.
Hidden Costs of Ignoring Pest Problems
At first glance, pests may seem like a minor inconvenience—something you can handle with a can of spray or a store-bought trap. But infestations left untreated often lead to massive repair bills. For example, termites cost U.S. homeowners billions of dollars in damages every year. Since most homeowner insurance policies exclude termite destruction, those costs fall entirely on you. A single treatment might cost between $500 and $1,500, but repairs to weakened structures can easily reach $10,000 or more.
Rodents are another common culprit. They gnaw through electrical wires, insulation, and plumbing. That can cause short circuits, burst pipes, or even fires—each of which leads to thousands in unexpected expenses. Even seemingly “small” pests like cockroaches and ants can cause food contamination and spread bacteria, which in turn might force you to throw out groceries or pay for medical visits.
In short: pests may look harmless at first, but ignoring them sets you up for bigger bills later.
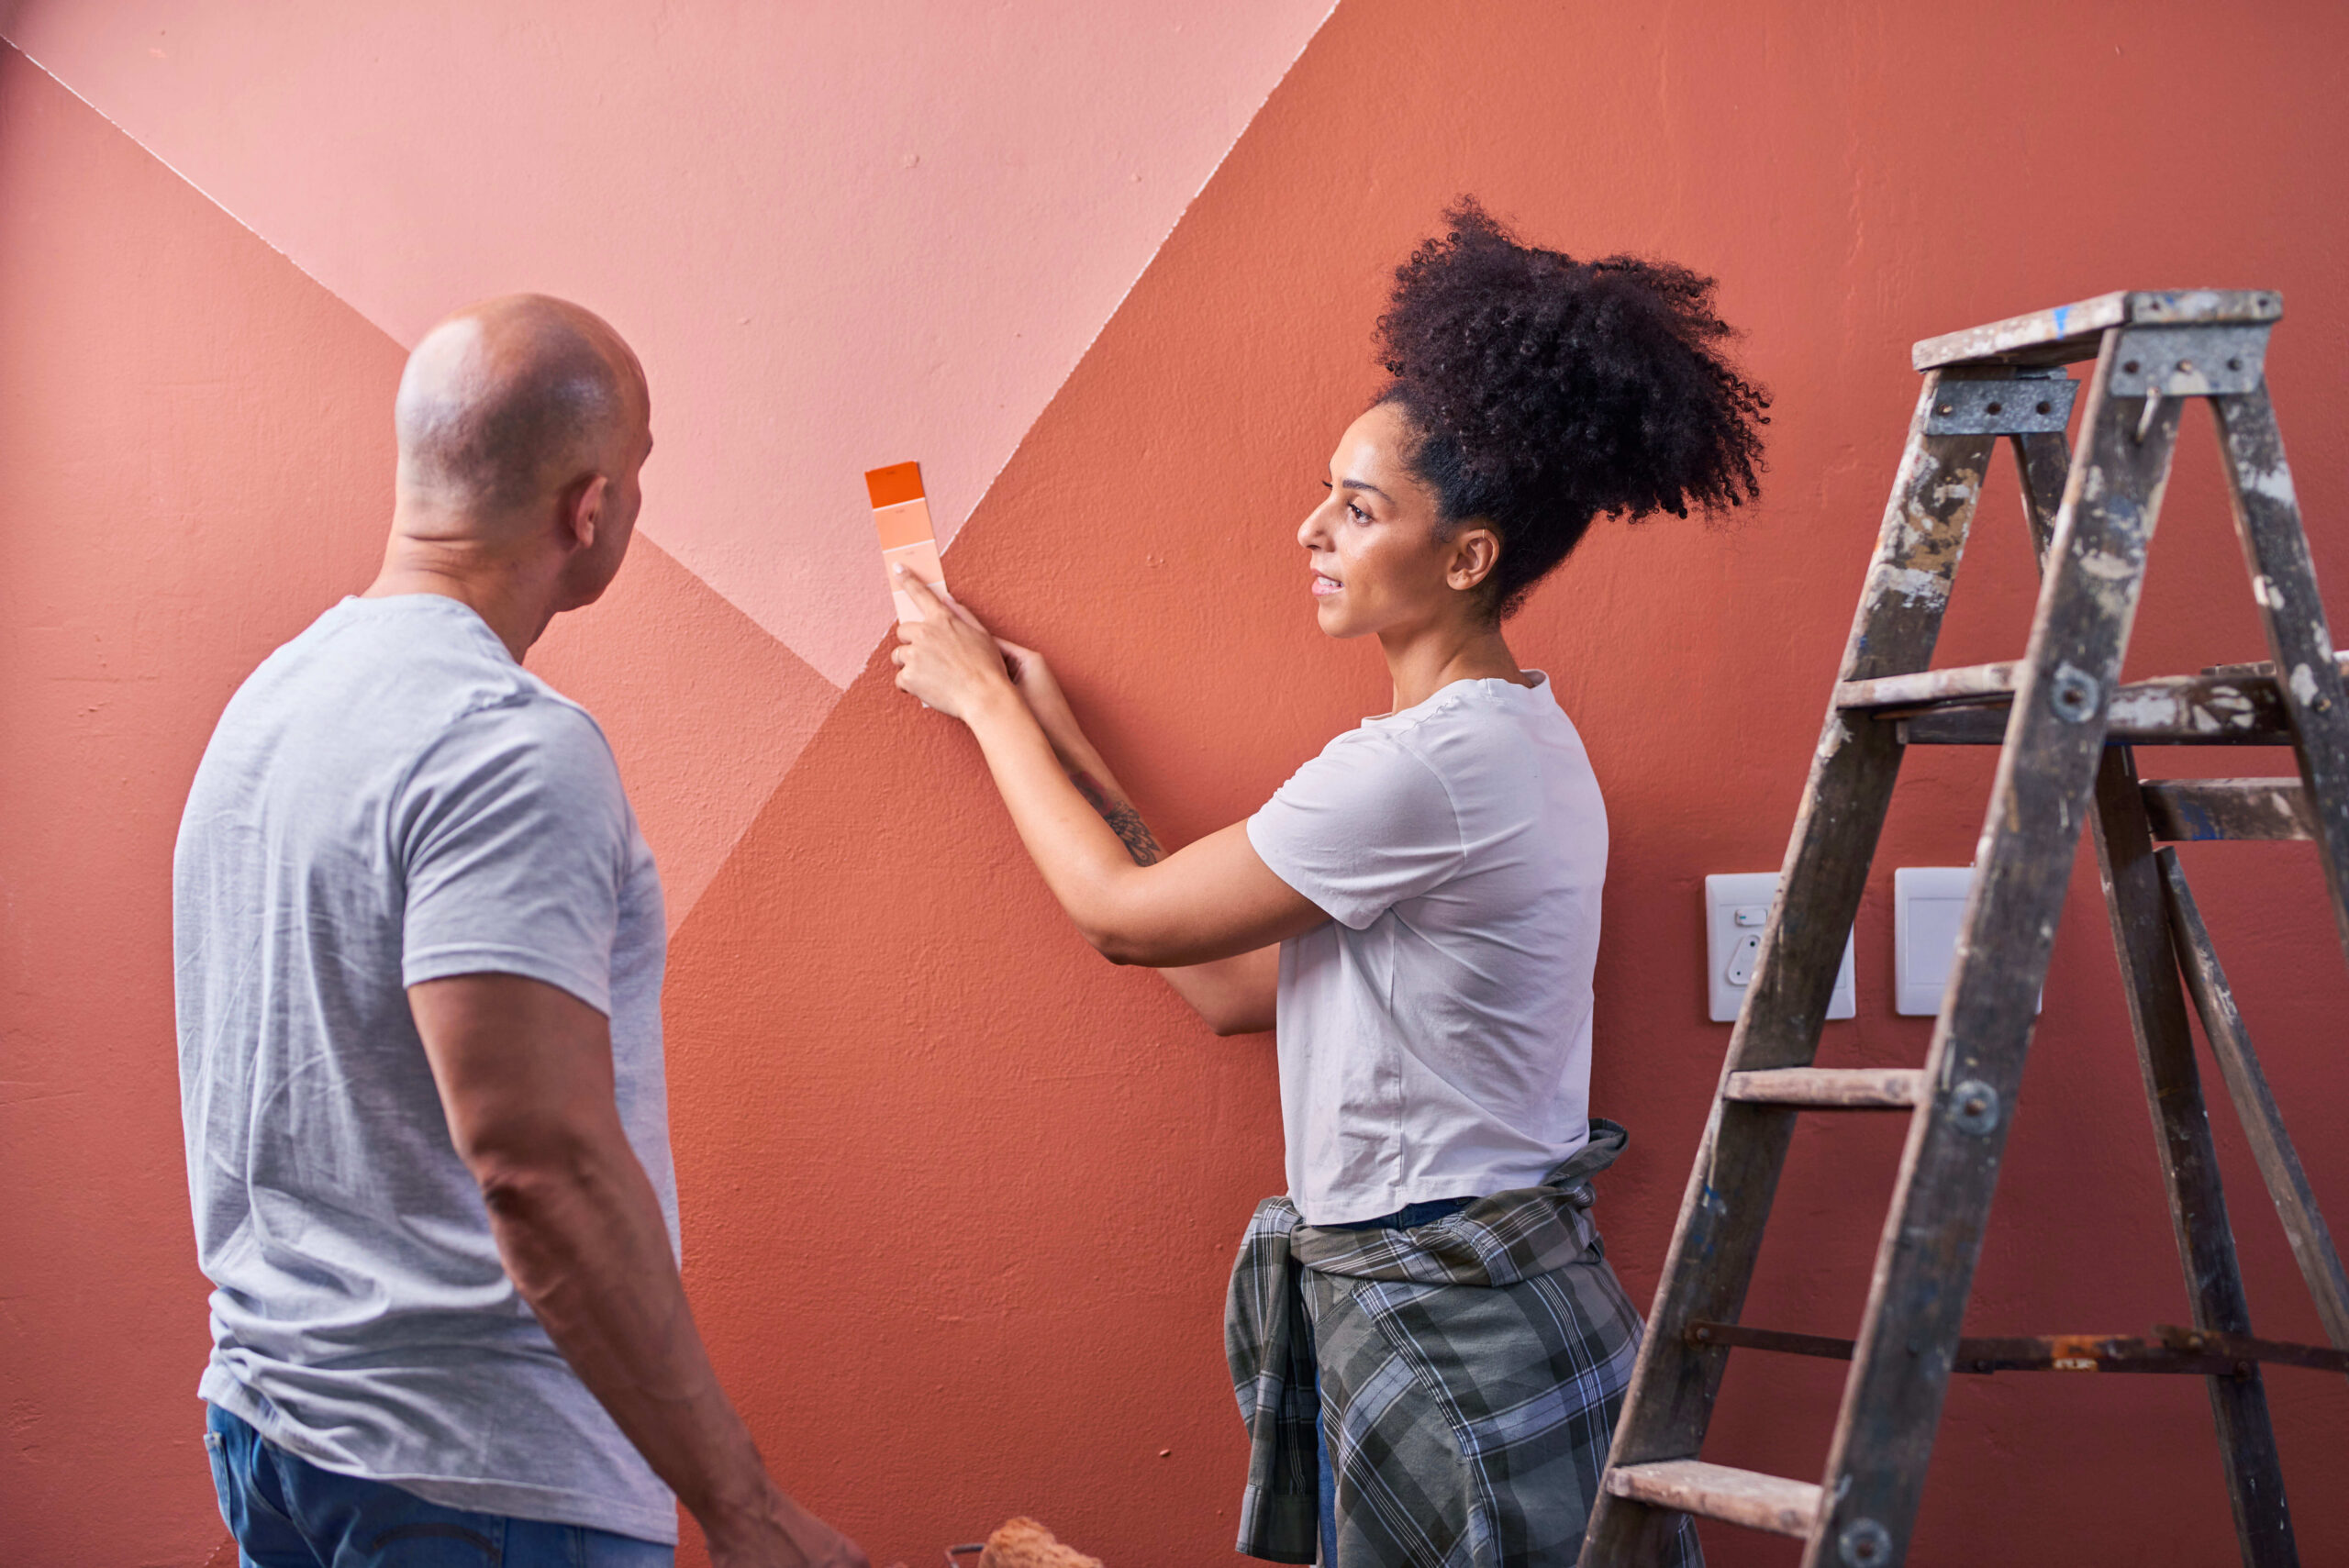
Preserving the Value of Your Home
A home is often your largest financial asset, and pests slowly eat away at that investment. Termites can hollow beams until they crumble, carpenter ants can compromise foundations, and rodents reduce insulation efficiency. Over time, this type of hidden damage chips away at property value.
If you decide to sell your house, the mere mention of an infestation—even one that’s been resolved—can make buyers nervous. They may demand costly inspections, request concessions, or lower their offer altogether. On the other hand, maintaining a record of consistent pest control shows that your home has been well cared for, making it easier to secure top-dollar offers. Realtors often say that visible pest damage is one of the fastest ways to scare off otherwise interested buyers.
In a competitive housing market, spending a few hundred dollars a year on pest control could easily protect tens of thousands in resale value.
Health-Related Savings
The health implications of pests are often overlooked, but they can have very real financial consequences. Rodents can spread diseases like hantavirus and salmonella, mosquitoes are known carriers of illnesses like West Nile virus, and cockroaches are infamous for triggering asthma attacks and allergies.
If you’ve ever had to miss work because of food poisoning, respiratory flare-ups, or other pest-related illnesses, you know those days quickly add up. Medical bills, prescriptions, and reduced productivity can strain your budget. Families with children or elderly members—who are more vulnerable—are especially at risk.
By keeping infestations at bay, you’re not just improving quality of life. You’re also reducing potential healthcare costs, which can climb much higher than most people expect.
Food Waste and Pantry Protection
Food waste is another hidden way pests drain your finances. Imagine opening your pantry and realizing a bag of flour is full of weevils, your cereal boxes have been chewed by mice, or ants have invaded your sugar and honey. Each of those moments means more food in the trash and another trip to the grocery store.
Using integrated pest management techniques—like sealing cracks, storing dry goods in airtight containers, and scheduling routine inspections—helps stop infestations before they start. The money saved on groceries over the course of a year often equals or exceeds what you’d spend on professional pest control.
If you’ve ever had to replace spoiled or infested food multiple times, you know just how quickly this type of expense can snowball.
Energy Efficiency and Maintenance Savings
Few people realize how much pest damage can affect energy efficiency. Insulation compromised by rodents or insects forces your heating and cooling system to work overtime. Even a small gap chewed by mice in ductwork can increase energy bills significantly.
On top of that, nests in gutters or ventilation systems can reduce airflow, block drainage, or stress HVAC units. Repairs to these systems are never cheap, often ranging from hundreds to thousands of dollars.
Keeping pests out ensures your home’s major systems last longer, operate more efficiently, and cost less to maintain. In an era of rising utility costs, that type of savings is worth paying attention to.
The Business Case for Pest Control
Businesses face even greater financial risks from infestations. Restaurants can be fined or shut down if pests are discovered, leading to immediate revenue loss and long-term reputation damage. Warehouses, grocery stores, and hotels can also face inventory damage, regulatory action, or lawsuits if pests are spotted.
For business owners, regular pest control isn’t just about compliance—it’s about protecting their brand. Customers today are quick to post negative reviews or photos online, and one viral incident can undo years of reputation-building. Compared to those potential losses, the cost of a regular pest control service is minimal.
DIY vs. Professional Pest Control: Where the Real Savings Lie
At first, DIY pest control seems like the cheaper option. Sprays, traps, and powders are relatively inexpensive, and they can sometimes fix minor issues. But most infestations go deeper than what you see on the surface. You might spend hundreds on repeated DIY treatments only to watch the pests return again and again.
Professional pest control companies, however, focus on identifying root causes. They use advanced tools, knowledge of pest behavior, and safe treatments to eliminate infestations and prevent them from returning. While hiring a professional might cost more up front, the long-term savings in avoided repairs, wasted food, and medical bills are significant.
How Preventative Pest Control Pays Off
Preventative pest control is where the real financial advantage comes into play. Regular inspections and treatments ensure that problems are caught while they’re still manageable. It’s similar to oil changes or dental cleanings: the routine cost is small, but it saves you from major emergencies later.
Think of it as insurance with a tangible payoff. Instead of worrying about termites causing thousands in damage or rodents chewing through your attic wiring, you can rest easy knowing small issues will be caught before they escalate. That peace of mind is valuable in itself—but the actual financial savings are even greater.
A Simple Cost-Benefit Breakdown
Here’s how the math usually works out:
- Annual pest control: $300–$600
- Termite treatment: $500–$1,500
- Repair costs for severe termite damage: $3,000–$8,000+
- Rodent damage to wiring/insulation: $1,000+
- Food waste due to infestations: hundreds of dollars per year
- Potential healthcare costs from pest-related illnesses: variable, but often significant
When viewed side by side, the preventive investment in pest control is clearly the smarter financial move.
Conclusion: A Smart Financial Strategy
Pest control isn’t just about keeping creepy crawlies out of sight. It’s a long-term financial strategy that protects your home, your health, and your wallet. From preserving property value to cutting down on wasted food and energy, the benefits extend far beyond comfort.
Instead of seeing pest control as an unnecessary expense, think of it as essential financial protection. The cost of prevention is predictable and manageable. The cost of neglect, however, can be devastating.
Sources
DIY

Home Services

Weather & Maintenance

Table of Contents
- Know What You’re Up Against
- Clear Gutters and Downspouts
- Trim Trees and Remove Dead Branches
- Secure Outdoor Items
- Seal Up Gaps and Cracks
- Check the Roof Without Climbing It
- Create a DIY Emergency Kit
- Install a Surge Protector (or Two)
- Use Sandbags or Barriers If Flooding Is Common
- Unplug Electronics During Severe Storms
- Stay Informed with Free Alerts
- Peace of Mind Doesn’t Have to Be Pricey
How to Protect Your Home from Summer Storms Without Spending a Lot: Affordable Prep Tips for Every Homeowner
Summer storms can hit fast and hard—bringing wind, rain, lightning, and even hail. While you can’t control the weather, you can take simple, budget-friendly steps to protect your home before the skies turn gray.
Know What You’re Up Against
Summer storms often come with more than just a little rain. Depending on where you live, you might deal with:
- Strong winds
- Flash flooding
- Hail
- Lightning strikes
- Power outages
Each of these can cause costly damage—but with the right prep, you can minimize the impact.
Clear Gutters and Downspouts
Clogged gutters are one of the biggest causes of water damage during storms. When water can’t drain properly, it can overflow, soak your siding, and even seep into your foundation.
DIY Fix:
- Use gloves or a small scoop to remove leaves and debris
- Run water through gutters with a hose to check for clogs
- Make sure downspouts direct water at least 3 feet away from the house
This quick job can save you thousands in water damage repairs—and costs almost nothing.
Trim Trees and Remove Dead Branches
Overhanging limbs are a major hazard during wind or lightning storms. Even healthy trees can lose branches if winds are strong enough.
| Task | Benefit |
|---|---|
| Trim back overhanging limbs | Reduces risk of roof or window damage |
| Remove dead trees or branches | Prevents them from falling unexpectedly |
| Tie down or stake small trees | Helps them survive high winds |
All you need is a pair of loppers, a handsaw, or a ladder. If the job’s too high, call in a pro for a one-time cut—often much cheaper than storm repairs.
Secure Outdoor Items
Lawn chairs, patio umbrellas, garden tools, and even planters can turn into flying debris during high winds. Take a few minutes to secure them before a storm hits.
Budget Solutions:
- Store items in a shed or garage
- Use bungee cords or rope to tie down larger furniture
- Lay umbrellas and lightweight décor flat on the ground
Do a quick scan of your yard any time storms are in the forecast to avoid unnecessary damage.
Seal Up Gaps and Cracks
Heavy rain and wind can exploit even small gaps in your home’s exterior. Look for potential entry points around:
- Windows
- Doors
- Foundation edges
- Attic or roofline vents
Use caulk or weatherstripping (usually under $10 per tube/roll) to seal leaks. This keeps water—and pests—out while helping your home stay energy-efficient too.
Check the Roof Without Climbing It
Your roof is your first defense during a storm. You don’t need to climb up there to spot potential problems.
What to Look For:
- Missing or curled shingles (use binoculars from the ground)
- Sagging or dark spots on the ceiling inside
- Granules in your gutters
If anything looks off, schedule a basic inspection with a roofing company—many offer them for free or low cost, especially after storms.
Create a DIY Emergency Kit
If the power goes out or roads flood, having a few basics on hand makes life a lot easier—and safer.
| Emergency Item | Why It Matters |
|---|---|
| Flashlights + batteries | Reliable light during outages |
| Bottled water | At least 1 gallon per person/day |
| First aid supplies | For minor injuries during cleanup |
| Nonperishable snacks | Easy meals if the power is out |
| Phone charger packs | Keeps communication going |
You don’t need to buy a premade kit—just gather supplies from around your home and store them in a plastic bin or backpack.
Install a Surge Protector (or Two)
Lightning strikes can damage TVs, routers, appliances, and more. Whole-house surge protectors are great but pricey—so start with a few power strip surge protectors.
- Use them for your TV, computer, and modem
- Look for UL-listed strips with an auto-shutoff
- Expect to pay around $15–$25 each
They’re a small investment that protects some of your most expensive gadgets.
Use Sandbags or Barriers If Flooding Is Common
If your area is prone to flash flooding or poor drainage, having a few sandbags on hand can save your basement or entryway from disaster.
- Stack bags near doors or garage openings before the storm
- Use plastic sheeting behind bags for extra protection
- Many cities give out free sandbags ahead of major storms
They’re heavy but simple to use—and far cheaper than water cleanup.
Unplug Electronics During Severe Storms
One of the easiest (and free) ways to protect your gear during a lightning storm is to unplug it altogether.
- Disconnect TVs, routers, gaming consoles, and small appliances
- Turn off breakers to high-end systems if you’re away during storms
It takes just a minute and could save you from major replacement costs.
Stay Informed with Free Alerts
Early warnings can help you prepare faster and better. Most local governments and weather apps offer free real-time alerts.
- Sign up for community alert systems via text or email
- Download a weather app with push notifications
- Keep a battery-powered radio in your emergency kit just in case
The more you know ahead of time, the more you can do to prepare—at no cost.
Peace of Mind Doesn’t Have to Be Pricey
You don’t need to invest in storm shutters or a backup generator to prepare for summer storms. Most of the protection your home needs comes from regular upkeep, a little prep work, and staying alert. With these simple, low-cost tips, you can keep your home and family safe—without blowing your budget.
DIY
Home Services
Weather & Maintenance

Table of Contents
- Why Add Shade?
- Use a Tarp or Drop Cloth
- Hang a DIY Shade Sail
- Create a Curtain Wall
- Build a Simple Frame with PVC or Wood
- Use Patio Umbrellas Creatively
- Repurpose Household Items for Shade
- Add Shade with Greenery
- Use an Outdoor Rug for Ground-Level Relief
- Try a Pop-Up Canopy for Quick Coverage
- Mix and Match for Full Sun Coverage
- Stay Cool, Stay Outside
Easy DIY Shade Ideas for Your Porch, Patio, or Yard: Budget-Friendly Ways to Stay Cool Outdoors
Soaking up the sun feels great—until it doesn’t. When your outdoor space turns into a heat trap, having a little shade can make all the difference. Whether you’re sipping coffee on the porch or hosting a backyard hangout, these easy DIY shade ideas can help you stay cool, without spending a fortune.
Why Add Shade?
Aside from making your space more comfortable, shade offers real benefits:
- Protects skin from UV exposure
- Keeps patios and decks from overheating
- Helps preserve furniture and plants
- Makes outdoor time more enjoyable (and longer-lasting)
The best part? You can create shady spots using things you already own—or inexpensive materials you can grab locally.
Use a Tarp or Drop Cloth
One of the quickest and cheapest shade fixes is a well-placed tarp or heavy-duty drop cloth.
How to Do It:
- Stretch it between trees, posts, fences, or the house
- Secure it with rope, bungee cords, or carabiners
- Angle it slightly to allow water runoff
These materials cost less than $20 and provide instant relief from the sun. Choose neutral colors or patterns to blend in with your décor.
Hang a DIY Shade Sail
Shade sails are lightweight, stylish, and surprisingly easy to install. They come in triangle or rectangle shapes and provide targeted shade for dining or lounging areas.
Setup Tips:
- Use three or four anchor points (trees, poles, or wall mounts)
- Tension is key—keep the sail taut to avoid sagging
- Overlap multiple sails for layered coverage and visual interest
Basic shade sails start at around $25, and you can reuse them each season.
Create a Curtain Wall
Have a covered porch or pergola? Hang lightweight curtains or fabric panels to block the sun when it’s most intense.
What You Can Use:
- Old bedsheets
- Outdoor curtains
- Shower curtains or fabric remnants
Mount a curtain rod, tension wire, or even PVC pipe to hang panels. You can open or close them based on sun position and wind.
| Fabric Option | Cost | Durability | Look |
|---|---|---|---|
| Drop cloth | $10–$15 | High | Rustic/Casual |
| Sheer curtain panels | $10/pair | Medium | Light/Elegant |
| Outdoor canvas | $15–$30 | High | Modern/Durable |
Build a Simple Frame with PVC or Wood
Creating a basic frame gives you more flexibility in shaping and adjusting your shade. All you need are a few posts, connectors, and a cover.
DIY Canopy Frame:
- Use PVC pipes or wooden stakes to create a square or rectangle
- Secure joints with connectors or brackets
- Cover the top with canvas, fabric, or a tarp
This is perfect for small patios or play areas—and easy to take down if needed.
Use Patio Umbrellas Creatively
A single patio umbrella works fine—but don’t be afraid to get creative:
- Cluster a few smaller umbrellas for wider coverage
- Position them at an angle to block the sun without taking up floor space
- Insert one into a heavy planter or sand bucket for a mobile option
Umbrellas are portable, adjustable, and don’t require permanent installation. Prices range from $20–$60 depending on size.
Repurpose Household Items for Shade
You don’t have to buy anything new—just get a little resourceful with what you already own.
| Item You Have | How to Use for Shade |
|---|---|
| Old sheets or blankets | Hang over a clothesline or rope |
| Shower curtain | Drape between posts or railing |
| Parasol or beach umbrella | Stick in planter or table mount |
| Pop-up tent | Great for kids’ play areas |
These quick fixes are especially handy for temporary setups or impromptu gatherings.
Add Shade with Greenery
Nature can be your best shade provider. With a few strategic plants or vines, you can create a living canopy over time.
Plant-Based Shade Options:
- Fast-growing vines: Morning glory, wisteria, or trumpet vine
- Tall potted plants: Bamboo, palms, or ornamental grasses
- Small trees: Great near patios or decks for partial shade
Pair with a trellis, pergola, or fence to help guide the growth. Bonus: greenery adds a cooling effect and boosts your outdoor aesthetic.
Use an Outdoor Rug for Ground-Level Relief
Not all shade comes from above. Dark stone or concrete absorbs heat and can make outdoor spaces feel hotter. A large outdoor rug can help:
- Keeps feet cool
- Adds color and comfort
- Defines a shaded “room” under other structures
Rugs start at around $30 and can be rolled up or washed as needed.
Try a Pop-Up Canopy for Quick Coverage
Pop-up tents or canopies are ideal for renters or anyone who wants temporary, flexible shade.
- Great for barbecues, parties, or weekend projects
- Easily set up in under 10 minutes
- Fold down and store between uses
Look for one with UV protection and adjustable legs to match your yard setup.
Mix and Match for Full Sun Coverage
There’s no rule that says you have to choose just one solution. Combining multiple shade ideas often creates the most effective and stylish outcome.
- Sail + potted plants = Boho chic
- Umbrella + curtain wall = Cozy conversation corner
- Rug + canopy + lights = Outdoor dining perfection
Think of your outdoor area as zones—dining, lounging, playing—and choose the shade setup that fits each one best.
Stay Cool, Stay Outside
The right shade can turn your outdoor space from a scorcher into a sanctuary. Whether you’re working with a large patio or a small balcony, these easy DIY ideas help you enjoy more fresh air, more comfort, and more time outside—without burning your budget.
DIY
Home Services
Weather & Maintenance
Table of Contents
Beat the Heat: Cheap Ways to Keep Your Home Cool This Summer Without Cranking the A/C
When temperatures rise, staying comfortable at home can feel like a challenge—especially if you’re trying to avoid a sky-high energy bill. Luckily, there are plenty of low-cost ways to keep your space cool and your wallet happy.
Block Out the Sun
Direct sunlight pouring into your home heats it up fast. One of the easiest and cheapest ways to stay cool is by keeping the sun out in the first place.
Simple Shade Solutions
- Close blinds and curtains during the hottest parts of the day
- Use blackout curtains in rooms that get the most sun
- Hang reflective window film to reduce heat transfer (often under $15 per window)
- Add outdoor shade like a tarp, umbrella, or awning for sun-facing windows
Keeping your home shaded can lower indoor temps by several degrees—no electricity required.
Use Fans the Smart Way
Fans don’t actually cool the air—they move it around to make you feel cooler. With a few strategic tricks, you can maximize their cooling power.
| Fan Strategy | Effectiveness | Budget Level |
|---|---|---|
| Ceiling fans counterclockwise | High | Already installed or $40–$100 |
| Box fan in a window | Moderate | $20–$40 |
| Fan + bowl of ice | Moderate | Under $5 |
| Cross-ventilation setup | High | Free |
Try placing a bowl of ice in front of a floor fan for a DIY air chiller. For best results, create a cross-breeze by opening windows on opposite sides of your home and placing fans to pull hot air out.
Adjust Appliance Use
Appliances like ovens, dryers, and even light bulbs can warm up your home fast. Small changes in how and when you use them can keep things cooler.
Heat-Reducing Tips
- Avoid oven use—grill outside, use the microwave, or prep no-cook meals
- Do laundry at night when it’s cooler
- Use LED bulbs instead of heat-producing incandescent ones
- Turn off unused electronics—they generate heat even in standby mode
Cooking smart and managing appliances can reduce both heat and energy bills.
DIY Cooling Tricks That Actually Work
You don’t need to spend much to lower your home temperature—just get a little creative.
- Hang a damp sheet in front of an open window for natural evaporative cooling
- Freeze a hot water bottle or rice sock and use it as a personal cool-down
- Sleep with a fan at your feet and a light sheet instead of a comforter
- Create a “cool-down” corner with a fan, misting bottle, and cold drink station
These small hacks add comfort where you need it most—especially during peak heat hours.
Focus on the Right Rooms
Instead of trying to cool the entire house, pick a few zones where your family spends the most time and concentrate your efforts there.
| Room Type | Cooling Strategy |
|---|---|
| Bedroom | Blackout curtains, ceiling fan, cool bedding |
| Living room | Cross-breeze setup, limited electronics |
| Kitchen | No oven, ventilation fan, shaded windows |
| Home office | Ice fan trick, LED lighting, hydration nearby |
Shutting doors to unused rooms can also help contain cool air where it’s needed.
Insulate and Seal Gaps
Keeping cool air in is just as important as keeping heat out. Inexpensive insulation fixes can prevent your cooled space from warming up too quickly.
Quick Insulation Fixes
- Seal gaps around windows and doors with weatherstripping or caulk
- Use door draft stoppers for interior rooms
- Cover windows at night if they let in outdoor heat
- Add rugs to tile or wood floors to reduce heat absorption
These upgrades are often under $20 and can make a noticeable difference in both summer and winter.
Upgrade Without Breaking the Bank
You don’t need to install central air to stay cool. Some affordable cooling products can make your space feel fresher without the high cost.
| Product | Average Cost | Cooling Impact |
|---|---|---|
| Portable fan | $15–$40 | Moderate |
| Evaporative cooler | $50–$100 | High (dry climates) |
| Reflective window film | $10–$25 | Moderate |
| Thermal blackout curtains | $25–$50 | High |
A few well-placed upgrades can go a long way—especially when combined with smart habits.
Hydration and Clothing Matter Too
Don’t underestimate the power of how you treat your body during hot weather. Staying hydrated and wearing breathable clothes can improve comfort even if your home isn’t ice-cold.
- Drink water regularly, even if you’re not thirsty
- Wear light, loose-fitting clothes made from cotton or linen
- Use a damp washcloth on your neck or wrists to cool down quickly
- Take cool showers to lower your body temp during heatwaves
Keeping yourself cool is just as important as cooling your space.
Chill Without the Chill Bill
You don’t need a high energy bill to enjoy a comfortable summer at home. By using smart shade, airflow tricks, simple insulation fixes, and a few personal comfort hacks, you can beat the heat—without sweating your budget.
DIY
Home Services
Weather & Maintenance
Table of Contents
How to Make Your Home Look Cleaner Without Cleaning More: Easy Visual Tricks That Work
Your home doesn’t have to be spotless to feel fresh and put-together. With a few clever tweaks, you can make any space look cleaner—without actually scrubbing or vacuuming more.
Focus on the First Impression
When it comes to how clean your home feels, the entryway matters. Clear the clutter near your front door to instantly make the whole place seem neater.
- Use baskets or bins for shoes, mail, and keys
- Add a small rug to define the space
- Keep surfaces empty—even one clean spot makes a big impact
This tiny zone sets the tone for everything else your guests (or you!) see.
Clear Off Countertops
Cluttered surfaces can make even the cleanest home feel messy. Start with the kitchen and bathroom—two of the most high-traffic, high-visual areas.
Quick Countertop Fixes
- Tuck away small appliances you don’t use daily
- Limit décor to one or two simple pieces
- Use trays to group items together and make them feel intentional
A mostly empty counter immediately gives off “clean and tidy” energy.
Let in More Natural Light
A dark room tends to feel dingy, even if it’s technically clean. Light creates the illusion of space and freshness.
- Open blinds and curtains during the day
- Use mirrors to bounce light around and brighten corners
- Clean windows occasionally—clear glass makes a subtle but powerful difference
Swap heavy drapes for sheer panels to let in even more sunlight.
Stick to a Simple Color Palette
Busy colors and too many patterns can make a space feel chaotic. Calming, coordinated tones create a more orderly look.
| Color Strategy | Effect on Space |
|---|---|
| Neutral walls | Make rooms feel cleaner |
| Matching decor tones | Adds cohesion and calm |
| One accent color | Keeps style without clutter |
Sticking to a consistent palette doesn’t mean boring—it just means less visual noise.
Add a Focal Point
When the eye has somewhere specific to land, the rest of the space fades into the background—making it feel cleaner, even if it’s not spotless.
- Hang a statement mirror or art piece
- Place a bold pillow or throw on the couch
- Use a plant or lamp as a central feature
It’s all about giving your room a sense of purpose.
Hide Clutter in Plain Sight
You don’t need to get rid of everything—just find smarter ways to store it. Hidden storage solutions make a world of difference.
Easy Storage Upgrades
- Ottomans or benches with storage inside
- Under-bed containers for off-season clothes or toys
- Bookshelves with baskets to hide loose items
These tricks keep clutter out of sight but still easily accessible.
Minimize Wall and Shelf Decor
Too many knick-knacks and photos can make a space feel busy—even dusty—without adding real style. Less truly is more.
- Limit open shelves to 3-5 curated items
- Group similar objects for a cleaner look
- Avoid overcrowding walls with mismatched frames
Empty space = visual breathing room.
Use Scents Strategically
A clean-looking home should also smell fresh. Even if you haven’t vacuumed in days, the right scent can make it feel like you just did.
- Simmer citrus and herbs on the stove
- Use essential oil diffusers or wax warmers
- Place baking soda or dryer sheets in hidden corners
Fresh smells can trick your brain into perceiving the space as cleaner.
Keep Floors Visually Tidy
Even if you haven’t mopped, making the floor look clear goes a long way.
| Floor Tip | Clean Look Boost |
|---|---|
| Vacuum high-traffic rugs | High |
| Hide cords with clips or organizers | Medium |
| Push furniture back to original spots | Medium |
| Use matching bins or baskets | High |
A few intentional moves can dramatically change the vibe of a room.
Pick One “Show Zone” to Tidy
Don’t try to clean the whole house every day. Just focus on one visible area—like your living room or kitchen counter—and keep it consistently neat.
That way, even if the bedroom’s a disaster, the area you (and guests) see most still feels put-together.
It’s All About Perception
You don’t need to scrub harder or clean more often to make your home feel tidy. By minimizing clutter, adding light, and using a few visual hacks, you can create a space that looks and feels cleaner—no deep-cleaning required.
DIY
Home Services
Weather & Maintenance
Table of Contents
Budget Outdoor Dining Ideas: Create a Stylish Backyard Setup Without Overspending
You don’t need a designer patio set or a fancy backyard renovation to enjoy outdoor dining. With a little creativity and some DIY spirit, you can build a welcoming, functional outdoor eating space for much less than you think.
Explore smart ways to use repurposed furniture, DIY projects, and affordable lighting to turn your backyard into the perfect place to eat and relax.
Start with a DIY or Thrifted Table
The dining table is the heart of your outdoor setup, and you don’t have to spend big to get something sturdy and stylish.
- Build It Yourself: Use reclaimed wood, pallets, or fence boards to create a rustic outdoor table. Plans are easy to find online and require just basic tools.
- Check Thrift Stores or Facebook Marketplace: Look for used dining tables or picnic tables you can repaint or seal for outdoor use.
- Folding Tables Work Too: Cover a basic folding table with a cute tablecloth or fabric for a fast, functional solution.
No matter what you choose, a little elbow grease can turn even the most worn-down table into a centerpiece.
Repurpose Seating for Outdoor Use
Skip the expensive patio chairs and think outside the box when it comes to outdoor seating.
- Old Dining Chairs: Seal or paint wood or metal chairs you already have to make them weather-ready.
- Benches and Crates: Use milk crates, storage benches, or cinder blocks with wood planks for creative, low-cost seating.
- Add Cushions or Pillows: Repurpose indoor cushions or use waterproof covers to make seating cozy without breaking your budget.
Mismatched chairs? No problem—just paint them in coordinating colors for an eclectic, intentional look.
Create Shade on a Dime
You don’t need a fancy pergola or built-in canopy to enjoy a little shade.
- Use a Large Umbrella: Basic patio umbrellas are often available on clearance or secondhand.
- DIY Shade Sail: Hang a sheet, tarp, or fabric between trees or poles for instant cover.
- Old Curtains or Shower Curtains: Hang lightweight curtains along fences or from a porch for flexible, breezy shade.
These shade solutions also help create a more intimate, defined dining space outdoors.
Set the Mood with Budget Lighting
Outdoor lighting makes a huge difference in atmosphere—and it’s easy to do on the cheap.
- String Lights: Drape string lights along fences, pergolas, or tree branches for a soft, inviting glow.
- Solar Path Lights: These are low-maintenance, energy-free, and perfect for outlining your dining space.
- Mason Jar Lanterns: Fill jars with LED candles or fairy lights and hang or place them on your table for homemade charm.
With just a few lights, your backyard dinner can go from basic to magical.
Add Personal Touches with Decor
Just like inside your home, small details make your outdoor space feel warm and welcoming.
- Use a Tablecloth or Runner: An old blanket, fabric remnant, or scarf can double as outdoor table decor.
- Potted Plants or Herbs: Place small plants or herb pots on the table or nearby for greenery and function.
- Repurposed Decor: Old picture frames, mirrors, or trays can be weatherproofed and used to style your outdoor dining area.
Decor doesn’t have to be expensive—just intentional and reflective of your style.
Keep It Functional and Flexible
The best outdoor setups are simple, practical, and easy to rearrange.
- Fold and Store: Use folding chairs or collapsible tables if space is limited.
- Add Storage Bins or Crates: Keep napkins, tableware, and citronella candles handy in a repurposed crate or tote.
- Use a Rug for Definition: An outdoor rug (or old indoor one) can help define the dining space and add comfort underfoot.
Think about what works for your space and make it easy to set up and tear down when needed.
Final Thoughts
You don’t need a big budget to enjoy al fresco meals in your own backyard. By using items you already have, tackling a few DIYs, and adding some creative touches, you can build an outdoor dining space that’s inviting, functional, and totally you.
Look into these affordable outdoor dining ideas and start enjoying your space without overspending.
DIY
Home Services
Weather & Maintenance
Table of Contents
Affordable Lighting Upgrades: Easy Ways to Refresh Any Room Without Renovating
Lighting can completely transform how a space looks and feels—and you don’t need to spend a fortune to make a big difference. With a few smart swaps, you can upgrade your lighting, brighten your home, and boost style in any room on a tight budget.
Find out how simple lighting changes can instantly refresh your space and improve functionality without a full renovation.
Swap Out Outdated Fixtures
Old, builder-grade light fixtures can make a space feel dark or dated—but replacing them is easier and cheaper than you might think.
- Flush Mount Makeover: Swap old “boob lights” for modern flush mounts or semi-flush fixtures starting at $25–$40.
- Statement Pendants: Hang a bold pendant light over a kitchen island or dining table for an instant style boost.
- Thrift and Save: Check Facebook Marketplace, thrift stores, or discount retailers for affordable finds that still look high-end.
Even replacing just one dated fixture can change the whole mood of a room.
Change Your Light Bulbs for Better Ambience
Light temperature and brightness have a huge effect on how your room looks—and how it feels to spend time there.
- Use Warm White (2700K–3000K): Ideal for living rooms, bedrooms, and cozy spaces.
- Cool White (4000K+): Great for kitchens, bathrooms, or workspaces that need bright, clear light.
- LED Bulbs Save Money: They last longer and use less energy, lowering your utility bill over time.
Swapping bulbs takes just a few minutes, but it can make your space look brighter and more welcoming instantly.
Add Dimmers for Instant Mood Control
Dimmers are one of the easiest ways to make lighting feel more customized and high-end.
- Install Inexpensive Dimmers: Basic dimmer switches cost around $10–$20 and can be added to most standard fixtures.
- Use Plug-In Options: No wiring skills? Try a plug-in dimmer for lamps and floor lights.
- Layer Your Light: Combine overhead lights with floor or table lamps for more control and ambience.
Adjustable lighting helps every room feel more flexible and comfortable, day or night.
Use Plug-In Sconces and Wall Lights
If you’re not into hardwiring or don’t own your home, plug-in sconces are a renter- and budget-friendly game changer.
- No Drilling Required: Most mount with just a couple screws or removable adhesive hooks.
- Perfect for Reading Nooks or Bedsides: Add targeted light without needing a table or surface.
- Hide the Cord: Use cord covers or creative placement to keep things looking tidy.
Stylish wall lighting brings personality and function to small spaces without calling an electrician.
Add Lamps in Dark Corners
Sometimes all a room needs is a little more light in the right place.
- Table Lamps for Accent: Add a lamp to a side table, dresser, or shelf to brighten dark spots.
- Floor Lamps for Statement: Use a tall, arched floor lamp in living rooms or reading areas to draw the eye upward.
- Mix Styles and Textures: Think fabric shades, metallic bases, or bold shapes to double as decor.
Lamps are the easiest way to boost both light and style without touching your ceiling fixtures.
Highlight with Under-Cabinet and Strip Lighting
Subtle lighting in unexpected places adds a modern touch and improves function.
- LED Strip Lights: These inexpensive lights are great under cabinets, behind TVs, or around shelves.
- Stick-On Puck Lights: Battery-powered and adhesive-backed, these are ideal for closets, pantries, or kitchen corners.
- Motion Sensor Options: Great for bathrooms or hallways to add safety and convenience.
A little hidden lighting goes a long way in making your home feel newer and more polished.
Create a Lighting Plan Room-by-Room
Not sure where to start? Look at how each room is used and layer lighting accordingly.
- Kitchen: Bright overhead lights plus task lighting under cabinets.
- Living Room: Combine a main fixture with table and floor lamps.
- Bedroom: Soft lighting at the bedside with optional reading lamps or wall sconces.
- Bathroom: Bright, cool-toned lights near the mirror plus a softer nightlight or dimmable overhead.
Tailoring light to each room’s needs helps every space feel intentional and comfortable.
Final Thoughts
You don’t need to spend a lot to get a big visual impact from better lighting. Whether it’s swapping fixtures, changing bulbs, or adding layered lights throughout your home, these budget-friendly upgrades can instantly make your space feel fresher, brighter, and more stylish.
Consider trying a few of these lighting ideas to give your home an instant refresh—without touching your renovation budget.
DIY
Home Services
Weather & Maintenance
Table of Contents
Budget Kitchen Cabinet Makeover Ideas: How to Upgrade Without Replacing Them
If your kitchen feels dated but a full renovation isn’t in the budget, don’t worry—you don’t have to rip out your cabinets to get a fresh look. With a few simple, affordable upgrades, you can breathe new life into your kitchen without the high cost of replacement.
Uncover easy ways to refresh your cabinets with paint, hardware swaps, and other budget-friendly tricks.
Paint for a Total Transformation
One of the most dramatic (and affordable) changes you can make is painting your cabinets.
- Choose the Right Paint: Look for durable cabinet or furniture paint designed for high-traffic areas.
- Prep Properly: Remove doors and hardware, clean surfaces thoroughly, and sand lightly for best results.
- Try a Two-Tone Look: Paint upper and lower cabinets different colors for a modern twist.
- Stick to Light Colors: White, soft gray, or pale green can make your kitchen feel bigger and brighter.
For the price of a gallon or two of paint and some elbow grease, you can completely change your kitchen’s look.
Swap Out the Hardware
Changing your cabinet handles and knobs is a fast, easy way to make a big impact.
- Mix Up the Styles: Try sleek bar pulls, vintage-style knobs, or matte black handles for a trendy look.
- Stick to Your Budget: Sets of hardware can be found at big box stores, discount retailers, or even thrift shops for under $30.
- Line It Up: Use a measuring template or guide to make sure everything is level and evenly spaced.
This small swap adds polish and personality to your kitchen without touching a single cabinet panel.
Add Trim or Molding
If your cabinets are plain, adding trim can give them a high-end, custom look.
- Crown Molding: Attach crown molding to the top of your cabinets to draw the eye upward and add a classic touch.
- Shaker-Style Frames: Use thin strips of wood or MDF to create shaker-style frames on flat doors.
- Edge Trim: Add thin molding to the edges of cabinet doors for extra dimension.
Trim pieces are inexpensive, easy to cut, and can be painted to match your cabinets for a seamless upgrade.
Remove Cabinet Doors for an Open Look
Sometimes, less is more. Removing cabinet doors can make your kitchen feel more open and modern.
- Open Shelving Vibe: Take the doors off one or two upper cabinets and paint the interiors to add contrast or a pop of color.
- Display Your Best Pieces: Stack plates, bowls, or glassware neatly to create a styled, functional display.
- Keep It Clean: This trick works best if you’re organized, since open shelves show everything.
It’s a free change that creates a more spacious, airy feel—no tools or shopping required.
Apply Peel-and-Stick Wallpaper or Contact Paper
Add color or texture to your cabinets without paint or power tools.
- Line the Interior: Use fun patterns or colors on the inside back panel of glass-front or open cabinets.
- Cover Flat Panels: Smooth contact paper or peel-and-stick wallpaper can be applied to cabinet fronts or sides.
- Easy to Remove: These products are great for renters or anyone wanting a temporary change.
This option lets you play with style risk-free—and it’s a lot of fun.
Update Hinges and Door Closures
If your cabinet doors creak or don’t close properly, new hinges can make your kitchen feel brand-new.
- Soft-Close Hinges: These are a small upgrade that makes your cabinets feel higher-end.
- Hidden Hinges: For a sleek, modern look, swap visible hinges for concealed ones.
- Match Your Hardware: Choose hinge finishes that coordinate with your new knobs or handles.
Fixing functionality makes your kitchen more enjoyable to use, even if you’re not changing the look drastically.
Clean and Polish for Instant Results
Sometimes, all your cabinets need is a deep clean and some shine.
- Degrease Thoroughly: Use a vinegar solution or degreasing spray to remove built-up grime.
- Polish with Oil: A little mineral oil or furniture polish can bring old wood cabinets back to life.
- Fill Small Scratches: Use a wood repair marker or crayon to fill in minor dings.
It’s the simplest way to make your cabinets look better—no budget required.
Final Thoughts
Upgrading your kitchen cabinets doesn’t have to involve tearing them out or spending thousands. A little paint, some new hardware, or a bit of trim can go a long way toward creating a kitchen that feels fresh and inviting.
Consider these budget-friendly cabinet updates to get a high-impact kitchen refresh—without the high price tag.
DIY
Home Services
Weather & Maintenance
Table of Contents
How to Maximize Natural Light at Home and Cut Energy Costs
Letting more natural light into your home does more than brighten up a room—it can help lower your electricity bill and boost your mood. Whether you’re working with a small apartment or a full house, a few smart design choices can make a big difference in how light flows through your space. Learn how to use layout, color, and decor to maximize sunlight and create a bright, uplifting home without spending a lot.
Choose Light and Reflective Colors
Color plays a big role in how much light bounces around your space.
Try This:
- Use light-colored walls in shades like soft white, pale gray, or pastel tones to reflect sunlight.
- Avoid dark paints and heavy patterns, especially in small rooms—they absorb light and make spaces feel smaller.
- Add furniture and accessories in neutral or light colors to keep the space open and airy.
Bonus Tip: If painting isn’t an option, use light-colored curtains, rugs, or slipcovers to brighten the space.
Use Mirrors to Reflect Light
Mirrors are a secret weapon for boosting natural light.
Ideas:
- Hang a large mirror across from a window to bounce light across the room.
- Use mirrored or glass furniture to reflect light and add visual interest.
- Try a collage of smaller mirrors if you’re on a budget or short on space.
Pro Tip: Choose frames in white, metallic, or light wood tones to keep the look fresh.
Keep Windows Clear and Clean
It sounds simple, but clean windows let in more sunlight.
What to Do:
- Wash windows regularly inside and out to remove dust and grime.
- Open curtains or blinds fully during the day—especially in the morning.
- Avoid putting furniture or clutter in front of windows that block the light.
Tip: Use sheer curtains to keep privacy without blocking the brightness.
Rearrange for Better Light Flow
The way your furniture is laid out affects how light moves through your space.
Try These Layout Tweaks:
- Move large or dark furniture away from windows to keep light from getting trapped.
- Angle furniture to face toward the light—this makes rooms feel more open and energized.
- Use open shelving instead of solid bookcases to allow light to pass through.
Bonus: A few small layout changes can completely change the feel of a room without buying anything new.
Choose Light-Enhancing Decor
Swap out heavy, dark accessories for items that help light shine.
Ideas:
- Use light-colored rugs, throw blankets, and pillows.
- Hang artwork with bright or natural themes.
- Pick decor pieces made of glass, acrylic, or shiny metal to reflect sunlight.
DIY Tip: Paint vases, picture frames, or trays with leftover white or metallic paint for a low-cost update.
Add Natural Elements
Plants and natural textures bring warmth and freshness to bright spaces.
Suggestions:
- Place houseplants near windows—they’ll thrive in the sun and make your room feel more alive.
- Use baskets, jute rugs, or wooden accents to add interest without darkening the space.
Helpful Hint: Choose pots in white, gray, or pastel shades to keep the light look going.
Use Layers of Light When Needed
Natural light changes during the day, so mix in soft artificial light to balance it out.
Try This:
- Use LED daylight bulbs for a natural glow when the sun starts to fade.
- Add table lamps with light-colored shades to avoid harsh lighting.
- Stick to warm or neutral white light to keep the cozy vibe at night.
Pro Tip: Avoid bright white or blue-toned bulbs, which can feel harsh or cold.
Final Insights
Maximizing natural light in your home is a simple way to save on electricity and boost your daily mood. By choosing light colors, smart decor, and making a few layout adjustments, you can create a space that feels sunny, fresh, and inviting—all without spending a lot. Let the light in, and see how it transforms your space and your energy.
DIY
Home Services
Weather & Maintenance
Table of Contents
Low-Cost Ways to Keep Your Home Cool in Summer Without Blasting the AC
As temperatures rise, keeping your home cool doesn’t have to mean cranking the AC or running up your energy bill. With a few smart, affordable upgrades, you can stay comfortable and beat the summer heat without breaking the bank.
Check out these budget-friendly cooling tips to keep your space chill all season long.
Block the Heat Before It Gets In
Keeping heat out in the first place is half the battle when it comes to summer comfort.
- Thermal Curtains: These thick, insulated curtains help block sunlight and reduce the amount of heat entering your home. Use them on windows that get direct sunlight during the day.
- Blackout Shades: These are especially useful in bedrooms and living rooms where heat tends to build up fast.
- Window Film: Reflective or tinted window films are easy to apply and reduce the amount of heat and UV rays coming in through glass. Many types are removable and renter-friendly.
These simple window upgrades can make a big difference in how much your AC has to work.
Get Smart with Fans
Fans are your best budget-friendly cooling tool, especially when used strategically.
- Ceiling Fans: Make sure your ceiling fan is spinning counterclockwise in the summer to push cool air down. This helps the room feel cooler even if the actual temperature stays the same.
- Box and Oscillating Fans: Place fans near windows at night to pull in cooler air, and during the day to circulate it around the house.
- DIY Air Cooler: Place a bowl of ice in front of a fan to create a DIY air conditioner. It’s surprisingly effective in small rooms!
Fans don’t lower the temperature but they help you feel cooler—which means you can ease up on the AC.
Upgrade Your Windows and Doors
Even small leaks can let hot air in and cool air out, making your cooling system work harder.
- Weather Stripping: Install weather stripping around doors and windows to seal air leaks.
- Door Draft Stoppers: A rolled-up towel or inexpensive draft stopper can block hot air from sneaking in under doors.
- Caulking: Fill small gaps and cracks around windows and doors with caulk to improve insulation.
A few dollars in supplies can save you plenty in cooling costs.
Cook and Clean Smart
Some daily habits can accidentally heat up your home. Here’s how to stay cool without changing your routine too much:
- Cook Outside: Grill outside or use a slow cooker or microwave instead of the oven, which heats up your entire kitchen.
- Run Appliances at Night: Dishwashers and dryers put off heat. Run them during cooler evening hours to avoid warming your home.
- Switch to LED Bulbs: They give off less heat than incandescent bulbs and use less energy.
Making these simple swaps helps your home stay cooler throughout the day.
Make Use of Natural Ventilation
Let your house breathe when the temperature drops outside.
- Cross-Ventilation: Open windows on opposite sides of your home to let a breeze flow through.
- Night Cooling: If it cools off at night, open windows to let that air in—just remember to close them in the morning before it gets hot again.
- Window Fans: Use fans in windows to draw in cool air and push warm air out.
Natural airflow works best when it’s cooler outside than inside—so keep an eye on temps.
Consider Small Upgrades
A few affordable home additions can go a long way in helping your home stay cooler.
- Reflective Window Shades: These bounce sunlight away and help lower indoor temps.
- Insulated Attic Access Covers: Hot air often seeps in from the attic. A cheap cover over attic doors or pull-down stairs can help keep it out.
- Portable AC Units: If you only need to cool one or two rooms, a small portable unit may be more efficient than running central air.
These one-time buys can make a big impact and pay for themselves in energy savings.
Final Thoughts
You don’t have to spend a lot to stay cool when summer hits. With smart fan use, heat-blocking window treatments, and a few minor home upgrades, you can stay comfortable while saving money on energy bills.
Dive into these easy cooling strategies and prep your home to handle the summer heat with ease.