Author: Natalia Voss
Table of Contents
- Swap Out the Hardware
- Refresh the Mirror
- Paint for a Clean, Crisp Feel
- Upgrade the Lighting
- Replace the Shower Curtain or Doors
- Add Peel-and-Stick Backsplash or Tile
- Add Open Shelving or Storage
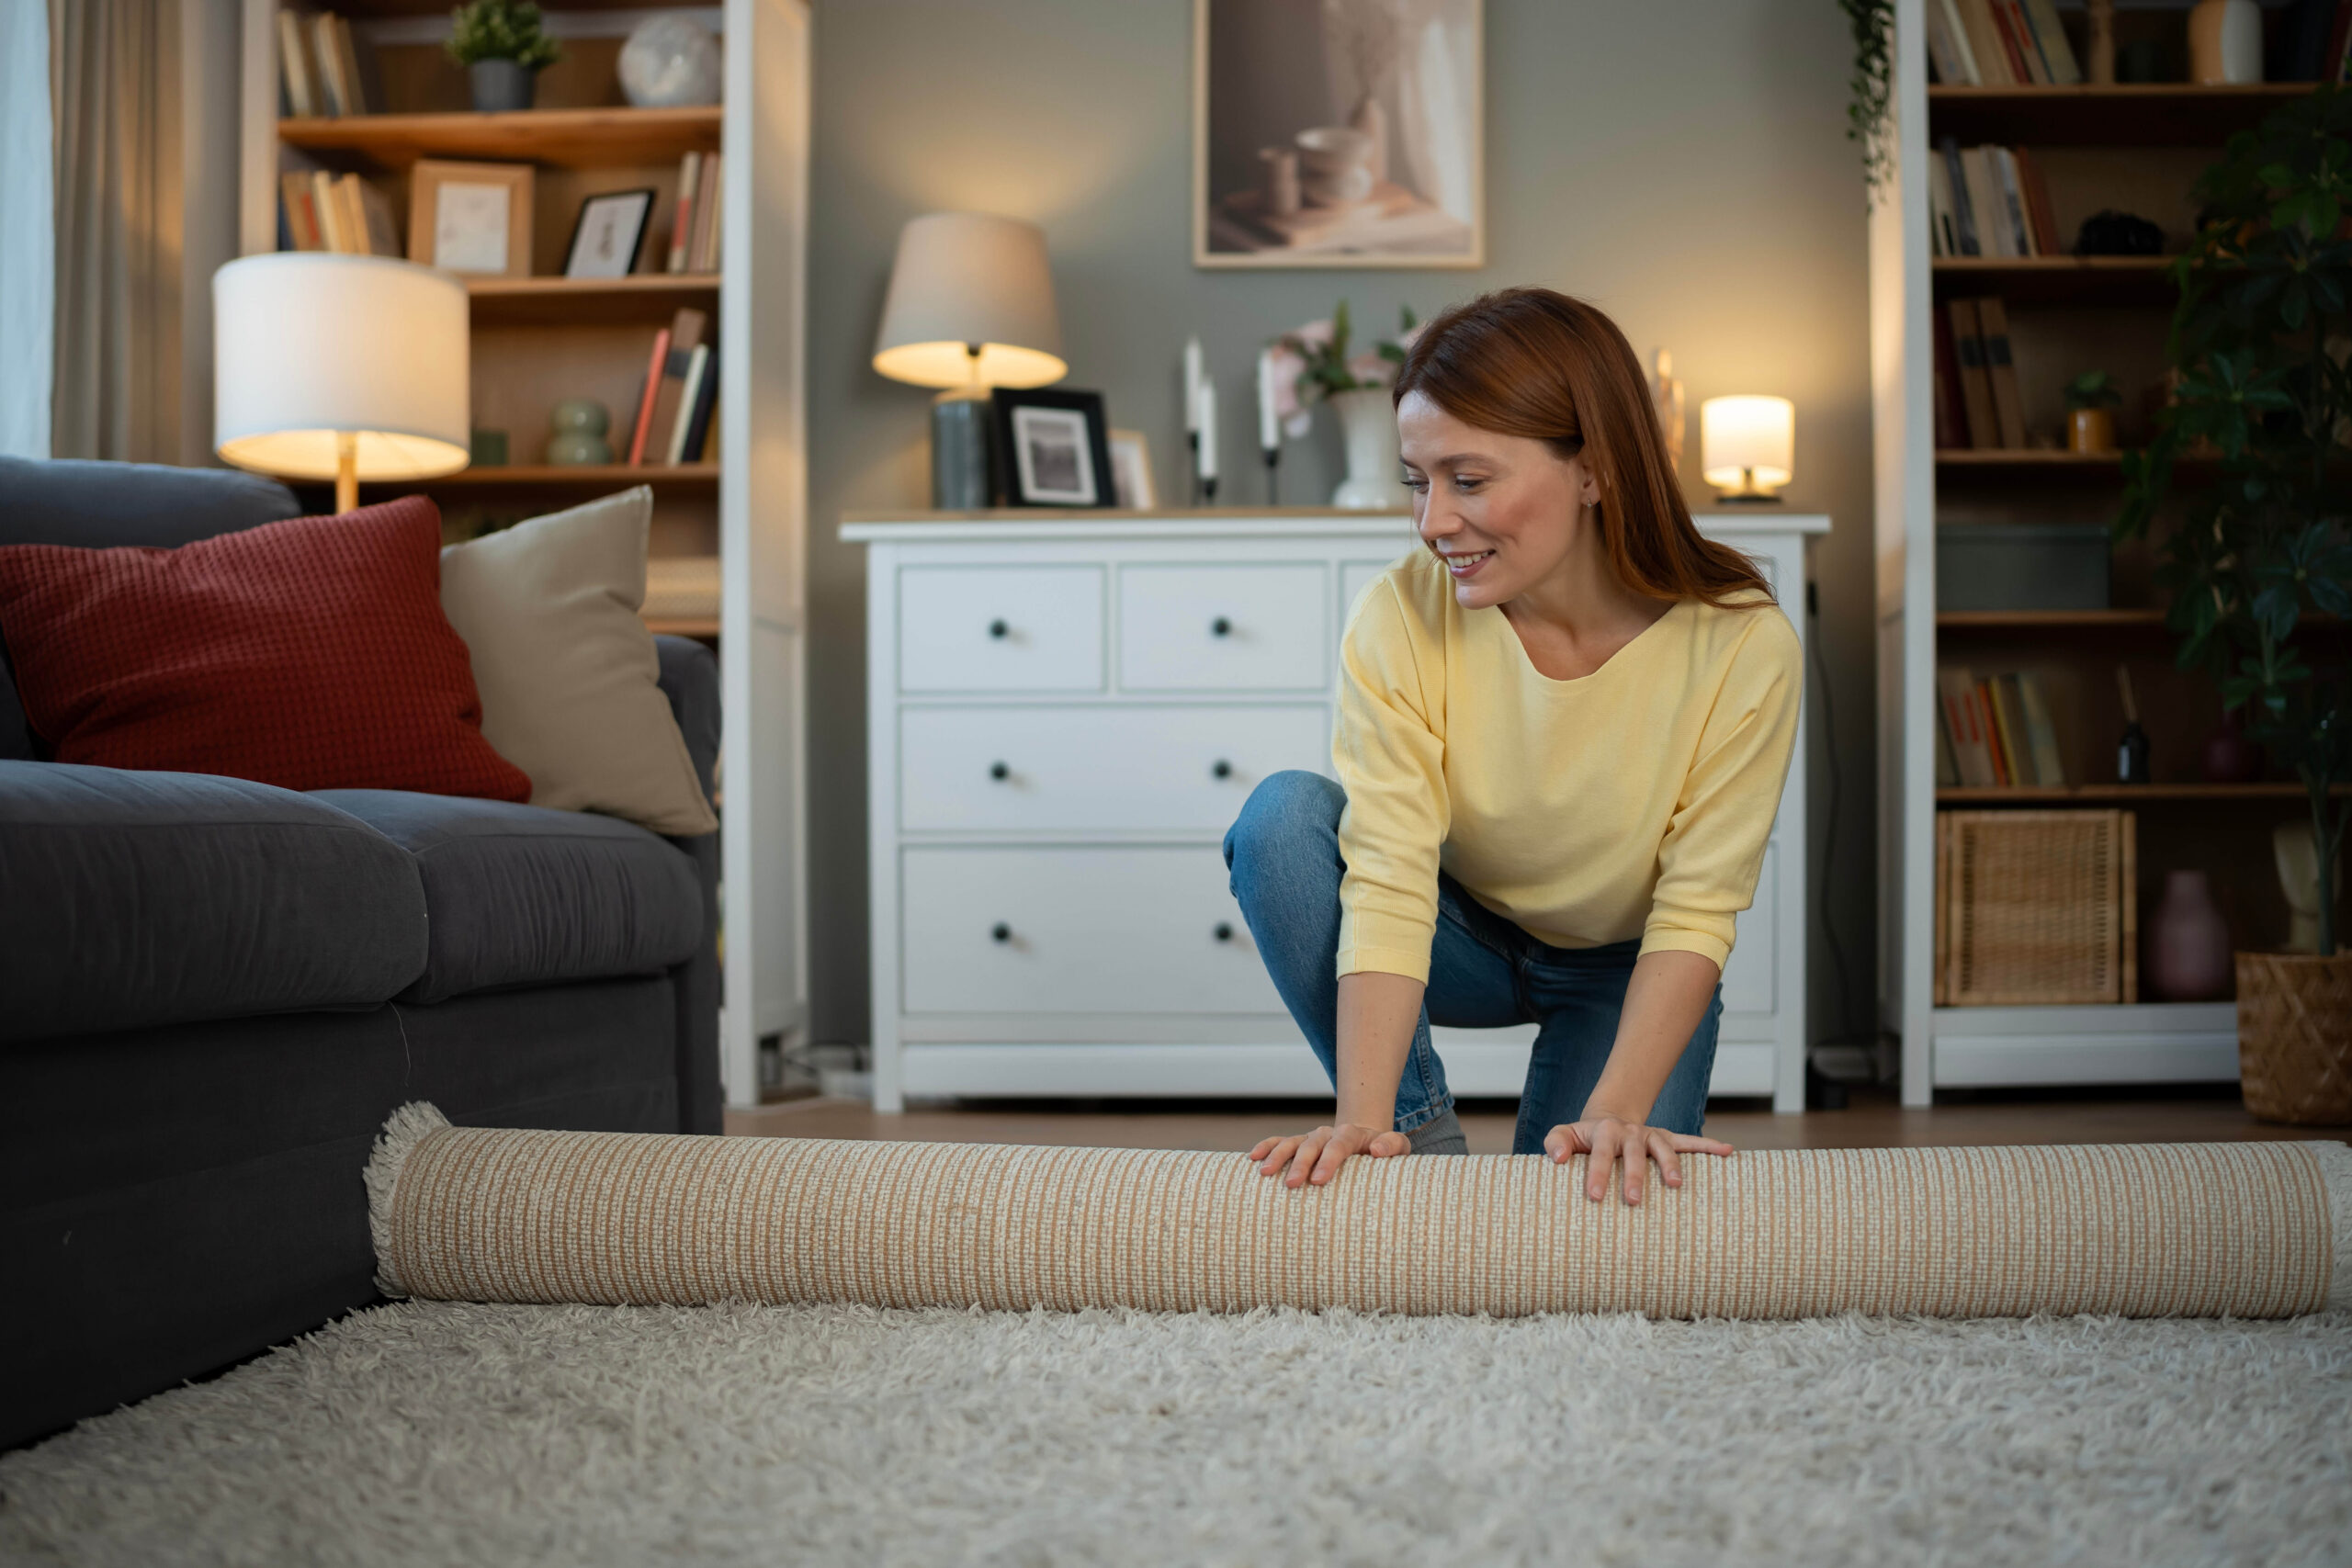
- Refresh the Floors—Without Replacing Them
- Upgrade the Fixtures You See the Most
- Add Greenery and Finishing Touches
- Clean It Like You Just Renovated
- Small Budget, Big Bathroom Glow-Up
Affordable Upgrades to Make an Old Bathroom Feel New Again: Budget-Friendly Ideas for a Fresh, Updated Look
A full bathroom remodel can cost thousands—but freshening up your space doesn’t have to. With a few strategic upgrades, you can make your old bathroom feel clean, modern, and inviting—all without tearing down walls or draining your savings.
Swap Out the Hardware
Replacing dated drawer pulls, cabinet knobs, and towel bars is one of the easiest ways to modernize your bathroom instantly.
Hardware Upgrade Ideas:
- Go for matte black, brushed gold, or oil-rubbed bronze
- Mix finishes for a trendy look (just keep it balanced)
- Look for budget sets at home stores or online marketplaces
You can update an entire bathroom’s hardware for under $50—and it makes a surprisingly big difference.
Refresh the Mirror
That basic builder-grade mirror? It doesn’t have to stay that way.
| Mirror Makeover Options | Budget-Friendly Approach |
|---|---|
| Frame your mirror | Use trim, peel-and-stick molding, or a frame kit |
| Replace with a new one | Check thrift stores or discount retailers |
| Add sconces or stick-on lights | Create a high-end vanity feel |
If you’re handy with a glue gun or a few brackets, a new mirror setup can elevate your whole space.
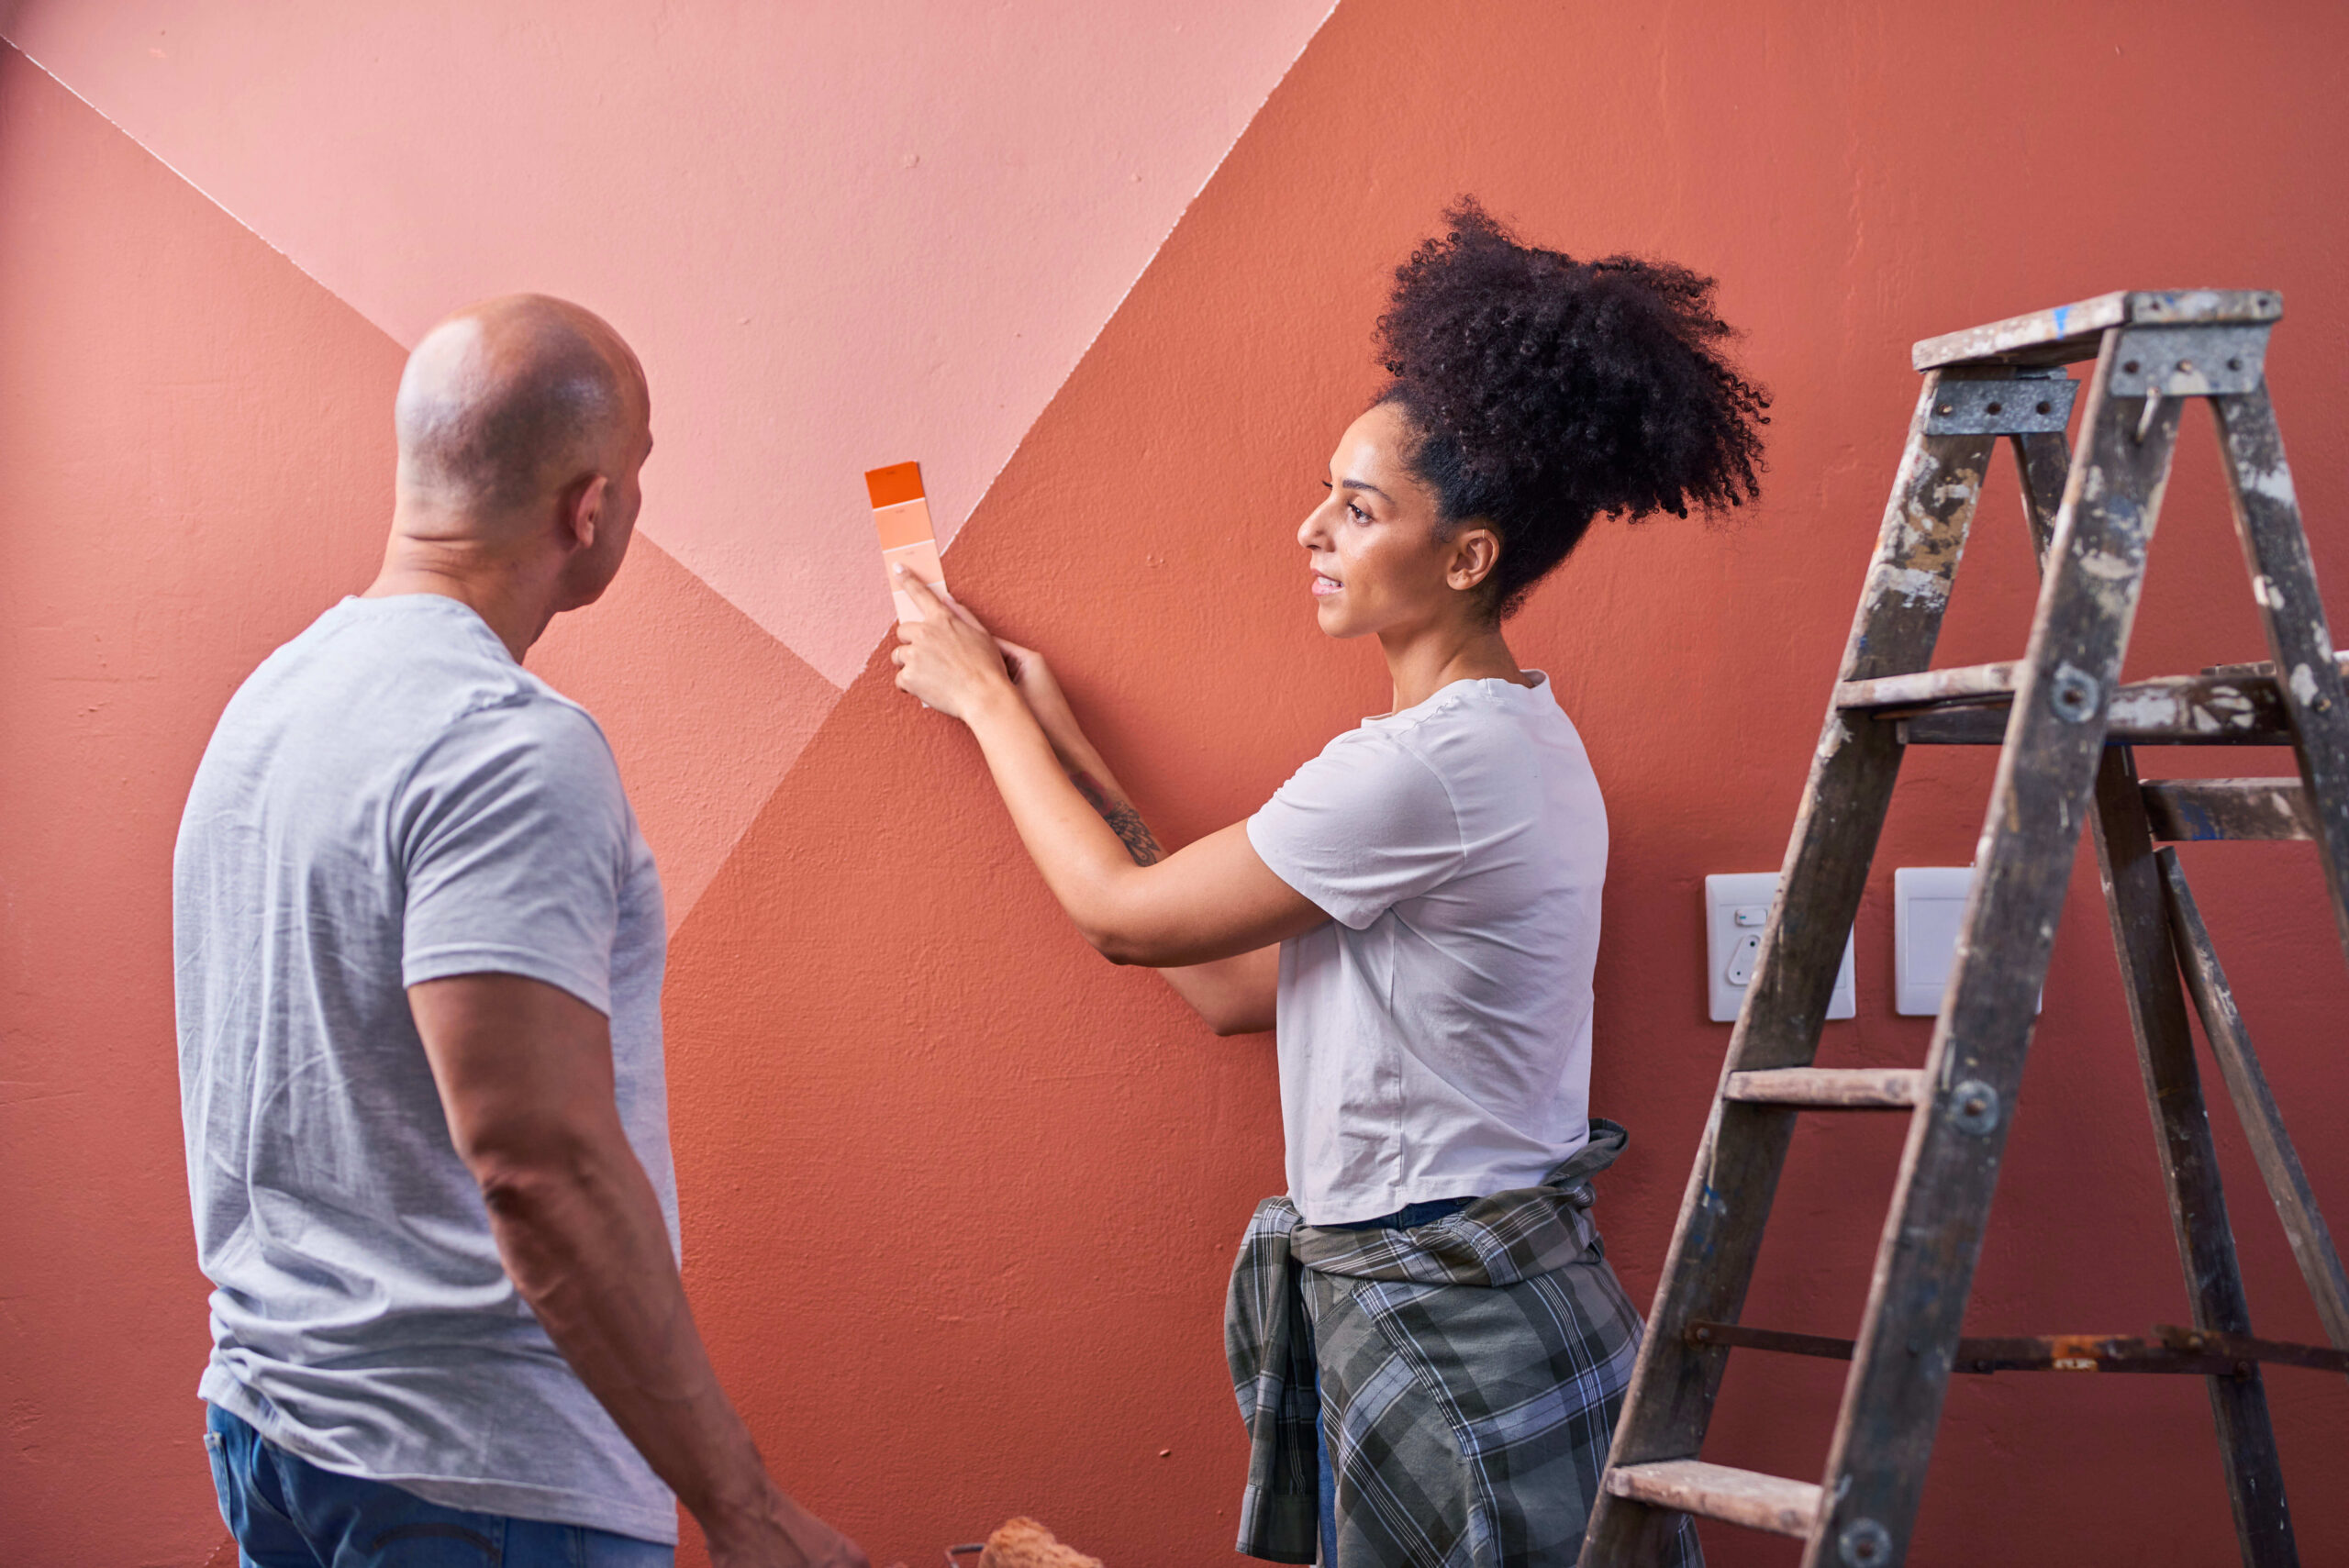
Paint for a Clean, Crisp Feel
Fresh paint can make old bathrooms feel brighter and cleaner—especially if the current color is dark or outdated.
Paint Tips:
- Stick to soft neutrals or light colors to make the room feel bigger
- Use mildew-resistant, semi-gloss paint for durability
- Paint the vanity or trim, not just the walls
Even just painting the ceiling or one accent wall can give your bathroom a whole new feel.
Upgrade the Lighting
Outdated or dim lighting can make even the cleanest bathroom feel dingy. A lighting swap is one of the most high-impact upgrades you can make on a budget.
Affordable Lighting Fixes:
- Replace an overhead light with a new fixture (many options under $75)
- Add LED vanity bulbs for better, more flattering light
- Use adhesive LED strip lights under shelves or mirrors for a soft glow
Aim for warm white or daylight bulbs for a spa-like vibe.
Replace the Shower Curtain or Doors
It sounds basic, but swapping out your old shower curtain or cleaning up the shower door makes a huge difference in how the room feels.
- Choose a curtain with bold patterns or calming neutrals
- Use a curved shower rod to make the space feel bigger
- If you have glass doors, give them a deep clean or add frosted film for a sleek look
Fresh linens and textiles go a long way toward creating that “new bathroom” feeling.
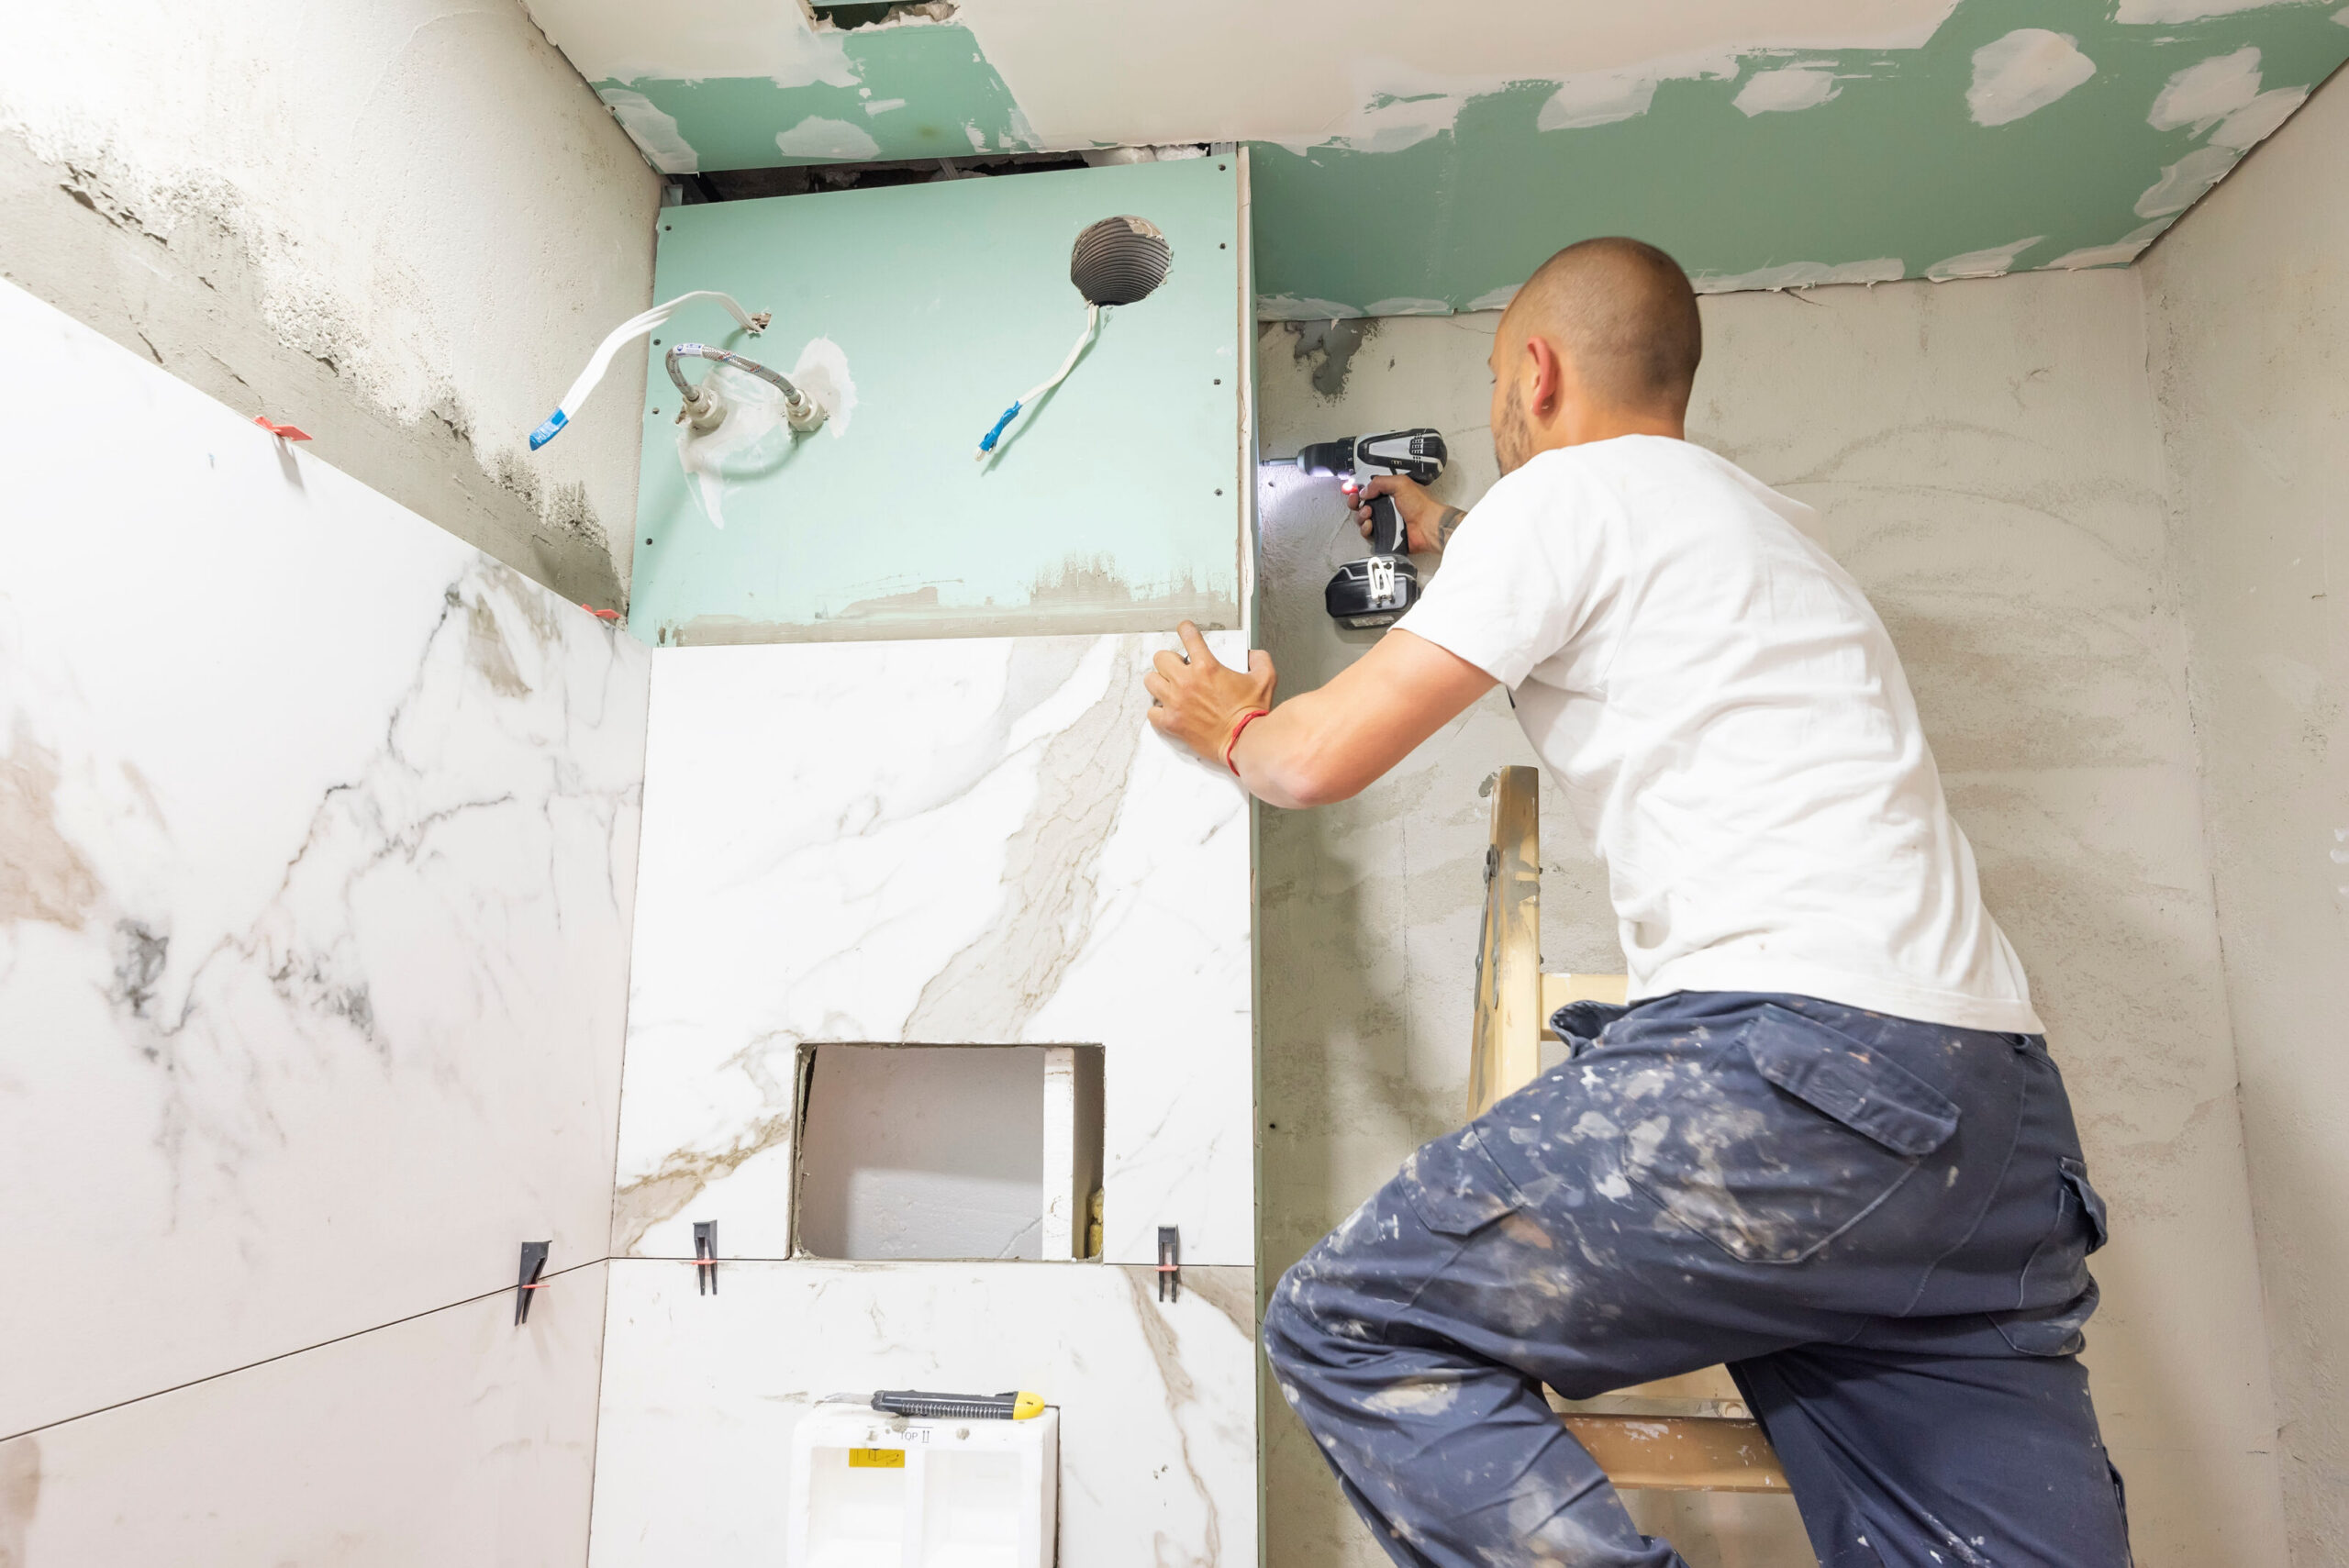
Add Peel-and-Stick Backsplash or Tile
Want the look of tile without the price tag or mess? Peel-and-stick tile is an easy DIY upgrade that adds instant polish.
| Peel-and-Stick Material | Ideal Area | Average Cost |
|---|---|---|
| Faux subway tile | Backsplash or sink wall | $1–$3 per sq. ft. |
| Vinyl floor tile | Over existing floors | $1–$2 per tile |
| Mosaic-style panels | Accent walls or shower surrounds | $2–$5 per sq. ft. |
Installation is simple, and you can complete a small wall or backsplash in a single afternoon.
Add Open Shelving or Storage
Freeing up space and adding style is easy with a few open shelves or new storage pieces.
- Install floating shelves above the toilet or next to the mirror
- Use baskets or glass jars for a clean, organized look
- Reuse thrifted or repurposed items like crates, spice racks, or small cabinets
Good storage isn’t just practical—it helps reduce clutter, which makes the whole space feel cleaner and newer.
Refresh the Floors—Without Replacing Them
New flooring might not be in the budget, but there are ways to give old floors a facelift.
Budget Floor Options:
- Peel-and-stick vinyl tiles: Go right over the existing floor
- Painted tile: Use tile paint and a stencil to add pattern
- Large washable rugs: Cover trouble spots and add softness
Focus on hiding or disguising problem areas until a bigger renovation is possible.
Upgrade the Fixtures You See the Most
You don’t have to swap every plumbing fixture—but updating just the faucet or showerhead can make the whole room feel newer.
- Look for budget faucet upgrades in modern finishes ($30–$75 range)
- Choose a rain-style or high-pressure showerhead for a better experience
- Don’t forget the toilet seat—a $20 replacement can go a long way
Stick to cohesive finishes for a clean, updated appearance.
Add Greenery and Finishing Touches
Plants, art, and accessories help a space feel styled—not just functional.
| Accent Item | Budget Tip |
|---|---|
| Small plants | Use pothos or snake plants that thrive in humidity |
| Framed art or prints | DIY printable art or thrift finds |
| Scented candles | Add spa vibes for under $10 |
| Matching dispensers | Ditch mismatched bottles |
The goal is to make your bathroom feel intentional and refreshed, not just updated.
Clean It Like You Just Renovated
Once you’ve added your upgrades, give everything a deep clean—grout lines, corners, vents, and mirrors. A sparkling clean bathroom makes all your updates look even better.
Don’t Skip:
- Scrubbing grout or using a grout pen to brighten lines
- Re-caulking around the tub or sink
- Polishing mirrors and wiping down baseboards
Sometimes, elbow grease makes a bigger impact than spending money.
Small Budget, Big Bathroom Glow-Up
You don’t need to tear everything out or call a contractor to breathe new life into an old bathroom. A few weekend upgrades, a fresh coat of paint, and some attention to detail can totally transform the space.
Whether you’re prepping your home for sale or just tired of looking at the same old setup, these budget-friendly changes will leave your bathroom looking—and feeling—brand new.
DIY
Home Services

Weather & Maintenance
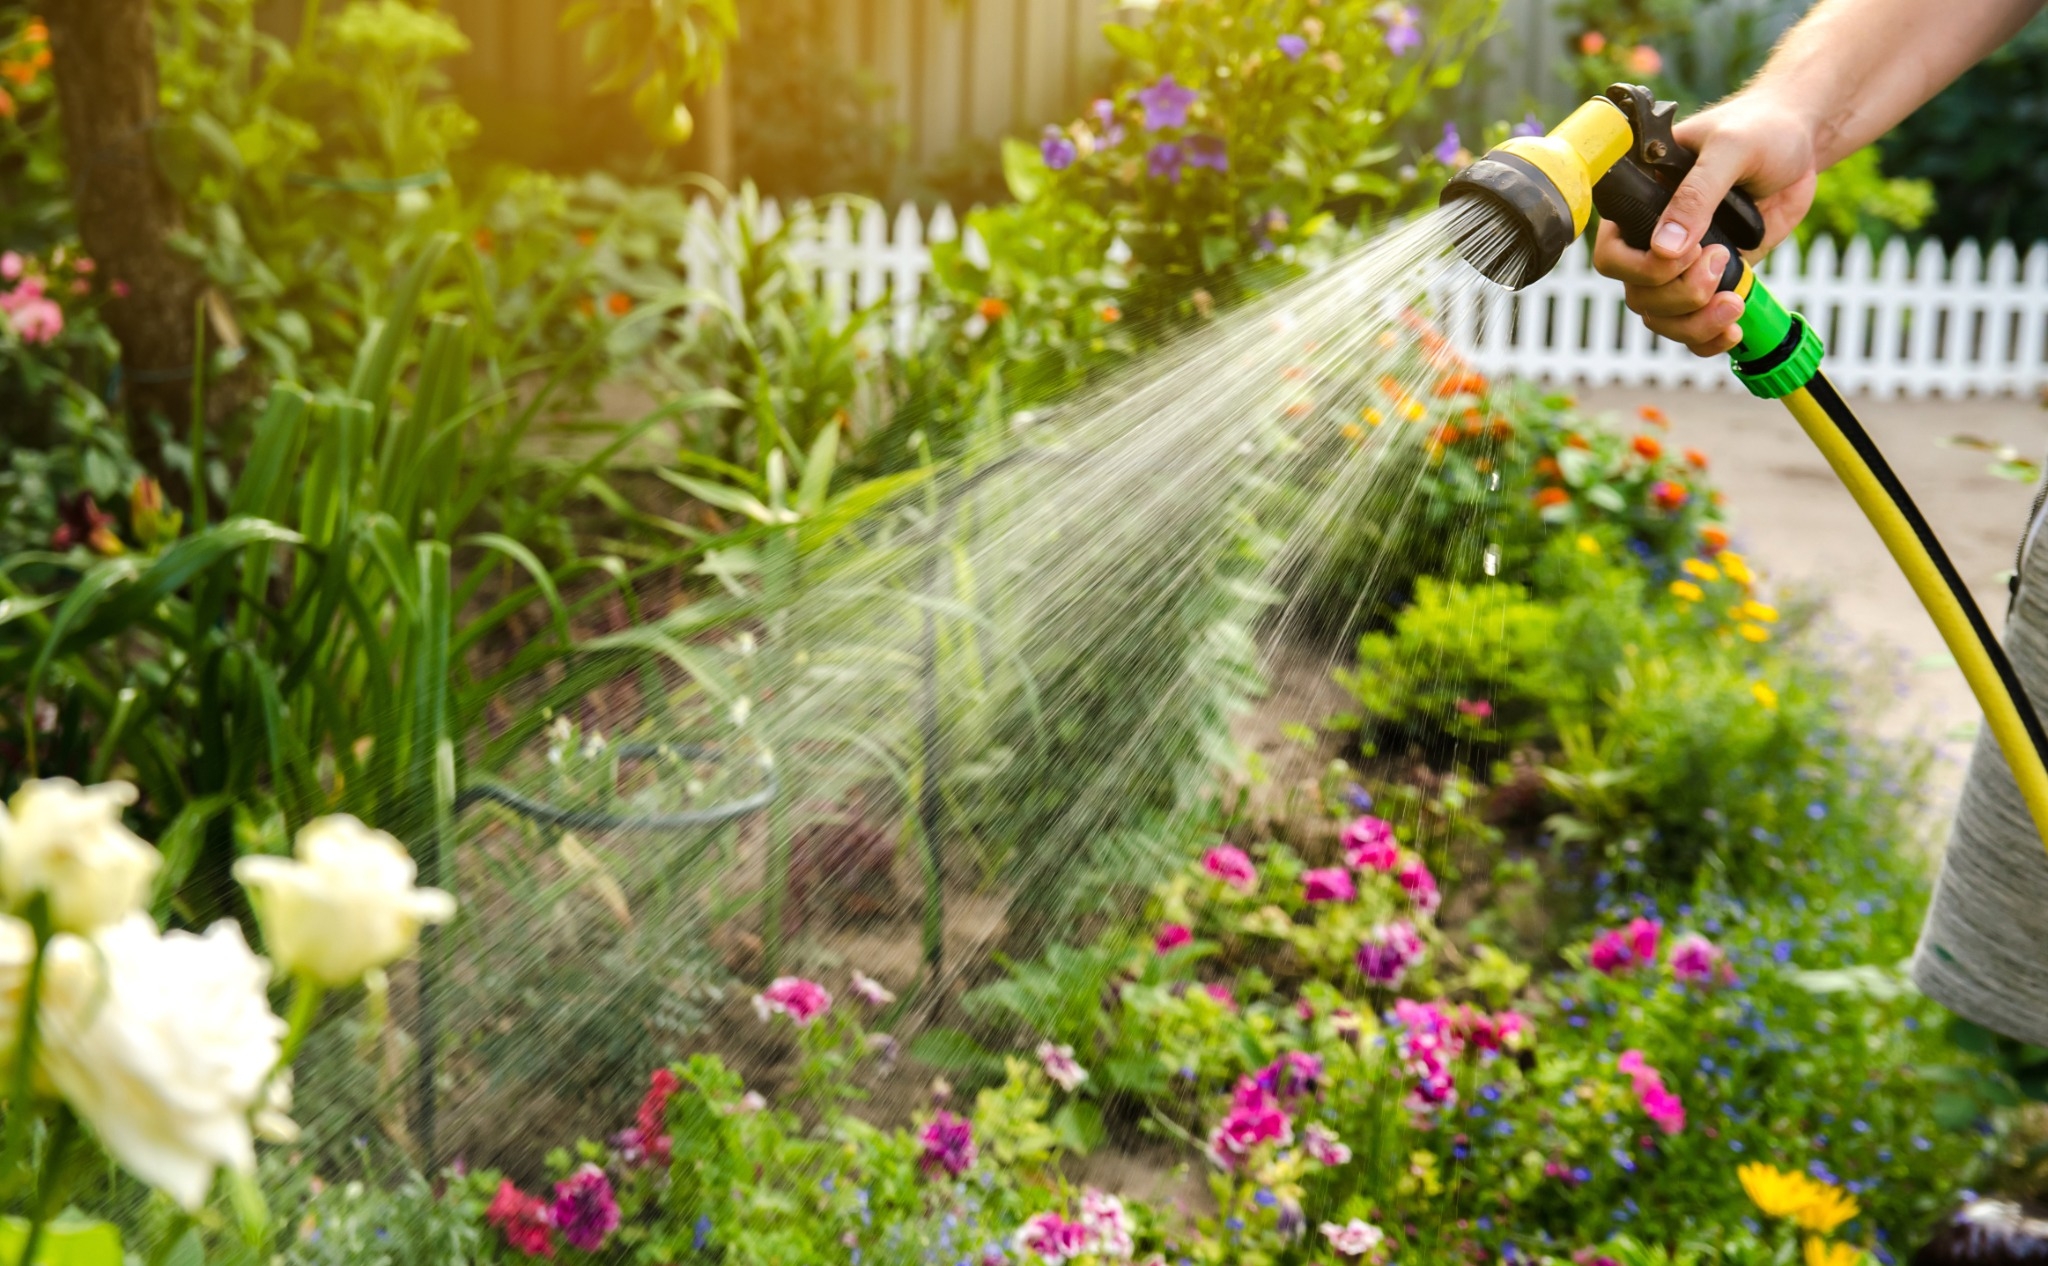

Table of Contents
- Understand Your Lifestyle and Needs
- Explore Affordable Alternatives to Premium Materials
- Factor in Installation Costs
- Consider Long-Term Value, Not Just Initial Price
- Shop Smart and Time Your Purchase
- Prioritize Eco-Friendly and Budget-Friendly Options
- Weigh Style Against Practicality
- Maintenance Matters More Than You Think
- Make Flooring Part of Your Long-Term Home Plan
- Final Thoughts
How to Choose the Perfect Flooring for Your Home While Saving Money
Your home deserves a foundation that feels as beautiful as it looks, and your flooring plays a major role in creating that atmosphere. The good news? With the right approach, you can find stunning, durable flooring that doesn’t break your budget and still makes every step feel like an upgrade.
Understand Your Lifestyle and Needs
The first step in choosing flooring is understanding how you live. Do you have kids who constantly spill drinks? Pets that scratch at surfaces? Or do you live a quieter lifestyle where wear and tear is minimal? Your daily routine and household traffic will dictate which flooring materials are practical.
For example, hardwood flooring has timeless appeal and can last decades, but it may not be the best choice for a home with multiple pets since scratches and water stains can accumulate quickly. In that case, luxury vinyl plank (LVP) or laminate flooring may be better choices. Both replicate the look of hardwood without the high maintenance or cost.
Thinking about how each room functions helps narrow your options. Bedrooms may benefit from the warmth of carpet, kitchens require water resistance, and living rooms often call for a balance between durability and style. Matching function to material ensures you’re not spending money on something that won’t serve you long-term.
Explore Affordable Alternatives to Premium Materials
A common misconception is that affordable flooring means sacrificing style. Modern technology has changed that entirely.
Laminate flooring, for instance, has come a long way from its early days. It now offers highly realistic wood and stone designs at a fraction of the cost. Similarly, luxury vinyl tile not only mimics ceramic or natural stone but is also softer underfoot and easier to install.
Even carpets have cost-effective options. Instead of high-end wool, synthetic fibers like nylon or polyester offer stain resistance, longevity, and affordability. They’re also easier to clean, which can save you money on maintenance down the road.
By exploring alternatives, you can achieve the look you love without straining your budget.
Factor in Installation Costs
One of the biggest hidden expenses in flooring isn’t the material—it’s the installation. Hiring professionals can significantly raise your costs, especially for intricate options like tile or hardwood.
If you’re open to DIY, some flooring materials are specifically designed for ease of installation. Laminate and vinyl planks often come with click-lock systems, allowing homeowners with basic tools to handle the job. This alone can save hundreds or even thousands of dollars.
However, DIY is not always the right path. If installation requires special adhesives, leveling, or cutting, mistakes can lead to higher long-term costs. It’s wise to compare both professional quotes and DIY possibilities before making a final decision.
Consider Long-Term Value, Not Just Initial Price
The cheapest option at the cash register isn’t always the most affordable in the long run. Think about durability, lifespan, and maintenance costs when weighing your decision.
For instance, while carpet may cost less upfront, it typically needs replacing more often than hardwood or vinyl. Similarly, inexpensive tile may crack or chip if poorly manufactured, requiring costly replacements.
Flooring that lasts longer can actually save you money, even if the initial investment is higher. Hardwood flooring can be refinished multiple times rather than replaced. Vinyl flooring often comes with 15- to 20-year warranties, making it a solid mid-range choice for value and durability.
To put it in perspective:
- Carpet averages $3–$5 per square foot installed, but may need replacing every 8–10 years.
- Vinyl plank flooring runs about $4–$7 per square foot installed and can last 15–20 years.
- Hardwood costs between $8–$12 per square foot installed, but with refinishing, it can last over 50 years.
When viewed over decades, hardwood often proves to be the best long-term investment.
Shop Smart and Time Your Purchase
Saving money on flooring doesn’t only come down to what you buy, but when and where you buy it. Retailers often run seasonal promotions, particularly during spring and fall when home renovations spike. Holiday weekends are also prime times for discounts.
Additionally, don’t overlook online marketplaces or clearance sections at big-box stores. Many sellers offer overstock, discontinued lines, or slightly imperfect batches at steep discounts. The imperfections are often barely noticeable but can shave hundreds off your total cost.
For those willing to negotiate, visiting local flooring retailers and asking about price matching or bulk discounts can also pay off. Some stores will even throw in free underlayment or delivery if you ask. Don’t hesitate to ask what promotions are coming up—you might score a better deal simply by waiting a week or two.
Prioritize Eco-Friendly and Budget-Friendly Options
Eco-conscious flooring is no longer limited to expensive boutique brands. Bamboo flooring, for example, is a fast-growing renewable resource that often costs less than hardwood. Cork is another sustainable material that’s naturally cushioned, providing both comfort and insulation.
For those who want affordability and sustainability, recycled flooring options are increasingly available. Some companies specialize in reclaimed wood, which provides a unique character while preventing waste. Others offer carpet tiles made from recycled fibers, which can be individually replaced instead of re-carpeting an entire room.
Not only are these options more budget-friendly over time, but they also contribute to reducing environmental impact—a win-win for homeowners who care about the planet.
Weigh Style Against Practicality
It’s easy to fall in love with the look of a flooring sample in a showroom, but always imagine how it will function in your space. Glossy hardwood might look stunning, but it will also show scratches and dirt more easily. White carpet could brighten a room but may become a nightmare for maintenance if you have children.
Neutral tones and versatile textures are often the best bet for balancing style and practicality. They can adapt to future décor changes without requiring you to replace your floors. Think long-term: flooring is not just a style choice but also an investment in how your home feels and functions.
Maintenance Matters More Than You Think
Maintenance should be a major consideration before purchasing flooring. Some materials require frequent polishing, sealing, or professional cleaning, which adds up over time.
For example, natural stone flooring is durable but porous, meaning it needs regular sealing to resist stains. Hardwood also requires refinishing every few years if it experiences heavy use. Vinyl and laminate, on the other hand, require little more than sweeping and mopping to stay in good condition.
The less maintenance your flooring requires, the more you’ll save both in time and money.
Make Flooring Part of Your Long-Term Home Plan
Think beyond the immediate renovation and consider how your flooring choice fits into your long-term home plan. If you plan on selling within the next five years, investing in attractive, durable flooring can increase resale value. Hardwood, in particular, is a major selling point for buyers, while worn-out carpet may hurt your chances of getting top dollar.
If this is your forever home, prioritize comfort and low maintenance. For instance, radiant-heated flooring beneath tile may be an upfront cost but will provide long-term comfort and efficiency in colder climates.
Flooring is both a financial and emotional investment. Taking the time to choose wisely ensures your home is beautiful, functional, and budget-friendly.
Final Thoughts
Your home is where you live your best memories, and the right flooring helps make it even more inviting. By balancing lifestyle needs, considering long-term costs, exploring alternatives, and shopping strategically, you can find flooring that looks great, performs well, and saves money. With a thoughtful approach, every step you take at home can be on a surface that feels just right—both for your style and your budget.
Sources
DIY
Home Services
Weather & Maintenance
Table of Contents
- Start with Just One Spot
- Use the “One Bag” Rule
- Set a Timer (and Stop When It Dings)
- Ask Simple Yes-or-No Questions
- Group Similar Items Together
- Use Bins or Boxes to Sort (Without Making a Bigger Mess)
- Clear the “Hot Spots”
- Stop Buying Storage Bins (For Now)
- Make It a Daily Habit
- Celebrate Progress, Not Perfection
- Clear Space, Clear Mind
Declutter Without Overwhelm: Simple Steps That Make a Big Impact
Decluttering your home doesn’t have to be an all-day event—or a total meltdown. By focusing on small, strategic steps, you can clear out the clutter without getting overwhelmed. These easy wins not only free up space but also help you feel more in control, calm, and comfortable at home.
Start with Just One Spot
Trying to declutter your whole house at once is a fast track to burnout. Instead, pick one small area and stay there.
High-Impact Starting Points:
- A kitchen junk drawer
- Your nightstand
- A bathroom shelf
- Entryway table or shoe rack
Decluttering even one drawer gives you a win—and momentum to keep going.
Use the “One Bag” Rule
If decluttering sounds like too much, set a simple goal: fill one bag.
- Trash bag: Toss broken, expired, or useless items
- Donation bag: Gently used clothes, decor, or kitchen tools
- Recycle bag: Old papers, boxes, or packaging
Just one bag a day can lead to serious progress in a week or two—without chaos.
Set a Timer (and Stop When It Dings)
Working within a short time frame helps avoid the “what have I done?” mid-declutter panic.
| Time Limit | Ideal For |
|---|---|
| 5–10 minutes | One drawer or shelf |
| 15–20 minutes | A small closet or countertop |
| 30 minutes | A whole room “once-over” |
When the timer goes off, stop. Step back. Appreciate what you’ve done. Then decide if you want to keep going—or come back later.
Ask Simple Yes-or-No Questions
Sometimes we hang onto stuff because we’re not sure what to do with it. Stop overthinking and ask clear, quick questions:
- Have I used this in the last 6–12 months?
- Would I buy this again today?
- Does this belong in this room?
- Is this adding value—or just taking up space?
If the answer is no, let it go.
Group Similar Items Together
Clutter isn’t just about too much stuff—it’s also about things being in the wrong place. Grouping like items makes it easier to spot duplicates and unnecessary extras.
- Stack similar T-shirts, towels, or kitchen tools
- Line up all your bathroom products in one spot
- Gather kids’ toys by type or size
Once you see how much you really have, it’s easier to decide what stays and what goes.
Use Bins or Boxes to Sort (Without Making a Bigger Mess)
Spreading everything out all over the floor can create stress fast. Instead, sort as you go using bins or boxes.
| Sorting Bin | Use For |
|---|---|
| Keep | Things you use often and love |
| Donate | Items in good shape that you don’t need |
| Relocate | Belongs in another room |
| Trash/Recycle | Broken, expired, or unusable stuff |
This keeps the process neat and gives you clear next steps.
Clear the “Hot Spots”
Every home has clutter catch-alls—those spots that just seem to collect everything.
Common Hot Spots:
- Kitchen counters
- Entry tables
- Dining room chairs
- Tops of dressers or desks
Spend 10 minutes clearing one of these areas. You’ll be amazed how much calmer the room feels with just one surface cleared.
Stop Buying Storage Bins (For Now)
It’s tempting to run to the store for cute baskets or boxes—but that’s just more stuff. Declutter first, then organize what’s left.
- You may find storage bins you forgot you had
- You might not need as much as you think
- Your home will feel more open without cramming every corner full
Once you’ve edited down your belongings, you’ll know what kind of storage (if any) you actually need.
Make It a Daily Habit
Decluttering isn’t a one-time job—it’s an ongoing process. But once it becomes part of your routine, it gets easier.
Easy Daily Wins:
- Toss junk mail the moment it comes in
- Return out-of-place items at the end of the day
- Declutter one drawer or shelf after dinner
- Set a “one-in, one-out” rule for new purchases
Small habits prevent messes from building back up.
Celebrate Progress, Not Perfection
Your home doesn’t have to look like a magazine to feel good. Focus on small wins, not total perfection.
- Clear the clutter off one surface? That’s a win.
- Donated a bag of old clothes? That’s a win.
- Got rid of 10 things today? That’s a win.
Every step forward is worth celebrating—and builds momentum for the next one.
Clear Space, Clear Mind
You don’t need a full weekend, fancy bins, or professional help to get your home under control. With small steps, simple habits, and realistic goals, you can reduce clutter and create a calmer, more livable space—without the overwhelm.
DIY
Home Services
Weather & Maintenance
Table of Contents
- Why Backyard Play Matters
- Classic Games With a DIY Twist
- Water Play That Won’t Soak Your Budget
- Backyard Camping Adventures
- Nature-Based Activities That Are Totally Free
- Creative Games Using Chalk
- Reuse and Repurpose for New Games
- Rotate Activities to Keep It Fresh
- Keep It Comfortable
- Making Memories Doesn’t Cost Much
Backyard Fun on a Budget: Cheap Outdoor Games and Family Activities That Don’t Cost a Fortune
You don’t need to spend big to enjoy big-time fun right in your own backyard. With a little creativity and a few basic supplies, your family can stay entertained all summer long—without ever leaving home or draining your wallet.
Why Backyard Play Matters
Backyard time gives kids and adults a chance to unplug, move around, and bond. It’s active, social, and screen-free. Plus, with a few affordable ideas, you can turn ordinary afternoons into memory-making adventures.
Classic Games With a DIY Twist
You don’t have to buy fancy lawn games—many backyard classics can be made at home using items you already have.
| Game | DIY Supplies Needed | Estimated Cost |
|---|---|---|
| Bean Bag Toss | Cardboard box + socks or beans | Under $5 |
| Ring Toss | Empty bottles + paper plate rings | Free |
| Obstacle Course | Hula hoops, cones, chalk, pool noodles | $5–$10 |
| Balloon Volleyball | String + balloon | $1–$2 |
| Backyard Bowling | Plastic bottles + ball | Free |
Let the kids help build or set up the games—it adds to the fun and makes them more invested in playing.
Water Play That Won’t Soak Your Budget
When temperatures rise, water games are a must. You don’t need a pool or a slip-n-slide to stay cool.
Easy Water Activities
- Sponge toss: Soak sponges in water and toss them into buckets (or at each other!)
- DIY splash pad: Use a tarp, sprinkler, and a little dish soap for a slippery, sliding good time.
- Water balloon toss: Classic, cheap, and perfect for teams or pairs.
- Cup races: Drill a hole in a cup, run string through it, and race to spray the cup across the line with a water gun.
Set rules ahead of time, especially if little ones are playing, to keep things fun and safe.
Backyard Camping Adventures
Turn your backyard into a budget-friendly campsite for the evening. All you need is a tent (or blankets), some flashlights, and snacks.
- Tell stories around a fire pit (or flashlight)
- Roast marshmallows—or toast them over a barbecue grill
- Gaze at stars using a free stargazing app
- Play card games or board games under the stars
It’s the feel of a camping trip, minus the packing and travel.
Nature-Based Activities That Are Totally Free
Your backyard offers a built-in playground—nature. Encourage kids to engage with their environment in fun, imaginative ways.
- Bug hunt: Give them a magnifying glass and a notepad to document their findings.
- Scavenger hunt: Create a list of things to find—like leaves, feathers, or different colored rocks.
- Nature art: Collect sticks, leaves, and stones to build art or mini fairy houses.
- Bird watching: Set up a DIY feeder and track which birds visit.
These activities are especially great for building curiosity and creativity without screens.
Creative Games Using Chalk
Sidewalk chalk is one of the cheapest, most versatile backyard tools. A few bucks gets you hours of entertainment.
| Chalk Game | Description |
|---|---|
| Chalk maze | Draw a winding path with dead ends |
| Shadow tracing | Trace each other’s shadows on the ground |
| DIY board games | Create life-sized tic-tac-toe or snakes and ladders |
| Fitness course | Hopscotch, jumps, and zig-zag runs |
Let kids design their own games or courses—it keeps them engaged and active.
Reuse and Repurpose for New Games
Look around the house before heading to the store. Many items can become game pieces with just a little imagination.
Household Items to Repurpose
- Laundry baskets: Use for target toss games
- Old sheets: Turn into tents or shade covers
- Plastic cups: Stack them for relay races or bowling
- Pool noodles: Use as swords, hurdles, or game boundaries
A simple change of scenery and a new purpose gives old stuff a second life—and saves money.
Rotate Activities to Keep It Fresh
Kids (and adults) get bored with repetition. To keep the backyard excitement going:
- Create a weekly game rotation
- Let each family member “host” a game day
- Combine games for themed events (like Water Wednesday or Fun Friday)
It doesn’t have to be elaborate. A little planning can help avoid the “I’m bored” blues.
Keep It Comfortable
If your backyard is going to be the family fun zone, a few small upgrades can make a big difference in comfort and usability.
| Upgrade | Purpose | Budget Option |
|---|---|---|
| Shade umbrella | Sun protection | Patio umbrella or tarp |
| Insect control | Keep bugs away | Citronella candles or DIY spray |
| Seating | Relax during breaks | Folding chairs or picnic blanket |
| Outdoor lights | Extend fun after dark | String lights or solar lanterns |
No need to go full backyard makeover—just enough to make it a space everyone enjoys.
Making Memories Doesn’t Cost Much
The best backyard fun comes from connection, not cost. Whether you’re tossing balloons, racing cups, or watching stars, what matters most is time spent together. Keep things simple, playful, and pressure-free—and you’ll find that your backyard becomes the best summer destination around.
DIY
Home Services
Weather & Maintenance
Table of Contents
Affordable Ways to Childproof or Pet-Proof Your Home: Budget Safety Tips for Families with Kids and Pets
Keeping kids and pets safe at home doesn’t have to cost a fortune. With a little creativity and the right tools, you can create a secure space that’s both budget-friendly and effective.
Why Safety Starts at Home
Your home should be a place of comfort—not a danger zone for curious toddlers or energetic pets. Everyday items like cleaning supplies, sharp corners, and electrical cords can pose real risks. The good news? Most hazards are preventable with a few thoughtful changes.
Budget-Friendly Childproofing Must-Haves
Kids love to explore, which means childproofing is all about anticipating the unexpected. You don’t need expensive gadgets—just smart solutions that work.
Inexpensive Childproofing Essentials
- Cabinet latches: Prevent access to cleaning products and sharp items. Stick-on options start at under $10.
- Outlet covers: Plastic plug-in covers cost less than $5 and stop fingers from poking into sockets.
- Foam corner bumpers: Perfect for tables and furniture edges. A pack of four typically costs around $7.
- Door knob covers: These limit access to rooms like bathrooms or basements and usually cost under $10 per set.
| Childproofing Item | Purpose | Average Cost |
|---|---|---|
| Cabinet latches | Block access to hazardous items | $5–$10 |
| Outlet covers | Prevent electrical shock | $3–$7 |
| Foam bumpers | Soften sharp furniture edges | $5–$8 |
| Baby gates | Restrict room access | $20–$30 |
| Door knob covers | Limit room entry | $6–$10 |
Pet-Proofing for Less
Pets are often like furry toddlers—they love to chew, explore, and sometimes make messes. Luckily, pet-proofing on a budget is easier than it seems.
Smart Pet Safety Hacks
- DIY baby gates: Use tension rods and mesh fabric as a low-cost room divider.
- Cable management sleeves: Keep cords tidy and chew-proof with sleeves or tubing for under $10.
- Secure trash bins: Use a bungee cord or childproof latch to keep curious noses out.
- Store food out of reach: Both human and pet food should be secured in upper cabinets or pet-proof containers.
Focus on High-Risk Areas
Some areas of the home are more hazardous than others. Prioritizing these spaces can help you childproof and pet-proof without overspending.
Target Zones to Safeguard
- Kitchen: Use stove knob covers and keep sharp tools out of reach.
- Bathroom: Lock up medications, cosmetics, and cleaners.
- Garage: Store chemicals high up or in locked cabinets.
- Living room: Anchor heavy furniture and mount TVs to the wall.
Use What You Already Have
Before you head to the store, take a walk around your home. You might already have useful items for safety upgrades.
- Old pool noodles: Cut and tape to table edges for bump protection.
- Rubber bands: Wrap around cabinet handles for a quick DIY lock.
- Velcro strips: Use to secure rugs and prevent slipping.
- Laundry baskets: Turn them upside down over houseplants or cords you want blocked off.
Secondhand Doesn’t Mean Second-Best
Many baby and pet-proofing items are used temporarily and then resold in excellent condition. Buying secondhand can save you 50% or more.
- Check local marketplaces: Facebook Marketplace, Craigslist, and neighborhood apps often list gently used gates, baby monitors, and more.
- Visit thrift stores: Many carry baby-proofing items, especially in family-friendly areas.
- Ask around: Friends or family with older kids may be looking to pass on their gear for free or cheap.
Training Is Also Protection
Childproofing and pet-proofing isn’t just about gadgets. Teaching kids and pets how to behave around potential hazards is a critical (and free) layer of safety.
- Teach basic commands: Simple cues like “leave it” or “stay” help pets avoid danger.
- Set boundaries early: Help children learn what’s off-limits and why.
- Use positive reinforcement: Reward safe behavior consistently.
Set It and Check It
Even the best childproofing or pet-proofing setup needs occasional inspection. As kids grow and pets learn, they find new ways to test limits.
- Monthly checks: Test locks, inspect barriers, and look for new risks.
- Watch behavior: See what your child or pet gravitates toward and adjust your setup.
- Stay flexible: As your home or routines change, your safety setup should too.
Safe Doesn’t Mean Sterile
A safety-first home doesn’t have to feel like a fortress. Soft rugs, hidden storage bins, and well-placed gates can blend into your home’s aesthetic while keeping it functional for kids and pets.
| Feature | Kid-Friendly | Pet-Friendly | Affordable | Stylish |
|---|---|---|---|---|
| Soft area rugs | ✅ | ✅ | ✅ | ✅ |
| Storage ottomans | ✅ | ✅ | ✅ | ✅ |
| Mesh baby gates | ✅ | ✅ | ✅ | ⚠️ |
| Cabinet organizers | ✅ | ✅ | ✅ | ✅ |
Keep Calm and Safety On
Making your home safer for kids and pets doesn’t have to be expensive or complicated. With a little resourcefulness and regular upkeep, you can reduce risk and increase peace of mind—without blowing your budget. Focus on high-impact fixes first, reuse or repurpose what you already have, and don’t hesitate to ask for gently used items from friends or community groups. A safer, more relaxed home is just a few small steps away.
DIY
Home Services
Weather & Maintenance
Table of Contents
Sustainability & Energy Savings: Simple Swaps for a Low-Waste Bathroom
The bathroom might be one of the smallest rooms in your home, but it can create a surprising amount of waste—from plastic bottles to paper products and water use. Luckily, small changes here can lead to big savings for both your wallet and the planet.
Find out how to make easy, budget-friendly swaps that cut down waste and save energy in your daily bathroom routine.
Switch to Reusable Cloths and Towels
Paper towels and disposable wipes are convenient, but they add up fast in cost and trash.
- Reusable Face Pads: Swap cotton rounds for washable cloth versions made from bamboo or soft cotton.
- Washcloths Over Wipes: Ditch makeup remover wipes for warm water and a soft washcloth.
- Unpaper Towels: Keep a stack of reusable towels for cleaning and hand drying instead of using paper towels.
These swaps are gentle on your skin, easy to clean, and save you money in the long run.
Upgrade to a Bidet Attachment
Toilet paper use is one of the biggest sources of bathroom waste, but there’s a cleaner and more sustainable option.
- Affordable Bidet Attachments: You can find simple bidets for under $40 that attach to your existing toilet.
- Less TP, Less Waste: Using a bidet can cut toilet paper use by up to 75%, saving you cash and reducing paper waste.
- Better Hygiene: Many users find bidets leave them feeling fresher than using paper alone.
A one-time upgrade can significantly reduce daily waste while boosting comfort and cleanliness.
Choose Bar Soap and Shampoo Bars
Plastic bottles from body wash and shampoo can pile up quickly.
- Bar Soap: Comes with little or no packaging, lasts longer than liquid, and is just as effective.
- Shampoo and Conditioner Bars: These solid alternatives reduce plastic waste and are often travel-friendly too.
- Soap Dishes Matter: Use a draining dish to keep bars dry and help them last longer.
These swaps are easy to find at most stores and are usually cheaper per use than bottled products.
Use Refillable and Bulk Options
If you prefer liquids, you can still reduce plastic waste with refill systems.
- Refillable Soap Dispensers: Use glass or reusable dispensers and buy soap in bulk or at refill stations.
- Bulk Shampoo and Cleaners: Look for stores that offer bulk buying or consider concentrated products that last longer.
- Mason Jars or Pump Bottles: Repurpose containers you already have to create a matching, minimalist setup.
Refill options save money over time and look nicer on your bathroom counter, too.
Go Reusable for Personal Care
The bathroom is full of single-use personal care products—but you’ve got reusable options.
- Menstrual Cups or Reusable Pads: These can replace years’ worth of tampons or disposable pads.
- Safety Razors: A metal safety razor lasts for years and only needs low-cost blade refills.
- Reusable Ear Swabs: Silicone swabs can be cleaned and reused, replacing hundreds of cotton ones.
These products often pay for themselves in just a few months, making them a smart, sustainable investment.
Saving energy in the bathroom isn’t just about products—it’s also about habits.
Reduce Water Waste
- Low-Flow Showerheads: These reduce water use without sacrificing pressure and cost as little as $15.
- Turn Off the Tap: Don’t let water run while brushing your teeth or shaving.
- Shorten Showers: Even cutting back by two minutes can save gallons per day.
Water-saving habits not only lower your bill but also help conserve an essential resource.
Green Cleaning Swaps
Most bathroom cleaners come in plastic bottles filled with harsh chemicals—but you’ve got greener, safer options.
- Vinegar and Baking Soda: A powerful, natural combo for tubs, sinks, and toilets.
- Reusable Cleaning Cloths: Replace sponges and wipes with washable cloths or old T-shirts.
- Refillable Cleaning Bottles: Mix your own solutions or buy concentrated tablets that dissolve in water.
These swaps reduce plastic, limit exposure to toxins, and cost much less over time.
Final Insights
Creating a low-waste bathroom doesn’t mean sacrificing convenience or comfort. By making a few thoughtful swaps and building better habits, you can reduce waste, save energy, and keep more money in your pocket.
Consider these simple changes and start building a more sustainable, budget-friendly bathroom routine today.
DIY
Home Services
Weather & Maintenance
Table of Contents
How to Caulk Like a Pro: Easy DIY Sealing Tips for Tubs, Windows, and More
Caulking is one of the easiest DIY home improvement projects that can help you save money on repairs, stop drafts, and prevent water damage. Whether you’re sealing up a drafty window, refreshing your bathtub, or fixing gaps around a backsplash, learning how to caulk like a pro gives you a cleaner, more energy-efficient home. Find out how to tackle these small sealing jobs with confidence and just a few basic tools.
Why Caulking Matters
Caulking doesn’t just make things look tidy—it also protects your home from water damage, mold, mildew, and energy loss. Over time, old caulk can dry out, crack, or peel away, especially in moist or high-traffic areas.
Benefits of Fresh Caulk:
- Seals out water around sinks, tubs, and showers
- Blocks air leaks at windows and doors
- Keeps bugs and dirt from creeping into gaps
- Gives your home a finished, polished look
What You’ll Need
Before you start caulking, gather these simple tools:
- Caulk (choose the right type for your project—more on that below)
- Caulking gun
- Utility knife or razor blade
- Putty knife or old credit card
- Painter’s tape (optional, for clean lines)
- Paper towels or rags
- Bucket of warm soapy water
Choosing the Right Caulk
There are different types of caulk depending on the job:
- Silicone Caulk: Best for kitchens and bathrooms. It resists water and mold but can’t be painted.
- Acrylic Latex Caulk: Good for trim, baseboards, and windows. It’s paintable and easy to clean.
- Hybrid or Specialty Caulk: Designed for specific materials like concrete, brick, or metal.
Tip: Check the label to make sure the caulk is meant for indoor or outdoor use depending on your project.
Step-by-Step Guide: How to Re-Caulk Like a Pro
Step 1: Remove Old Caulk
Use a utility knife or scraper to peel off the old caulk. Try to get as much as possible out of the joint or crack. Wipe the area clean with a damp rag to remove dirt and leftover debris. Let the area dry completely before adding new caulk.
Step 2: Apply Painter’s Tape (Optional)
If you want super-clean edges, apply painter’s tape along both sides of the joint. This helps create a perfect line and prevents extra cleanup.
Step 3: Load the Caulking Gun
Cut the tip of the caulk tube at a 45-degree angle. Puncture the seal inside the nozzle if needed (some caulking guns have a built-in poker for this). Insert the tube into the caulking gun.
Step 4: Apply the Caulk
Hold the caulking gun at a slight angle and apply even pressure as you move along the joint. Try to make a steady, continuous line without stopping. Work in small sections if needed.
Pro Tip: Less is more. Don’t overload the area—you can always add a little extra if needed.
Step 5: Smooth the Caulk
Dip your finger or a smoothing tool in water and gently smooth the caulk line before it starts to dry. This pushes the caulk into the gap and gives it a clean, even finish.
Step 6: Remove Tape and Let Dry
If you used painter’s tape, peel it off carefully while the caulk is still wet. Allow the caulk to dry according to the label instructions—usually 24 hours—before using the area.
Common Caulking Projects You Can Do Today
Re-Caulk a Bathtub or Shower
Water damage around tubs and showers is a common problem. Scrape away old, moldy caulk and apply a fresh bead of waterproof silicone caulk around the edges where the tub meets the wall or floor.
Seal Drafty Windows
Cracks around window frames can let in cold air. Use acrylic latex caulk to fill in gaps where the window trim meets the wall, inside or out.
Update Kitchen Backsplashes
Over time, the seal between your countertop and backsplash can wear out. Remove old caulk and apply a neat line of silicone caulk to keep out crumbs and moisture.
Baseboards and Trim
Caulk the gaps where baseboards or crown molding meet the wall to hide seams and make your room look polished.
Exterior Touch-Ups
Seal gaps around outdoor outlets, vents, or siding with weatherproof caulk to block drafts and moisture.
Caulking Tips and Tricks
- Always read the product label—some caulks aren’t paintable or may need special handling.
- Store leftover caulk by sealing the tip with plastic wrap or a nail to prevent it from drying out.
- Practice on a scrap surface if you’re nervous about getting a clean line.
- Use a damp cloth to wipe up any messes immediately—dried caulk is much harder to remove.
Final Insights
Caulking doesn’t take long, but it can make a big difference in how your home looks and functions. With just a few basic tools and a little practice, you can take on small sealing projects that improve comfort, prevent damage, and even cut down on energy costs. So grab that caulking gun and tackle one gap at a time—you’ve got this!
DIY
Home Services
Weather & Maintenance
Table of Contents
Homeownership or Renting—Which One Fits Your Budget This Year
Torn between renting and buying your next home? With housing costs on the rise, it’s more important than ever to know which option gives you the most financial flexibility and value. Here’s a no-fluff breakdown to help you decide what works best for your budget and lifestyle.
So which is better—renting or owning? Like most things in personal finance, the answer depends on your goals, your money situation, and even your personality. Here’s a breakdown of the real costs, pros, cons, and questions to help you figure out which option fits your life best.
Renting: Flexibility Without the Long-Term Commitment
Renting means paying a landlord each month to live in a space you don’t own. While that might sound like “throwing money away,” the reality is a bit more complex.
Pros of Renting
Flexibility is probably the biggest benefit. You can move with relatively short notice, whether you’re chasing a job opportunity, avoiding a rent hike, or just want a change of scenery. This is especially valuable if your future feels uncertain or if you’re not ready to settle down.
Renting also comes with fewer upfront costs. There’s no down payment, no closing costs, and no property taxes. Most leases require just a security deposit and maybe first and last month’s rent.
Maintenance is another perk. If the roof leaks or the water heater dies, it’s the landlord’s problem—not yours. That peace of mind (and lack of surprise expenses) can be a big deal for your budget.
And in some markets, renting is still cheaper month-to-month than owning, especially when you factor in insurance, taxes, and maintenance.
Cons of Renting
The downside? Your money isn’t building equity. You’re paying for a place to live, but none of that cash goes toward something you’ll eventually own. That’s fine for a while, but it may feel frustrating long-term.
Rents can also rise every year. While some places offer rent control, many landlords can raise prices when leases end, which can push you out of a neighborhood you love.
And finally, you’ve got less control. Want to paint the walls? Install new shelves? Adopt a big dog? You’ll need to check the lease first. Some landlords are more lenient than others, but you never truly call the shots in a rented space.
Owning: Building Equity and Putting Down Roots
Buying a home means you own the property and (hopefully) gain equity as it increases in value or as you pay down the mortgage. It’s a huge financial commitment—but one that can pay off in both wealth and stability.
Pros of Owning
The biggest upside is equity. When you make a mortgage payment, a portion goes toward owning more of your home. Over time, that adds up—especially if your home increases in value.
You also get predictable housing costs if you have a fixed-rate mortgage. Unlike rent, your principal and interest payments stay the same every month. That stability can help with long-term financial planning.
Ownership also means freedom to customize. Paint the walls neon pink. Knock out a wall. Add solar panels. You’re the boss.
Plus, there are tax benefits. Mortgage interest and property taxes may be deductible, and profits from selling your primary residence are often tax-free up to certain limits.
And in many cases, a home is a long-term investment. While values can fluctuate, real estate tends to appreciate over time, particularly in growing markets.
Cons of Owning
Buying a home comes with big upfront costs—down payment, closing costs, and often private mortgage insurance (PMI) if you’re putting less than 20% down. You’ll also have ongoing expenses like property taxes, homeowners insurance, HOA fees (in some areas), and maintenance.
Speaking of maintenance—it’s all on you. A broken furnace or leaky roof means dipping into savings, not calling a landlord.
And then there’s less flexibility. Selling a home isn’t quick or cheap. If you need to move, it could take months—and potentially cost you thousands in realtor fees, repairs, and closing costs.
Finally, there’s the risk of being “house poor.” That means putting so much of your income toward your home that there’s not enough left for other goals like travel, saving, or investing.
Renting vs. Owning: Cost Comparison
Here’s a side-by-side to help you visualize the difference:
| Category | Renting | Owning |
|---|---|---|
| Upfront Costs | Security deposit, 1–2 months rent | Down payment, closing costs, inspections |
| Monthly Costs | Rent, renter’s insurance | Mortgage, taxes, insurance, maintenance |
| Maintenance | Covered by landlord | Paid by you |
| Flexibility | High – Easy to move | Low – Selling takes time |
| Customization | Limited (depends on lease) | Full control |
| Equity Building | None | Builds over time |
| Tax Advantages | Limited | Mortgage interest, property tax deductions |
| Risk | Rent increases, eviction | Home value may drop, costly repairs |
Key Questions to Ask Yourself
To decide what’s right for you, ask:
- How long do I plan to stay in one place?
- Am I ready for the responsibilities of homeownership?
- Do I have enough saved for a down payment and unexpected repairs?
- How stable is my income and job situation?
- Do I value flexibility more than long-term financial gain?
A good rule of thumb: if you plan to stay in a home for at least 5 years, buying often makes more financial sense due to equity building and appreciation. But if you’re in a period of transition—or just want simplicity—renting can be the smarter choice.
It’s Not Just Financial, It’s Personal
There’s no universal “right” answer in the renting vs. owning debate. Both come with trade-offs, and the better choice really depends on where you are in life—and what matters most to you.
Owning a home can be a powerful way to build wealth and feel grounded, but it’s not for everyone. Renting gives you flexibility and freedom from long-term commitments, but doesn’t build equity.
The good news? You don’t have to get it perfect right away. Your housing choice isn’t permanent. Rent now, own later. Own now, rent again later. As long as your living situation aligns with your financial goals and personal priorities, you’re on the right track.
Useful Links and Resources
DIY
Home Services
Weather & Maintenance
Table of Contents
How to Create a Budget-Friendly Backyard Oasis with Shade, Comfort, and Privacy
You don’t need a big budget to turn your backyard into a relaxing retreat. With a little creativity and smart planning, you can create a cozy, comfortable outdoor space that feels like an escape without leaving home. Whether you’re looking for more shade, comfort, or privacy, there are plenty of affordable ways to upgrade your yard. Check out these easy tips for transforming your backyard into the perfect budget-friendly oasis.
Add Shade Without Breaking the Bank
Staying cool on sunny days is key to enjoying your backyard. These low-cost shade ideas offer relief from the heat without the hefty price tag.
DIY Shade Sails or Fabric Canopies – Use outdoor fabric, drop cloths, or even old curtains to create shade sails. Hang them between trees, poles, or your house using rope or hooks.
Umbrellas and Canopies – Portable patio umbrellas and pop-up canopies are easy to set up and move around. Look for deals at discount stores or secondhand shops.
Grow Your Own Shade – Plant fast-growing trees or tall shrubs that provide natural shade over time. You can also train climbing plants like morning glories or wisteria to grow over a trellis or pergola.
Repurpose an Old Sheet or Tarp – With a few clothesline clips or nails, a large sheet or tarp can become a quick and easy shade cover.
Create Comfortable Seating
You don’t need expensive patio furniture to relax in comfort. Try these affordable seating options to make your space more inviting.
DIY Pallet Furniture – Repurpose wooden pallets into couches, chairs, or tables. Add outdoor cushions or pillows for comfort.
Floor Seating – Use blankets, outdoor rugs, and large floor pillows or poufs for a relaxed, boho-style seating area.
Foldable Chairs and Benches – Keep an eye out for folding lawn chairs, benches, or camp stools that can be stored away easily.
Refurbish Old Furniture – Give old chairs and tables new life with a fresh coat of outdoor paint or weatherproof fabric.
Build Privacy Without the High Cost
Adding privacy can make your backyard feel like a true retreat. These easy, inexpensive ideas will help block views from neighbors and create a peaceful atmosphere.
Hang Outdoor Curtains – Use curtain rods, wire, or rope to hang light fabric or shower curtains around your seating area, deck, or pergola.
Use Lattice or Trellis Panels – Lattice panels are affordable and can be used to support climbing plants or stand alone as a screen.
Create a Living Wall – Line up potted plants, tall grasses, or a row of shrubs to form a natural barrier. Bamboo and ornamental grasses grow quickly and look great.
DIY Fence Enhancements – Add decorative panels, old shutters, or reclaimed wood to an existing fence to boost privacy and charm.
Decorate with Low-Cost Touches
It’s the little things that make a space feel special. Add personality to your backyard with these budget-friendly decorating ideas.
String Lights – Hang string lights across your patio, fence, or trees to create a warm and cozy glow at night. Solar-powered options are eco-friendly and cost-efficient.
Lanterns and Candles – Place mason jars, battery-operated candles, or small lanterns on tables and ledges for soft evening lighting.
Outdoor Rugs – Use indoor-outdoor rugs to define seating areas and add comfort underfoot. Look for deals online or in discount bins.
DIY Centerpieces – Fill glass jars or bowls with stones, shells, or seasonal flowers for easy table decor.
Bring in Natural Elements
Adding nature to your backyard oasis is simple and budget-friendly.
Potted Plants – Arrange inexpensive potted plants around your seating area. Mix flowers, herbs, and greenery for color and fragrance.
Herb Garden – Start a small herb garden in containers or along a fence line. Herbs like basil, mint, and rosemary are easy to grow and smell amazing.
Bird Feeders and Baths – Attract birds and create a peaceful atmosphere with DIY feeders and water bowls made from recycled materials.
Water Feature on a Budget – Use a large bowl, some pebbles, and a small fountain pump to create a mini water feature for relaxing background sounds.
Organize and Keep It Clean
A tidy space feels more relaxing and is easier to enjoy. Use budget-friendly storage solutions to keep your backyard clutter-free.
Storage Benches or Boxes – Look for dual-purpose furniture that hides away garden tools, toys, or cushions.
Hooks and Baskets – Mount hooks on fences or walls to hang garden tools, lanterns, or decorations.
Buckets and Totes – Use large buckets or bins to corral toys, gardening supplies, or outdoor games.
Final Insights
You don’t need a fancy budget or a total backyard overhaul to create your own outdoor oasis. By using what you have, getting a little creative, and focusing on comfort, shade, and privacy, you can turn any outdoor space into a peaceful, welcoming retreat. Start with one corner or small area and build from there—you’ll be surprised how far a few smart changes can go!
DIY
Home Services
Weather & Maintenance
Table of Contents
Budget Accent Wall Ideas: Cheap Ways to Add Color and Style to Any Room
Want to refresh a room without a full renovation? An accent wall is a simple, low-cost way to transform your space with color, texture, and personality. Whether you’re using paint, paneling, or peel-and-stick wallpaper, it’s a weekend project that can make a big impact on a small budget.
Dive into these creative and affordable ways to give any room a stylish upgrade with an accent wall.
Choose the Right Wall
Before you break out the paintbrush or wallpaper, pick the best wall to highlight.
- Natural Focal Points: Choose a wall behind your bed, sofa, or dining table to draw the eye.
- Well-Lit Walls: A wall with good natural light will show off color and texture more effectively.
- Avoid Cluttered Walls: Steer clear of walls filled with doors, windows, or shelves—they’re harder to work with and can feel chaotic.
Choosing the right spot sets the stage for a stunning accent wall that feels intentional and balanced.
Paint: The Classic Budget Option
Paint is the most affordable and versatile way to create an accent wall.
- Bold Colors: Go for deep blues, rich greens, or even black for drama. Or try a soft pastel for a calming vibe.
- Geometric Designs: Use painter’s tape to create stripes, chevrons, or color-blocked shapes.
- Color Wash or Ombre: Blend two or more tones together for a subtle, artistic effect.
One quart of paint is often enough for a single wall, making this one of the cheapest ways to add serious style.
Peel-and-Stick Wallpaper
Removable wallpaper is a game-changer for renters or anyone who wants a non-permanent design.
- Tons of Patterns: Choose from florals, brick, faux wood, or abstract designs.
- Easy to Install: No glue or paste required—just peel and stick.
- Removable: When you’re ready for a change, it comes off without damaging your walls.
This option adds major visual interest without the mess or commitment of traditional wallpaper.
DIY Wood Paneling or Slats
Add texture and a touch of rustic or modern charm with wood panels or slats.
- Plywood Strips: Cut plywood into thin strips, paint or stain them, and glue them vertically or horizontally.
- Board and Batten: Use inexpensive molding or trim to create raised square or rectangular patterns on your wall.
- Reclaimed Wood: Salvaged wood or pallets can be cut and attached to a wall for a rustic, cabin-like look.
Most home improvement stores will even cut wood for you—just measure ahead of time to save hassle.
Fabric and Tapestries
If you want an ultra-easy, low-commitment accent wall, consider fabric.
- Tapestry or Blanket Wall: Hang a colorful tapestry or patterned blanket for an instant splash of personality.
- Curtain Panels: Mount a curtain rod and hang long, dramatic panels for a soft, cozy feel.
- Stapled Fabric: Stretch fabric across the wall and staple it directly to the edges—no paint, no glue, no fuss.
This method is renter-friendly and perfect for adding color and texture without damaging walls.
Stencils and Decals
Create custom-looking walls with minimal effort using pre-made stencils or decals.
- Wall Stencils: Paint repeating patterns like flowers, tile shapes, or Moroccan designs with a reusable stencil.
- Vinyl Wall Decals: Apply ready-made quotes, shapes, or murals that can be removed later.
- DIY Dot Walls: Use a circle punch and colored contact paper to create a playful polka-dot look.
These are perfect for kids’ rooms, entryways, or any space where you want a little extra fun.
Combine Color and Texture
If you really want to step up your accent wall game, mix techniques.
- Paint + Panels: Paint your wall a bold color, then add wood trim or panels over it for a layered look.
- Wallpaper Inside Trim: Install wood trim in a geometric pattern, then fill the spaces with peel-and-stick wallpaper.
- Two-Tone Walls: Paint the bottom half in one color and the top in another, divided by a chair rail or simple tape line.
Combining elements lets you personalize your space even more without spending a lot.
What’s Next?
Creating an accent wall doesn’t require a big budget or professional skills—just a little creativity and a free afternoon. From bold paint to textured panels or peel-and-stick wallpaper, there are tons of ways to add color and style to any room.
Consider trying one of these budget-friendly accent wall ideas and give your space a fresh new vibe without the stress.