Author: Elliot Grayson
Table of Contents
Easy DIY Wall Shelves: Budget-Friendly Storage Ideas to Upgrade Any Room
When you’re short on storage but big on style goals, wall shelves are the perfect solution. They’re affordable, practical, and completely customizable. Whether you’re working with a tiny apartment or looking to refresh a blank wall, these easy DIY shelf ideas will help you add function and flair without spending a fortune.
Why Wall Shelves Work So Well
Wall shelves are the ultimate double-duty decor—they add storage and style at the same time. Here’s why they’re a go-to budget upgrade:
- Free up floor space in tight rooms
- Keep essentials within reach
- Showcase your personality with books, plants, or decor
- Fit in virtually any space, from entryways to bathrooms
And since most DIY shelf projects use basic materials, they’re a great option if you’re looking for a quick weekend project with a big payoff.
Basic Materials You’ll Need
Most DIY wall shelves use materials you can find at any hardware store—or may already have in your garage.
| Material | Use | Budget Tip |
|---|---|---|
| Wood planks | Shelf surface | Pine is inexpensive and easy to stain or paint |
| Brackets or corbels | Support the shelves | Look for clearance or thrifted options |
| Screws + anchors | Secure into the wall | Use drywall anchors for added stability |
| Level + drill | Essential for installation | Borrow tools if you don’t own them |
A basic DIY shelf setup costs $10–$25 per shelf, depending on your materials and size.
Floating Shelves
Floating shelves are sleek, modern, and ideal for small spaces. They hide their brackets or supports for a clean look—and they’re surprisingly easy to make.
How to Make Them:
- Use 1×6 or 1×8 wood boards for the shelf base
- Install hidden brackets or build a hollow “box” that slides onto a support piece
- Paint or stain the shelf to match your decor
These are great for living rooms, kitchens, and bedrooms—anywhere you want that “built-in” feel.
Rustic Wood and Metal Brackets
If you like a farmhouse or industrial vibe, pair stained wood with metal brackets.
Styling Tips:
- Stain your boards in warm tones (walnut, oak, or espresso)
- Use matte black or brushed brass brackets
- Display mason jars, ceramics, or vintage books
This combo is timeless, sturdy, and easy to adapt to any wall space—plus, you can easily scale it up or down.
Picture Ledge Shelves
Picture ledges are shallow shelves with a lip that hold frames or small art pieces. They’re perfect for flexible wall decor.
Why They Work:
- Easy to rotate art or photos without new holes
- Simple to build using a flat board and a small front lip (like a quarter-round molding)
- Ideal for kids’ art, gallery walls, or above beds and couches
They’re also renter-friendly if you install them with removable anchors.
Corner Shelves
Got an awkward corner that’s just collecting dust? Turn it into functional storage or display space with custom corner shelves.
DIY Corner Shelf Tips:
- Use triangle-cut boards to fit into wall corners
- Mount with small L-brackets underneath
- Paint the same color as your walls to make them feel built-in
Perfect for bedrooms, bathrooms, or kitchen nooks.
Crate or Box Shelves
Repurpose wooden crates or old drawers as ready-made wall shelves—just mount and go.
| Item to Repurpose | New Use |
|---|---|
| Wine crate | Display shelf for kitchen or bar |
| Vintage drawer | Bathroom storage or entryway shelf |
| Wood box | Shadow box-style display |
You can hang them horizontally or vertically, stack them, or mix different shapes for an eclectic wall layout.
Above-the-Toilet Shelves
This often-overlooked spot is ideal for adding a few shelves for extra bathroom storage.
Setup Ideas:
- Use two or three short shelves with brackets
- Store toilet paper, small baskets, candles, or folded towels
- Keep the look minimal to avoid visual clutter
Choose water-resistant finishes or use paint to seal the wood.
Entryway Drop Zone Shelf
Need a quick landing spot for mail, keys, or sunglasses? A single shelf near your front door can do the trick.
- Add hooks underneath for bags or jackets
- Pair with a mirror or small tray
- Keep it shallow to avoid bumping into it
This simple addition adds function without eating up floor space.
Styling Your Shelves
Once your shelves are up, it’s time for the fun part—styling.
Quick Styling Tips:
- Use odd numbers of items (groups of 3 or 5) for a balanced look
- Mix materials like wood, glass, and ceramic for visual interest
- Layer items front to back (books behind a plant or frame)
- Leave some empty space so the shelf doesn’t feel crowded
You don’t need to buy new decor—just move things around from other rooms or shop your own storage bins.
Keep It Level, Keep It Safe
Whatever shelf style you choose, be sure to:
- Use a level to keep lines straight
- Install into wall studs when possible
- Use proper anchors for drywall installs
- Avoid overloading shelves—check weight limits if using brackets
Safe and sturdy shelves are just as important as stylish ones.
Affordable, Stylish, and Totally Doable
Whether you’re looking to add a little more storage, decorate a blank wall, or show off your favorite things, DIY wall shelves are an easy, affordable solution. With just a few basic materials and a little weekend time, you can transform your space—and boost your home’s function and charm.
DIY


Home Services

Weather & Maintenance
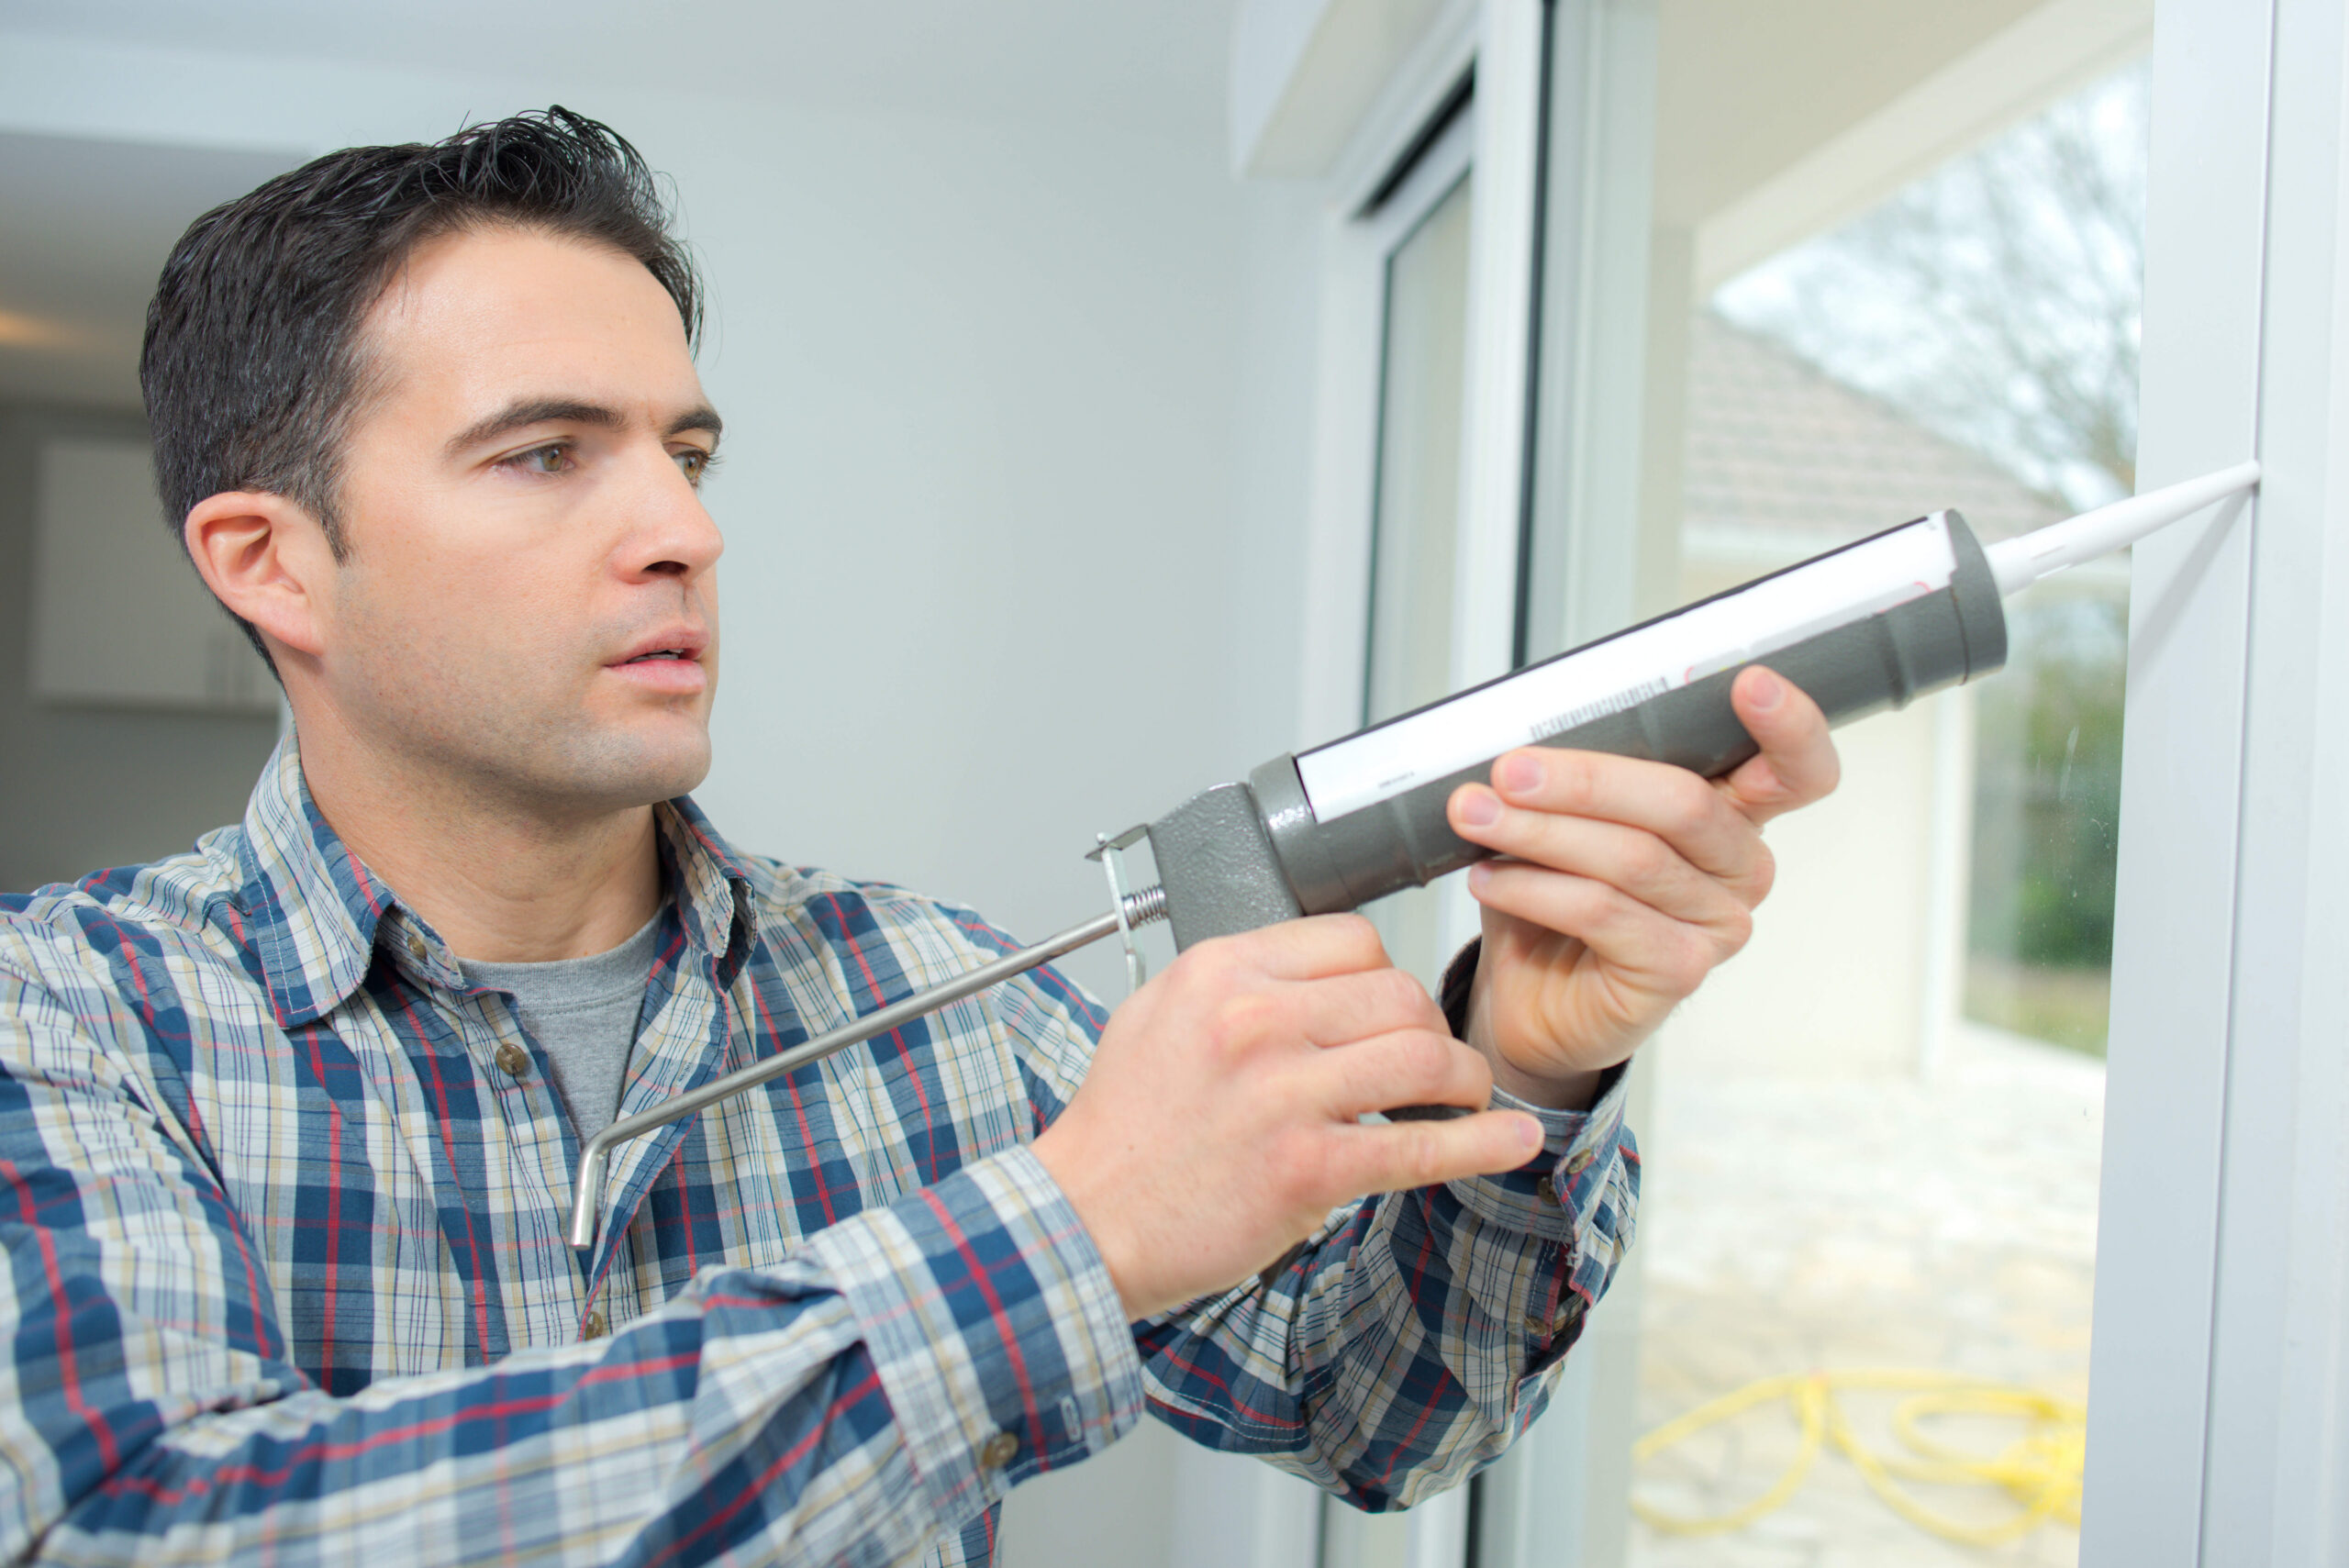

Table of Contents
Budget Backsplash Ideas: Affordable Ways to Upgrade Your Kitchen Walls Without a Full Remodel
Upgrading your kitchen doesn’t have to mean a full gut job—or a drained savings account. A stylish backsplash is one of the easiest ways to give your kitchen a fresh, updated look on a budget. With the right materials and a bit of creativity, you can create a backsplash that’s high on style and low on cost.
Why Backsplashes Make a Big Impact
A backsplash doesn’t just protect your walls from splashes and spills—it’s also a focal point in your kitchen. It can tie together your color scheme, add texture, and create a custom look without touching your cabinets or counters.
And the best part? You don’t need a professional to get it done.
Peel-and-Stick Tiles
Peel-and-stick tiles are the MVPs of affordable kitchen makeovers. They’re renter-friendly, mess-free, and come in hundreds of styles—from subway tile to faux marble and metallic finishes.
Why They Work:
- Easy to install—just measure, cut, and stick
- Removable and repositionable
- No grout or special tools required
| Style Option | Price Per Sq. Ft. | Look Achieved |
|---|---|---|
| Faux subway tile | $1–$3 | Classic and clean |
| Metallic hex patterns | $2–$4 | Modern or glam |
| Faux mosaic | $2–$5 | Textured and detailed |
Perfect for covering outdated tile or adding interest to a plain wall.
Paint It On
If you’re working with a tight budget and already have a smooth wall surface, paint can work wonders.
Paint Ideas for Backsplashes:
- High-gloss paint: Easy to wipe clean, reflects light beautifully
- Stencils: Mimic the look of tile with minimal cost
- Color blocking: Use painter’s tape to add geometric shapes or faux tiles
Choose mildew-resistant, washable paint for best results. A quart or two is often all you need.
Beadboard Panels
Beadboard is an underrated backsplash option. It’s affordable, easy to install, and adds instant cottage or farmhouse charm to any kitchen.
Quick Beadboard Tips:
- Available in large sheets at hardware stores
- Paintable to match or contrast your cabinets
- Attach with adhesive or nails, then caulk the seams
This is a great way to warm up a kitchen with traditional or vintage vibes.
Tin Tiles or Faux Metal Sheets
Looking for something eye-catching? Tin tiles or faux-metal panels can bring a vintage or industrial edge to your space.
- Use real pressed tin or lightweight plastic versions with metallic finishes
- Apply with adhesive and trim with metal edging
- Works well behind stoves or sinks for a high-impact look
They’re heat-resistant, durable, and often under $4 per square foot.
Laminate Sheets or Remnants
Laminate isn’t just for countertops—it also makes a sleek, modern backsplash option.
| Laminate Option | Best For | Pros |
|---|---|---|
| Sheet laminate | Seamless look | Easy to clean, budget-friendly |
| Remnants from counters | Smaller spaces | Often discounted or free |
Adhesive and a utility knife are all you need to get started.
Wallpaper—Yes, Really
Vinyl or moisture-resistant wallpaper can give your kitchen walls texture and pattern without committing to tile.
- Use peel-and-stick wallpaper for easy application
- Go bold with florals, geometrics, or textured neutrals
- Add a layer of clear acrylic sealer for extra water protection
This is an especially smart idea for renters or weekend refreshes.
Ceramic Tile—On a Budget
If you’ve got your heart set on real tile, you can still make it work without overspending.
Tile Tips for Saving:
- Buy clearance or discontinued styles from local hardware stores
- Use tile only behind the stove or sink instead of the full wall
- Mix tile with paint or beadboard for a half-and-half look
- DIY installation with premixed grout and adhesive
Subway tile is timeless and often the most affordable, at around $1 per square foot.
Repurpose What You Have
Before you head to the store, check your garage, attic, or local reuse center for overlooked materials.
Unexpected Backsplash Materials:
- Old wood planks or pallet boards
- Mirrors or mirrored tiles for a glam look
- Chalkboard paint for a writable backsplash
- Reclaimed tiles or mosaic pieces for a patchwork style
With a little sanding, sealing, or painting, these pieces can turn into unique backsplash statements.
Go Halfway Up the Wall
If full-wall coverage isn’t in the budget, try a half-wall or partial-height backsplash. It still protects key areas and adds design flair—while cutting your material costs nearly in half.
- Use beadboard, tile, or paint up to chair-rail height
- Top it with trim for a finished look
- Great for behind the sink or under open shelves
This minimalist approach works especially well in small kitchens or tight galley layouts.
Tips for a Successful Budget Backsplash
Even the most affordable backsplash can look amazing with the right prep and finishing touches.
| Pro Tip | Why It Matters |
|---|---|
| Measure carefully | Avoid buying too much material |
| Prep and clean walls | Ensures proper adhesion |
| Use caulk or trim to finish edges | Gives a professional look |
| Keep it consistent with your style | Makes your kitchen feel cohesive |
Take your time and don’t rush the process. Even low-cost upgrades can feel luxe when done right.
Big Style, Small Spend
A backsplash upgrade doesn’t have to mean expensive tile, contractors, or a full kitchen makeover. With a few materials, a weekend, and a little elbow grease, you can transform your space into something that feels fresh, modern, and totally you.
Stylish, functional, and budget-friendly? That’s a win in any kitchen.
DIY
Home Services
Weather & Maintenance
Table of Contents
- The Real Cost of Going Dark
- Beyond the Fridge: The Hidden Electronics Threat
- Your Home Office Can't Afford Downtime
- The Hotel Alternative Nobody Wants
- Your Property Value Just Got a Boost
- Insurance Companies Are Paying Attention
- Choosing Your Financial Protection
- The Long Game Pays Off
- Your Next Power Outage is Coming
- Sources
How a Home Generator Can Actually Put Money Back in Your Pocket
Your power just went out again, but this time you’re not worried about spoiled groceries or missed work deadlines. That’s because you made one smart investment that’s already saved you thousands—and here’s how a home generator can actually put money back in your pocket.
The Real Cost of Going Dark
Power outages aren’t just annoying disruptions to your evening Netflix binge. They’re expensive disasters hiding in plain sight, and most homeowners have no idea how much money they’re hemorrhaging every time the lights go dark.
The U.S. Department of Energy puts the annual economic impact of power interruptions in the billions, but let’s talk about what matters to you: your household budget. Even a four-hour outage can cost hundreds in spoiled food alone, and that’s just the beginning. The USDA’s food safety guidelines are crystal clear about this—your refrigerator keeps food safe for exactly four hours without power, while your freezer manages forty-eight hours if you resist the urge to peek inside.
Do the math on your last grocery trip. A typical family loses $200-400 worth of groceries during a single extended outage, and that’s before you factor in hotel rooms, takeout meals, and lost work time. Hurricane Ida demonstrated this brutal reality when it knocked out power for over a million people in Louisiana, some for up to two weeks. Families without generators faced grocery losses, hotel bills exceeding $150 per night, and thousands in repair costs from damaged electronics when unstable power finally returned.
Your neighborhood might not see category 4 hurricanes, but blown transformers, rolling blackouts, and severe thunderstorms happen everywhere. Each one costs money you don’t have to spend.
Beyond the Fridge: The Hidden Electronics Threat
Here’s what nobody talks about when discussing power outages: the real damage often happens when the power comes back on, not when it goes off. Power surges during restoration can instantly fry your expensive electronics, and we’re talking about serious money here.
Your $2,000 home theater system, that smart home setup you spent months configuring, your high-end gaming computer—all vulnerable. The Electrical Safety Foundation International reports that power surge damage costs American homeowners over $1 billion annually, yet most people focus solely on the inconvenience of being without power rather than the financial devastation waiting on the other side.
Consider Sarah Chen, a freelance graphic designer in Austin who learned this lesson during the February 2021 Texas freeze. She didn’t just lose power for five days—she lost two computers, a professional monitor, and her router when electricity was restored with unstable voltage spikes. Total damage: $4,200. Her neighbor with a whole-home Generac system? Zero losses, because the generator provided clean, stable power throughout the crisis.
Your HVAC system faces similar risks that most homeowners never consider. A sudden surge can damage the control board, compressor, or other expensive components, with replacement costs easily running $3,000-8,000. When you’re already dealing with the stress and expense of an extended outage, the last thing you need is a repair bill that could’ve bought a quality generator system.
Your Home Office Can’t Afford Downtime
The remote work revolution changed everything about how we think about power outages. Your dining table isn’t just where you eat anymore—it’s your office, conference room, and primary income source. Every hour without power now equals lost income, and the math is sobering.
If you’re billing $50 per hour as a consultant and lose an eight-hour workday to a power outage, that’s $400 vanished into thin air. Experience two outages per year, and you’ve just lost $800—money that could’ve bought a quality portable generator with change left over. Marketing director James Rodriguez learned this lesson during a December ice storm in Oklahoma City when he lost power for 12 hours, missed a critical client presentation, and watched a $15,000 contract slip away. “I bought a generator the next week,” he says. “Should’ve done it years ago.”
The financial impact gets exponentially worse for business owners and freelancers who depend entirely on their home-based operations. Missed deadlines don’t just cost immediate income—they damage your reputation and future earning potential. Forbes research on remote work shows that 73% of remote workers have lost income due to power-related issues, yet most still haven’t invested in backup power solutions.
Consider the ripple effects beyond immediate lost wages. Client relationships suffer when you can’t meet commitments. Projects get delayed, pushing back payment schedules. Team members in other time zones continue working while you’re offline, potentially making decisions without your input. For entrepreneurs and consultants, reliability isn’t just convenient—it’s your brand. Harvard Business Review notes that maintaining consistent communication has become critical for remote work success.
The Hotel Alternative Nobody Wants
Extended outages force homeowners into an expensive corner: stay in a cold, dark house with no heat and risk serious property damage, or shell out hundreds for emergency lodging while your empty home potentially suffers thousands in repairs.
Winter outages present the most brutal financial double-whammy. Without heat, your pipes can freeze and burst—a repair nightmare that typically costs $2,000-10,000 and often requires temporary relocation anyway while contractors fix the damage. Many homeowners evacuate to hotels preemptively rather than gamble with their plumbing, but this creates its own expense spiral. This Old House estimates that frozen pipe damage affects over 250,000 families annually.
Summer outages aren’t much better financially. Extreme heat makes staying home dangerous, especially for children and elderly family members, forcing expensive relocations. During last year’s heat dome in the Pacific Northwest, hotels were booked solid and price-gouging as families fled powerless homes, with some paying $300+ per night for rooms that normally cost $89. The American Red Cross emergency shelter guidelines recommend evacuation when indoor temperatures exceed safe limits.
A three-day hotel stay for a family of four typically runs $300-600, depending on your area and the surge pricing that kicks in during emergencies. Add restaurant meals for every breakfast, lunch, and dinner—another $200-300 for the family—and you’re looking at $500-900 per outage. Rural families face even higher costs since the nearest hotel might be an hour’s drive away, adding gas, wear-and-tear, and time costs to an already expensive situation.
Compare that financial bloodletting to a generator keeping your heating, cooling, and essential systems running smoothly. You stay comfortable in your own home, cooking your own food, sleeping in your own bed, avoiding both the expense and logistical nightmare of emergency relocation.
Your Property Value Just Got a Boost
Smart buyers pay attention to resilience features when house hunting, and generators have become a significant selling point that can boost your property value by thousands. Realtor.com data on home features shows homes with standby generators sell 3-5% above comparable properties in storm-prone areas, representing real money back in your pocket when it’s time to move.
In Florida, North Carolina, and Texas—states where outages are common—generators have evolved from luxury items to standard expectations for higher-end homes. Real estate agent Monica Williams in Houston puts it bluntly: “I won’t even show a $400,000+ home without a generator to serious buyers anymore. It’s like trying to sell a house without air conditioning—you’re immediately at a disadvantage.”
The resale boost often recovers 60-80% of your initial generator investment, turning what might seem like a pure expense into a partially self-funding home improvement. Remodeling Magazine’s Cost vs. Value report consistently ranks backup power systems among improvements with strong ROI. Install a $12,000 whole-home system, and you might see $7,000-9,000 added to your home’s value when you sell. That’s not counting the years of protection and peace of mind you enjoyed while living there, making it one of the few home improvements that pays dividends both during ownership and at sale time.
Insurance Companies Are Paying Attention
Your insurance provider has a vested interest in avoiding expensive claims, which is why many now offer discounts for homes equipped with standby generators—typically 2-5% off your annual premium. While that might not sound like much, it adds up to real money over time and helps offset your generator purchase cost.
Here’s why insurers care about your backup power situation: generators prevent the most expensive claims they typically face. Frozen pipes cause $15 billion in damage annually according to the Insurance Information Institute, but keep your heating system running during winter outages and this disaster simply doesn’t happen. Similarly, basement flooding from failed sump pumps during storms costs thousands in remediation, but your generator keeps that crucial pump running when you need it most.
State Farm, Allstate, and several regional insurers offer specific “loss mitigation” discounts for generators, recognizing them as genuine risk reduction tools rather than just convenience items. Call your agent to ask about available discounts—you might already qualify for savings that help justify your purchase decision. Some insurers even provide rebates or financing assistance for generator installations, treating them as investments in claim prevention rather than optional upgrades.
Choosing Your Financial Protection
Not all generators offer the same financial benefits, and understanding your options helps ensure you get the best return on your investment. The key is matching your generator choice to your specific outage patterns, work situation, and budget constraints.
Portable generators in the $500-2,000 range work well for occasional, short outages typical in suburban areas with generally reliable grids. They’ll keep your refrigerator, a few lights, and basic electronics running, preventing food spoilage and maintaining minimal connectivity. Perfect if you lose power 1-2 times per year for less than 24 hours, but they require manual setup and fuel management during outages.
Standby generators priced at $8,000-15,000 installed make financial sense for frequent or extended outages. They start automatically within seconds, power your entire home including large appliances, and require zero action from you during outages. Essential if you work from home, live in storm-prone areas, or regularly face outages lasting days. The convenience factor alone justifies the higher cost for many families.
Whole-home battery systems like Tesla Powerwall, running $15,000-25,000, offer silent operation and renewable energy integration. Higher upfront investment, but potential additional savings through time-of-use rate management and solar coupling make them attractive for environmentally conscious homeowners in areas with favorable net metering policies.
Consider your outage history, work-from-home income potential, and risk tolerance. The Consumer Reports generator buying guide offers detailed comparisons and testing data, but don’t get paralyzed by analysis. Any backup power solution beats none when the lights go out and your wallet starts bleeding.
The Long Game Pays Off
Think of your generator as the only insurance policy you’ll actually enjoy using. Unlike homeowner’s insurance—which you hope never to need—your generator provides measurable value every single time it kicks on, protecting both your immediate comfort and long-term financial health.
Calculate your potential annual savings and the numbers become compelling quickly. Food spoilage prevention saves $200-800 annually for most families. Electronics protection could save you $500-5,000 by avoiding just one major surge event. Lost income prevention ranges from $400-2,000 depending on your work situation. Hotel avoidance saves $500-1,500 per extended outage. Insurance discounts add another $50-200 to your annual savings.
Even conservative estimates show $1,000+ in annual protection value for most homeowners. Over a generator’s typical 15-20 year lifespan, that represents $15,000-30,000 in avoided costs—often more than the total cost of purchasing and maintaining the system.
Rachel Torres, a Jacksonville accountant, tracks her generator savings with the same attention she gives client accounts. “We’ve had our Kohler system for six years,” she explains. “It’s activated during eight different outages, saving us roughly $1,200 per year in spoiled food, hotel costs, and lost billable hours. The system paid for itself completely in year four, and now it’s pure profit every time it runs.”
The financial protection extends beyond immediate savings to long-term wealth preservation. Your home maintains its value instead of suffering damage during outages. Your business relationships stay strong because you can always meet commitments. Your family avoids the stress and expense of emergency relocations. These intangible benefits have real dollar values that compound over time.
Your Next Power Outage is Coming
Weather patterns are intensifying across the country while aging infrastructure struggles under increasing demand. The next outage that’ll cost you money isn’t a question of if—it’s when, and whether you’ll be prepared or another casualty of poor planning.
You can wait until after the next expensive disaster, scrambling to find a generator when everyone else wants one too and supply chains are strained. Or you can get ahead of the problem now, when you have time to research options, compare prices, and find qualified installers without the pressure of an emergency situation driving up costs.
That backup power system isn’t just about keeping the lights on during the next storm. It’s about protecting your food investment, safeguarding your expensive electronics, maintaining your income stream, and keeping your family comfortable in your own home. It’s about turning what would be a costly emergency into a minor inconvenience that you barely notice.
The peace of mind that comes with knowing you’re prepared? That’s just the bonus. The real value sits in your wallet, safe from the financial devastation of the next time the power goes out.
Sources
DIY
Home Services
Weather & Maintenance
Table of Contents
- Choose Light, Cool Colors
- Go Monochrome
- Paint the Ceiling a Lighter Color
- Use Stripes to Stretch the Room
- Paint One Wall to Add Depth
- Match Wall and Curtain Colors
- Paint the Trim to Disappear—or Stand Out Strategically
- Use Gloss Wisely
- Extend Wall Color to Built-Ins
- Use Two-Tone Walls Strategically
- Small Room, Big Style
Paint Tricks That Make Small Rooms Feel Bigger: Color and Design Hacks for Airy, Open Spaces
Got a small room that feels cramped? The right paint choices can work magic—visually expanding your space without knocking down a single wall. Whether it’s a tiny bedroom, narrow hallway, or compact living room, these paint tricks can help you open things up and create a light, airy vibe.
Choose Light, Cool Colors
The quickest way to make a small room feel larger is to stick with light, cool-toned shades. These colors reflect more light and give the illusion of space.
Top Choices:
- Soft whites
- Pale grays
- Cool blues
- Light greens
- Soft taupe or beige
Dark or warm colors absorb light and tend to close a room in, while cool tones bounce it around, creating an open effect.
Go Monochrome
Using a single color—or colors from the same family—across your walls, trim, and even furniture can trick the eye into seeing a more expansive space.
| Element | Paint Strategy |
|---|---|
| Walls | Use light, neutral base color |
| Trim & molding | Match wall color or use slightly lighter tint |
| Furniture | Keep in same palette for a seamless look |
When there’s less contrast between surfaces, your eyes flow more easily around the room—making it feel less boxed in.
Paint the Ceiling a Lighter Color
Dark ceilings can make a room feel like it’s caving in. Lighten them up to lift the space visually.
- Use a soft white or a lighter version of your wall color
- If you’re bold, try a barely-there sky blue for an airy ceiling effect
- Avoid glossy paint unless you’re aiming for a dramatic, reflective finish
Lighter ceilings give the impression of added height, even if your actual ceilings are low.
Use Stripes to Stretch the Room
Stripes aren’t just for fashion—they’re one of the best ways to “reshape” a room with paint.
Vertical Stripes:
- Make ceilings feel higher
- Ideal for short or boxy rooms
Horizontal Stripes:
- Make walls feel longer
- Perfect for narrow hallways or small bedrooms
Keep stripes subtle—think tone-on-tone or soft contrast colors—for a sophisticated, space-enhancing look.
Paint One Wall to Add Depth
An accent wall can give a room depth when used thoughtfully. Instead of closing the room in, a darker feature wall can pull the eye outward.
- Choose the wall opposite the entry or behind a headboard or couch
- Opt for deeper shades like navy, charcoal, or forest green—but only on one wall
- Keep the other walls light and neutral to maintain balance
This trick adds interest without overwhelming the room.
Match Wall and Curtain Colors
When curtains match the walls, they blend in instead of standing out—and that visual trick keeps the room from feeling chopped up.
- Paint walls and install curtains in similar shades (or even identical ones)
- Use floor-length curtains to draw the eye upward
- Choose lightweight fabrics that allow light to filter through
This creates a smooth, continuous flow that helps the space feel cohesive and larger.
Paint the Trim to Disappear—or Stand Out Strategically
If you want walls to stretch from floor to ceiling with no breaks, paint the trim the same color as the walls. It makes everything blend together seamlessly.
Alternatively, if you’re working with high ceilings or wide door frames, crisp white trim can highlight the architecture and add definition—just be sure the contrast doesn’t break up the space too much.
| Trim Approach | Effect on Room |
|---|---|
| Same as wall color | Unified, expansive feel |
| Lighter than wall | Fresh, airy contrast |
| Darker than wall | Adds drama, can reduce openness |
Choose based on what you want the eye to notice—or ignore.
Use Gloss Wisely
Different paint sheens reflect light differently. In small rooms, this matters more than you think.
- Flat or matte: Great for hiding flaws but absorbs light
- Eggshell or satin: Light reflection with a soft finish—ideal for most small spaces
- Semi-gloss or gloss: Reflective but can highlight imperfections
Stick to satin or eggshell for walls. Use semi-gloss for trim or furniture if you want a slight pop.
Extend Wall Color to Built-Ins
If your small room has built-in shelves or cabinets, painting them the same color as the wall helps them recede visually—rather than stand out and dominate the space.
- Makes the room feel less cluttered
- Creates a smooth, continuous backdrop
- Keeps focus on what’s on the shelves instead of the furniture itself
This is especially useful in home offices or living rooms with wall-to-wall storage.
Use Two-Tone Walls Strategically
In some cases, painting the bottom third of a wall a slightly darker color can make the ceiling feel higher. This technique works well in dining areas, hallways, and entryways.
How to Try It:
- Use chair rail or painter’s tape to divide the wall horizontally
- Choose a soft contrast (light taupe + white, pale gray + cream)
- Paint the upper portion lighter to draw the eye upward
It’s a modern spin on wainscoting and adds dimension without bulky molding or added furniture.
Small Room, Big Style
Paint might be the most budget-friendly way to make a small room feel bigger—and better. With the right colors and techniques, you can transform even the tiniest corner into a light, open, and inviting space.
Try one or two of these tricks in your next mini-makeover. The results will speak for themselves—no sledgehammer required.
DIY
Home Services
Weather & Maintenance
Table of Contents
How to Maximize Natural Light at Home: Budget Tips to Brighten Your Space and Save Energy
Natural light doesn’t just make your home look better—it can also lower your energy bills and lift your mood. With a few simple layout changes and decor tricks, you can brighten up your space without flipping a switch.
Find out how to make the most of the sunlight you already have for a brighter, more energy-efficient home.
Keep Windows Clear and Clean
Letting in more light starts with making sure your windows aren’t blocking it.
- Clean Regularly: Dust, dirt, and smudges can dim the light that comes through. A quick wipe-down inside and out makes a big difference.
- Avoid Heavy Window Treatments: Use light-filtering or sheer curtains instead of thick drapes to let sunshine in while maintaining privacy.
- Skip the Clutter: Don’t place furniture or large objects directly in front of windows—they block valuable daylight.
Clean, open windows are the easiest way to increase natural light for free.
Use Mirrors to Reflect Light
Mirrors are a budget-friendly way to multiply the sunlight already in your space.
- Place Opposite Windows: A mirror across from a window reflects light around the room and makes the space feel bigger.
- Use Mirrored Decor: Shiny picture frames, glass furniture, or metallic accessories can help bounce light around.
- Hang in Hallways or Small Rooms: Mirrors brighten tight areas that might not get much natural light.
It’s a simple trick with a powerful effect—no rewiring or remodeling needed.
Choose Light Colors for Walls and Decor
The colors in your home play a big role in how light behaves.
- Go Light and Bright: White, off-white, or light gray walls reflect more sunlight than darker shades.
- Use Glossy or Satin Finishes: Paint with a bit of shine helps bounce light around the room.
- Limit Dark Furniture: Stick to lighter tones for big pieces, or add bright pillows and throws to lighten the look.
This swap doesn’t have to be expensive—sometimes just repainting one wall can make a room feel entirely new.
Rearrange Furniture for Better Flow
Sometimes, your furniture layout is the reason a room feels dark or closed off.
- Avoid Blocking Windows: Shift furniture away from light sources to let daylight fill the space.
- Open Up the Layout: Create pathways that allow light to flow naturally through the room.
- Lower Furniture Helps: Use low-profile sofas and tables to keep sightlines open and light unobstructed.
Rearranging costs nothing but can dramatically change how light moves through your home.
Use Glass and Reflective Surfaces
Let light travel further by choosing materials that help carry it.
- Glass Doors or Panels: Use clear or frosted glass on interior doors to share light between rooms.
- Shiny Decor: Chrome, glass, and glossy finishes on accessories or furniture reflect light like a mirror.
- Glossy Tiles or Backsplashes: Especially in kitchens or bathrooms, shiny surfaces brighten spaces with limited windows.
These small material choices can maximize natural light in even the darkest corners.
Maximize Daylight Hours
Use the sun’s natural rhythm to your advantage.
- Open Curtains Early: Let in as much daylight as possible during the morning and afternoon.
- Track the Sun’s Path: Move your work-from-home or reading area to wherever the sun hits during the day.
- Set Up “Sun Zones”: Arrange furniture where light naturally falls, creating warm, inviting spots for relaxing or working.
Getting more sunlight during the day also helps regulate sleep and boosts your overall mood.
Save Energy With Smarter Lighting Habits
Using natural light means less electricity—especially during daytime hours.
- Turn Off Lights During the Day: Make it a habit to rely on daylight when it’s available.
- Use Task Lighting: Instead of overhead lights, use small lamps in areas that need extra light without overpowering natural light.
- Choose Light-Sensing Bulbs: Some LED lights adjust brightness based on room lighting to use less power.
These small shifts reduce your electric bill while making your home feel more balanced and bright.
Final Thoughts
Making the most of natural light is one of the easiest and most affordable ways to boost your home’s atmosphere and save on energy. With a few layout tweaks, lighter decor choices, and smart furniture placement, you can enjoy a brighter, more inviting space every day.
Try these practical tips to harness the sun’s power and turn your home into a light-filled haven.
DIY
Home Services
Weather & Maintenance
Table of Contents
- What Is Residential Solar Power?
- How Much Do Solar Panels Cost?
- Federal and State Incentives Can Help
- How Much Can You Save with Solar?
- Factors That Affect Solar Panel Efficiency
- Pros of Installing Solar Panels at Home
- What Are the Downsides?
- Should You Lease or Buy?
- Real-Life Success Story
- The Bottom Line: Is Solar Worth It?
Homeowners Are Slashing Their Power Bills with Solar—Should You?
Thinking about going solar? You’re not alone. More homeowners than ever are asking whether installing solar panels is really worth the cost. The truth? It depends. But don’t worry—we’ll break it down so you can decide if solar energy is the right move for your home and wallet.
What Is Residential Solar Power?
Residential solar power uses photovoltaic (PV) panels to convert sunlight into electricity you can use in your home. These panels are typically installed on your roof or on ground-mounted systems in your yard. The goal is to generate enough electricity to lower (or even eliminate) your electric bill, reduce your reliance on the grid, and shrink your carbon footprint in the process.
How Much Do Solar Panels Cost?
Let’s talk numbers—because this is usually the biggest question.
The average cost for a solar panel system in the U.S. is around $16,000 to $20,000 before tax credits or incentives. That’s for a standard 5 to 6 kilowatt system, which is typically enough to power a medium-sized household.
Cost Breakdown Example (5 kW System)
| Expense | Estimated Cost |
|---|---|
| Equipment & Installation | $16,000 |
| Federal Tax Credit (30%) | -$4,800 |
| Total After Incentives | $11,200 |
That’s a big chunk of change upfront, but the key is in the long-term savings. Depending on where you live and how much you currently pay for electricity, you could recoup that investment within 6 to 10 years.
Federal and State Incentives Can Help
The federal solar tax credit (known as the Investment Tax Credit or ITC) allows you to deduct 30% of the cost of your solar panel installation from your federal taxes. This incentive is set to remain at 30% through 2032, which is great news if you’re considering going solar soon.
In addition to the federal tax credit, many states offer rebates, property tax exemptions, and solar renewable energy credits (SRECs) that can shave thousands off your total cost.
How Much Can You Save with Solar?
This is where things get exciting. On average, homeowners save $20,000 to $30,000 over 20 years by switching to solar. In areas with high electricity rates (like California or New York), those savings can be even higher.
Here’s a look at potential 20-year savings by state:
| State | Estimated 20-Year Savings |
|---|---|
| California | $40,000 |
| New York | $35,000 |
| Texas | $25,000 |
| Florida | $23,000 |
| Illinois | $21,000 |
These numbers vary depending on energy usage, electricity rates, and system size, but the trend is clear: the long-term savings can be substantial.
Factors That Affect Solar Panel Efficiency
Solar isn’t a one-size-fits-all solution. Here are a few things that affect how well a solar system will work for your home:
- Sunlight Exposure: Homes in sunny areas like Arizona or Nevada get more bang for their buck.
- Roof Orientation & Shade: South-facing roofs without shading from trees or buildings are ideal.
- Roof Condition: Old or damaged roofs may need repairs before installation.
- Local Electricity Rates: Higher utility costs mean higher potential savings.
- Net Metering Policies: This lets you earn credits for excess energy sent back to the grid.
Pros of Installing Solar Panels at Home
Still on the fence? Here’s what you stand to gain by going solar:
Lower Monthly Energy Bills
One of the biggest perks. Once your system is up and running, your electric bill can shrink dramatically—sometimes down to zero.
Energy Independence
Generating your own electricity means you’re less affected by power outages or rising energy prices.
Increased Home Value
Studies show that homes with solar panels sell faster and for more money than homes without them.
Environmental Impact
Solar power is clean and renewable. You’ll be reducing your carbon footprint and contributing to a more sustainable future.
What Are the Downsides?
No solution is perfect. Here’s what to watch out for:
High Upfront Cost
Even with tax incentives, the initial investment can be a hurdle for some homeowners. Financing options like solar loans or leases can help, but they come with their own pros and cons.
Not Every Roof Is Solar-Friendly
If your roof is heavily shaded, oddly shaped, or in bad condition, solar might not be feasible without extra costs.
Maintenance & Repairs
Solar panels are low-maintenance, but inverters or batteries may need occasional repairs. Most systems come with 20-25 year warranties, though.
Battery Storage is Pricey
If you want to store energy for use at night or during outages, you’ll need a battery system—which can add $10,000 or more to the total cost.
Should You Lease or Buy?
When going solar, you have two main options: buying or leasing.
Buying (Cash or Loan)
- Higher upfront cost
- You own the system and qualify for tax credits
- Bigger long-term savings
Leasing
- Low or no upfront cost
- Third-party owns the system
- You pay a monthly fee and may save less over time
Here’s a quick comparison:
| Option | Upfront Cost | Ownership | Tax Incentives | Savings Potential |
|---|---|---|---|---|
| Buy (Cash) | High | Yes | Yes | High |
| Buy (Loan) | Medium | Yes | Yes | Moderate to High |
| Lease | Low | No | No | Low to Moderate |
Real-Life Success Story
Let’s talk about Lucy and Greg, a couple from Austin, TX. They installed a 6 kW solar panel system on their home in 2020 for around $17,000. After the 30% federal tax credit, their out-of-pocket cost was closer to $12,000. Since then, they’ve saved an average of $1,500 a year on electricity bills. In just 8 years, their system will have paid for itself—and then some.
They also reported their home value increased by $15,000 when they got it appraised for refinancing. Win-win.
The Bottom Line: Is Solar Worth It?
If you’ve got a sunny roof, plan to stay in your home for several years, and can afford the upfront investment (or financing), solar can absolutely be worth it. The savings, energy independence, and environmental impact make it a smart long-term play for many homeowners.
But if your roof isn’t ideal or you don’t use much electricity, it might not be the right fit. Use online solar calculators or consult with local installers to see how the math works out for your specific situation.
Sources
- U.S. Department of Energy – Office of Energy Efficiency & Renewable Energy
- EnergySage – Solar Panel Cost Guide
- SolarReviews – State-by-State Solar Incentives
- National Renewable Energy Laboratory (NREL)
- North American Board of Certified Energy Practitioners (NABCEP)
- DSIRE – Database of State Incentives for Renewables & Efficiency
- Consumer Affairs – Solar Energy Pros & Cons
- Forbes Home – Solar Panel Installation Costs
DIY
Home Services
Weather & Maintenance
Table of Contents
- Online Home Value Estimators: Are They Accurate?
- How to Improve the Accuracy of Online Estimates
- Real Estate Agent Comparative Market Analysis (CMA)
- Professional Appraisals
- County Assessor's Value vs. Market Value
- Factors That Can Skew Home Estimates
- Which Method Should You Trust?
- Know Your Home's Worth with Confidence
How to Get a Spot-On Home Estimate (Without Overpaying or Underselling)
Wondering how much your home is really worth? Getting an accurate home estimate doesn’t have to cost a fortune or involve complicated appraisals. With the right mix of tools and tips, you can uncover your home’s true value and make smarter financial moves.
First, let’s break down what actually affects how much your home is worth. It’s not just about square footage or the number of bathrooms—although those do matter. Home value is based on a mix of tangible and intangible factors, including:
- Location: Proximity to schools, shopping, public transportation, and crime rates
- Comparable Sales (Comps): How much similar homes nearby have recently sold for
- Size and Layout: Total square footage and how that space is used
- Condition: Age of the home, recent renovations, and general upkeep
- Market Trends: Supply and demand in your local real estate market
- Curb Appeal: The aesthetic quality of your home and landscaping
When you understand these variables, it becomes a lot easier to see why home estimates can vary so widely.
Online Home Value Estimators: Are They Accurate?
Let’s talk about those tempting “What’s Your Home Worth?” widgets you see all over the internet. Online estimators use algorithms that pull public data like tax assessments, property records, and recent sales to come up with a ballpark number.
Here are some of the most popular home value tools:
Zillow Zestimate
Zillow’s Zestimate is probably the most well-known tool, with estimates for over 100 million U.S. homes. It uses a proprietary algorithm that considers public data, MLS records, and user-submitted info. Zillow claims the median error rate for on-market homes is around 2.4%, but for off-market homes, that number jumps to about 7.5%.
Redfin Estimate
Redfin’s estimate tool uses a similar automated valuation model (AVM), but it’s updated daily and pulls directly from MLS data where Redfin operates. Redfin says their estimates for homes listed on the platform are within 2.23% of the eventual sale price half the time.
Realtor.com My Home
This tool combines public data with insights from CoreLogic, a major real estate data provider. Realtor.com also allows homeowners to claim their home and update info to improve accuracy.
Chase Home Value Estimator
This tool is built for customers looking into refinancing, and it gives a general estimate based on public data. It’s a good starting point if you’re exploring loan options.
Eppraisal and HomeLight
These tools provide a range of home values based on different sources. They’re often used by sellers who want a quick overview before reaching out to an agent.
While these tools are convenient, keep in mind they don’t account for unique upgrades, recent renovations, or even the overall vibe of your neighborhood. Think of them as educated guesses rather than gospel.
How to Improve the Accuracy of Online Estimates
To get the most accurate number from an online estimator, you’ll want to:
- Claim your home on platforms like Zillow or Realtor.com and update details
- Add information about recent upgrades (like a new roof or kitchen renovation)
- Check multiple sources to compare estimates and look for common ground
- Be realistic—automated tools can’t walk through your home or see its true condition
If you’re seeing wildly different numbers across tools, it’s a sign that you need a more hands-on evaluation.
Real Estate Agent Comparative Market Analysis (CMA)
One of the most trusted ways to get a reliable estimate is by working with a local real estate agent. Most agents offer a Comparative Market Analysis (CMA) for free if you’re thinking about selling. A CMA evaluates similar homes that have recently sold in your area—often using insights that aren’t visible in public data.
Because agents know the nuances of your neighborhood, they can factor in local buyer behavior, upcoming developments, and hyper-local trends. Plus, they actually visit your home, so they can see upgrades and condition with their own eyes.
Professional Appraisals
If you’re refinancing or applying for a home equity loan, your lender will require an official home appraisal. This is a paid service (usually $300–$600) conducted by a licensed professional who evaluates your home based on:
- A physical walkthrough
- Comparable recent sales
- Market trends
- Structural condition
- Any renovations or additions
Appraisals are considered the gold standard for home value because they’re regulated, objective, and accepted by lenders and banks. However, they’re not always useful if you’re just curious about your home’s worth.
County Assessor’s Value vs. Market Value
It’s important to understand the difference between assessed value and market value. Your local tax assessor calculates your home’s assessed value to determine property taxes. This number is usually lower than your home’s market value and isn’t updated as frequently.
Don’t rely solely on the tax-assessed value when trying to estimate what your home could sell for—it’s just not designed for that purpose.
Factors That Can Skew Home Estimates
Some common reasons home value estimates might be off include:
- Outdated renovations or incorrect square footage in public records
- Inconsistent neighborhood comps (e.g. comparing a two-story home to a ranch)
- Rapidly changing markets (especially post-pandemic, values have shifted fast)
- Unique features that AVMs don’t know how to price (like solar panels, home offices, or detached studios)
Which Method Should You Trust?
Here’s a quick breakdown comparing the most popular methods:
| Method | Cost | Accuracy | Best For |
|---|---|---|---|
| Online Estimators | Free | Moderate | Quick check, starting point |
| CMA by Agent | Usually Free | High | Selling or buying |
| Professional Appraisal | $300–$600 | Very High | Refinancing, legal/financial decisions |
| Tax Assessor’s Value | Free | Low to Medium | Property tax purposes only |
If you’re selling soon or making big financial moves, go beyond the free tools. Combining an online estimate with a CMA or appraisal gives you the full picture.
Know Your Home’s Worth with Confidence
Getting an accurate estimate of your home’s value isn’t about finding the perfect number—it’s about understanding the range. The more sources you check and the more accurate your data, the better equipped you’ll be to make smart decisions about your home.
Whether you’re testing the market, planning to refinance, or just curious about your equity, using a combination of online tools and expert input will give you the clearest view of what your home is really worth.
Sources & Tools Referenced
DIY
Home Services
Weather & Maintenance
Table of Contents
Easy Spring to Summer Decor Swaps Using What You Already Own
When the seasons change, it’s natural to want your home to reflect the warmer weather and brighter days. But you don’t need to spend money on brand-new decorations to make your space feel fresh and ready for summer. By reusing items you already have and making a few simple swaps, you can update your home’s look in a way that’s easy on your wallet. Learn how to transition your decor from spring to summer without spending a fortune.
Lighten Up Your Color Scheme
Spring is all about pastels and soft tones, while summer calls for brighter, bolder shades.
What to Do:
- Swap out light pinks and purples for sunny yellows, crisp whites, and ocean blues.
- Look through your linens, throw pillows, and accessories for items in brighter colors and bring them to the front.
- If you’ve used floral prints for spring, try switching to stripes, tropical patterns, or solids for a clean summer feel.
Budget Tip: Use pillow covers instead of buying new pillows. You can even make simple covers from old shirts, sheets, or fabric remnants.
Refresh Your Textiles
Changing out fabrics is one of the fastest ways to give a room a new vibe.
How to Do It:
- Swap out heavy blankets for lightweight throws or no blankets at all.
- Change curtains from thick, insulated panels to breezy, sheer options.
- Replace tablecloths or runners with lighter, brighter alternatives.
Look Around the House: Use scarves, beach towels, or even clean bedsheets to replace heavier fabrics.
Rearrange Decor Pieces
You can breathe new life into your home just by moving things around.
Try This:
- Move spring decor from the entryway to the kitchen, or vice versa.
- Use baskets for organizing summer accessories like sunglasses or sunscreen.
- Replace spring-themed centerpieces with bowls of fresh fruit, seashells, or candles.
Bonus: Rearranging is free, and you might find new favorite spots for items you already love.
Incorporate Nature
Bringing the outdoors in is perfect for summer decorating.
Use What’s Around You:
- Display fresh-cut flowers, greenery, or even branches in jars or bottles.
- Collect shells, rocks, or driftwood from your local beach or park.
- Place potted herbs on your windowsill for a mix of decor and function.
Tip: You don’t need fancy vases—recycled jars, cups, and tins work just as well.
Simplify and Declutter
Summer decor is often lighter and more minimal.
What to Clear:
- Put away heavier spring decor like ceramic bunnies, nests, or layered vignettes.
- Remove some small items to let your space breathe and feel more open.
Storage Tip: Keep a labeled bin or box to store spring items so they’re ready to use again next year.
Refresh with Scent and Light
Appeal to all your senses with seasonal swaps in fragrance and lighting.
Fragrance:
- Use citrus or coconut candles, reed diffusers, or essential oils to bring summer scents inside.
- Open windows more often to let in fresh air.
Lighting:
- Replace warm-toned bulbs with soft white or daylight bulbs.
- Use string lights, lanterns, or battery-operated candles to create a relaxed, summer glow.
Use Everyday Items in New Ways
Sometimes the best decor is already sitting on your shelf.
Get Creative:
- Use a beach hat or tote as wall decor.
- Fill a pitcher with flowers for a unique centerpiece.
- Repurpose a basket as a planter or storage bin.
You’d be surprised how everyday items can take on a whole new life when placed in the right spot.
Final Insights
You don’t need to buy new decor each season to keep your home feeling fresh and festive. With just a few swaps, some creativity, and a little repurposing, you can transition your home from spring to summer without spending much at all. Look around, rearrange, and reuse—you’ve got more decorating power than you think right in your own home.
DIY
Home Services
Weather & Maintenance
Table of Contents
Save Big with New Windows: How This Simple Upgrade Can Cut Energy Bills Fast
Swapping out old windows might not sound like the most exciting home improvement project, but it’s one of the smartest ways to cut down on energy bills. Drafty frames and outdated glass could be leaking your hard-earned dollars—literally—right out the window.
Let’s dig into how installing new windows can actually save you money, increase comfort, and boost your home’s value.
How Old Windows Drain Your Wallet
Your windows are a major line of defense against outdoor weather, but older models weren’t built to the same efficiency standards we have today. Most pre-2000 homes have single-pane windows or basic double-pane units that allow heat to pass through easily.
When windows aren’t properly insulated or sealed, your heating and cooling systems have to work harder to keep the indoor temperature comfortable. This leads to:
- Higher energy bills
- Overworked HVAC systems
- Cold drafts and hot spots in your home
According to the U.S. Department of Energy, heat gain and loss through windows are responsible for 25%–30% of residential heating and cooling energy use.
The Benefits of Energy-Efficient Replacement Windows
Upgrading to modern, energy-efficient windows can lead to big savings—financially and environmentally. Here’s what you get when you make the switch:
Lower Monthly Energy Bills
Energy Star–rated windows can save homeowners up to 12% on annual energy bills. In colder climates, that number can be even higher when replacing single-pane windows with double- or triple-pane options.
Improved Comfort Year-Round
Modern windows use advanced technologies like low-emissivity (Low-E) coatings, gas fills (like argon or krypton), and insulated frames to block heat in the summer and keep it in during the winter. That means fewer drafts, more stable indoor temps, and a more comfortable living space.
Increased Home Value
Energy efficiency is a top priority for today’s buyers. According to Remodeling Magazine’s Cost vs. Value Report, homeowners can recoup around 60%–70% of the cost of new windows at resale.
Noise Reduction
Energy-efficient windows also cut down on outside noise, especially if you upgrade to triple-pane models. This makes a huge difference if you live near traffic, schools, or noisy neighbors.
Comparing Window Options
When shopping for new windows, it’s not one-size-fits-all. Here’s a breakdown of common types and how they perform:
| Window Type | Energy Efficiency | Cost (Per Window) | Best For | Noise Reduction |
|---|---|---|---|---|
| Single-Pane | Poor | $100–$300 | Sheds, garages | Low |
| Double-Pane | Moderate to Good | $300–$600 | Most homes | Moderate |
| Triple-Pane | Excellent | $500–$1,000+ | Cold climates, noise areas | High |
| Low-E Coating | High | Add-on cost | All climates | Moderate |
| Gas-Filled (Argon) | High | Included in premium | Energy savings, insulation | High |
*Prices vary based on region and installation costs.
The Payback Period: How Long Until You Break Even?
The up-front cost of new windows can seem steep, but they pay for themselves over time. The exact break-even point depends on your local climate, energy prices, and the condition of your existing windows.
On average:
- Basic upgrades (like double-pane vinyl windows) may break even in 7–10 years.
- Premium models with triple-pane glass and Low-E coatings could take 10–15 years.
But if your current windows are particularly leaky or damaged, the payback time can be even shorter.
Rebates and Incentives: Don’t Miss Free Money
Many utility companies and state governments offer rebates or tax credits for upgrading to energy-efficient windows. Check the Database of State Incentives for Renewables & Efficiency (DSIRE) to see what’s available in your area.
As of 2025, U.S. homeowners may qualify for:
- Up to $600 in federal tax credits for Energy Star–certified windows
- Local rebates from utility providers worth $50–$200 per window
These incentives help reduce the cost barrier and speed up your return on investment.
Do You Really Need New Windows?
Here’s a quick checklist to help you decide:
- Do you feel drafts near your windows?
- Are your energy bills climbing year after year?
- Do you notice condensation between window panes?
- Are your window frames warped, rotting, or hard to open?
- Is outside noise becoming a problem?
If you answered “yes” to even a couple of these, it might be time to consider a window replacement.
Alternatives to Full Replacement
Not quite ready for a full window upgrade? There are smaller steps you can take in the meantime:
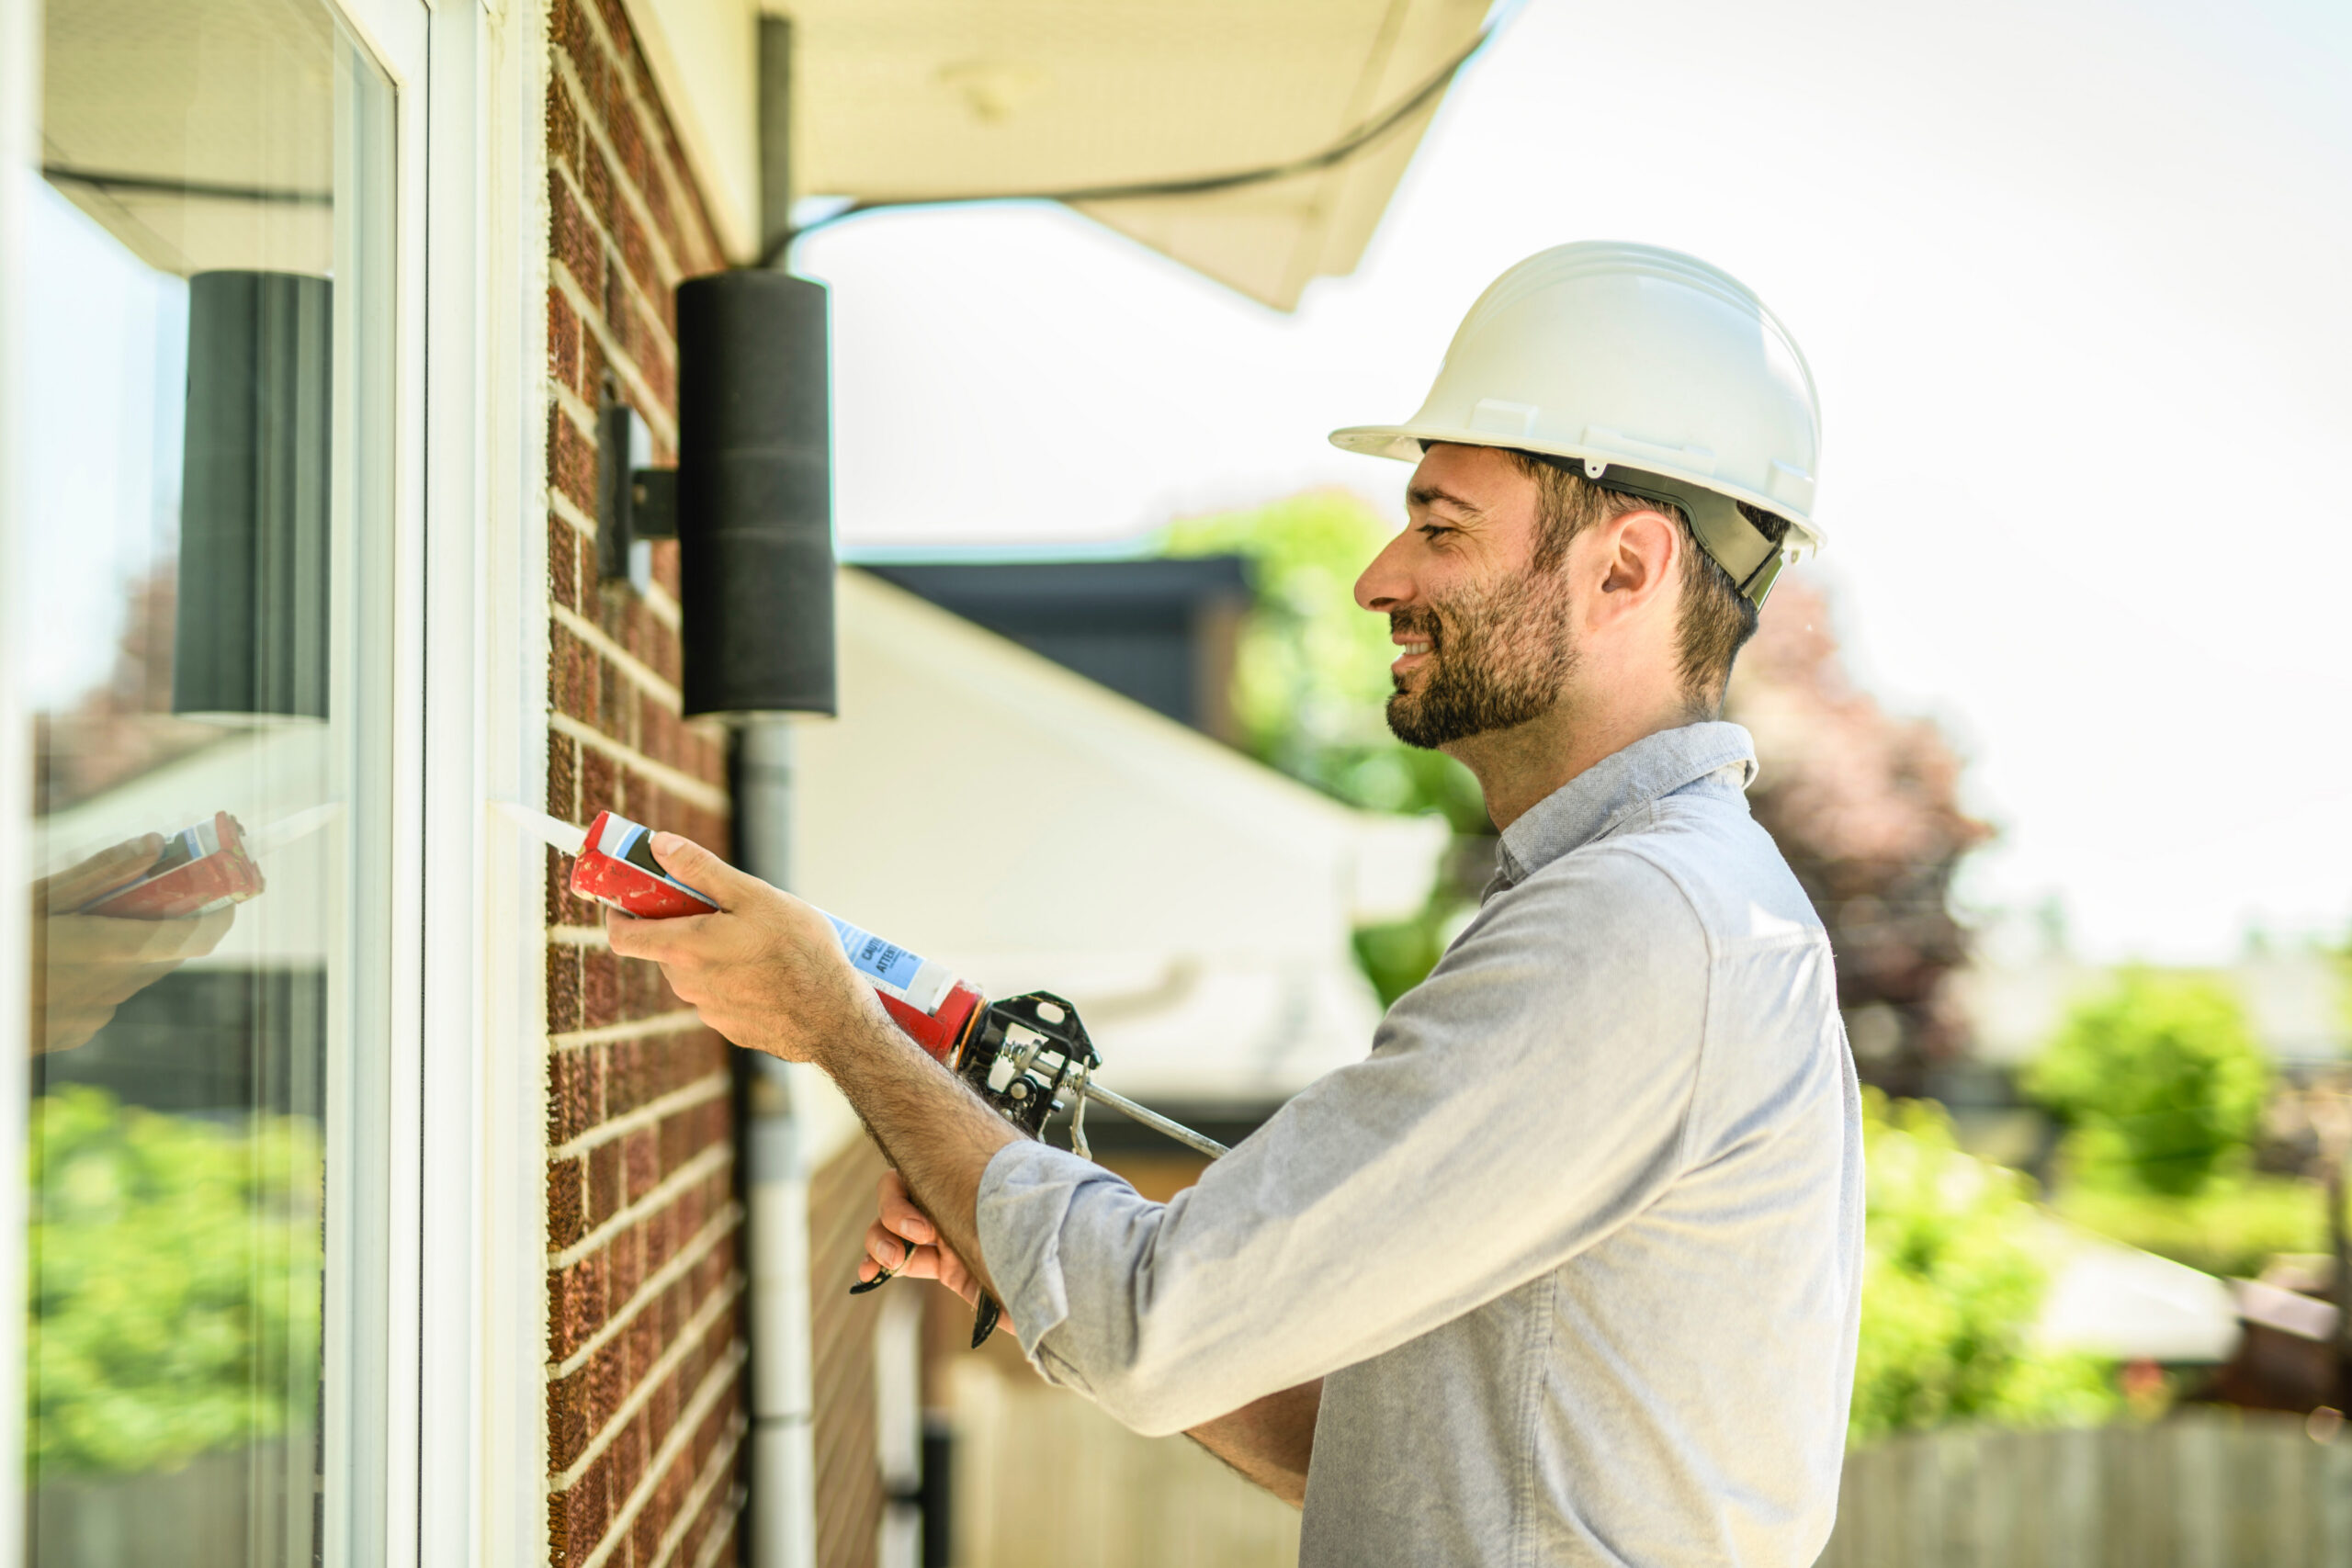
- Add weather stripping or caulk to seal leaks
- Use thermal curtains to block drafts
- Install window film for extra insulation
- Consider storm windows for added protection
These options won’t offer the same long-term savings as new windows, but they can provide temporary relief while you plan your investment.
Making the Clear Choice
Upgrading your windows might not be as glamorous as a kitchen remodel, but it’s a decision that pays off—both in dollars and day-to-day comfort. With rising energy costs, choosing efficient windows is one of the best home improvements you can make. They’re not just glass—they’re your home’s front line in the fight against waste.
Helpful Sources and Links
- Update or Replace Windows – U.S. Department of Energy
- Residential Windows, Doors & Skylights – ENERGY STAR
- Windows & Skylights Federal Tax Credit – ENERGY STAR
- DSIRE – Database of State Incentives for Renewables & Efficiency
- Idaho Power Rebates and Offers
- 2023 Cost vs. Value Report – JLC Online
- 2024 Cost vs. Value Report – Zonda
DIY
Home Services
Weather & Maintenance
Table of Contents
- Why Gutters Matter More Than You Think
- Gutter Materials: What Are Your Options?
- Gutter Styles: Function Meets Curb Appeal
- Seamless vs. Sectional Gutters
- Gutter Guards: Worth the Investment?
- Downspouts and Drainage: Don’t Forget the Final Step
- Professional Installation vs. DIY
- How Much Do New Gutters Cost?
- Staying Ahead of Gutter Leaks
- Keeping Your Foundation Strong
New Gutters Could Save Your Foundation—and Your Wallet
When it rains, it pours—and if your gutters aren’t up to the task, your home could be at risk. Leaky, clogged, or outdated gutters can cause foundation problems, basement flooding, and even mold growth. But with the right gutter system, you can steer clear of expensive repairs and protect your home from top to bottom.
Here’s how to tackle gutter leaks by choosing the right system for your home.
Why Gutters Matter More Than You Think
Gutters may not be glamorous, but they’re one of your home’s most essential defense systems. Their job? Channeling rainwater safely away from your foundation. When they fail, water can seep into your walls, erode landscaping, and crack your foundation over time.
Common signs your gutters might be failing include:
- Pools of water around your foundation
- Peeling paint or mildew near the roofline
- Sagging or detached gutters
- Water stains on siding
- Flooded basements or crawlspaces
These issues may seem small at first, but left unchecked, they can lead to thousands of dollars in damage.
Gutter Materials: What Are Your Options?
The first step to fixing gutter leaks is choosing the right material. Each type has its pros and cons in terms of cost, durability, and appearance.
| Material | Cost per Linear Foot | Durability | Appearance | Maintenance Needs |
|---|---|---|---|---|
| Vinyl | $3–$6 | Low (brittle in cold) | Basic look | Easy to install, prone to cracks |
| Aluminum | $5–$9 | Moderate | Paintable, clean lines | Lightweight, prone to denting |
| Steel | $9–$15 | High | Strong, industrial | Can rust without coating |
| Copper | $15–$30+ | Very high | Elegant, patinas over time | Low, but costly |
| Zinc | $15–$25 | High | Matte gray, high-end | Low, long-lasting |
Aluminum is the most popular due to its balance of price and performance, but if you’re going for long-term durability and aesthetics, copper or zinc could be worth the splurge.
Gutter Styles: Function Meets Curb Appeal
Next up is choosing a gutter style. The shape of your gutters affects how much water they can handle and how they look on your home.
K-Style Gutters
- Shape: Resembles crown molding
- Capacity: Good for heavy rainfall
- Best for: Traditional and modern homes
- Pros: Affordable, blends well with architecture
Half-Round Gutters
- Shape: Semi-circular trough
- Capacity: Slightly less than K-style
- Best for: Historic or European-style homes
- Pros: Less likely to clog, smoother flow
Box Gutters
- Shape: Square and deep
- Capacity: High capacity for large roofs
- Best for: Commercial buildings or modern homes
- Pros: Great for flat roofs, hidden options available
Seamless vs. Sectional Gutters
One of the biggest decisions homeowners face is choosing between seamless and sectional gutters.
Seamless Gutters
- Made from a single piece of metal
- Custom-cut to fit your home
- Fewer joints = fewer leaks
- Typically installed by professionals
Sectional Gutters
- Come in pre-cut lengths
- Assembled on-site
- More affordable and DIY-friendly
- More joints = more leak potential
If you’re battling gutter leaks already, seamless gutters are often the better choice to prevent future problems.
Gutter Guards: Worth the Investment?
Tired of cleaning leaves and gunk from your gutters? Gutter guards can help keep debris out, reducing the risk of clogs and overflow.
Types of gutter guards include:
- Mesh screens – fine holes block debris but let water in
- Reverse curve – water flows in while leaves slide off
- Brush inserts – cylindrical brushes that catch debris
- Foam inserts – fit directly inside gutters to block solids
While not foolproof, quality gutter guards can cut down on maintenance and extend the life of your system.
Downspouts and Drainage: Don’t Forget the Final Step
Even the best gutters can’t protect your home without proper drainage. Make sure your downspouts:
- Extend at least 4–6 feet from your foundation
- Direct water away from your home’s perimeter
- Are kept clear of blockages and debris
You can also consider adding splash blocks, gutter extenders, or even underground drainage pipes for extra protection.
Professional Installation vs. DIY
Installing gutters might seem like a good DIY project, but improper pitch, poor sealing, and bad ladder work can turn into costly mistakes. Hire a pro if:
- Your roofline is complex
- You’re installing seamless or copper gutters
- You’re not comfortable working at heights
DIY is doable with sectional vinyl or aluminum gutters, but double-check slope and alignment to ensure proper drainage.
How Much Do New Gutters Cost?
The price of a new gutter system depends on material, style, home size, and labor costs. Here’s a rough breakdown:
| Gutter Type | Average Cost (Installed) |
|---|---|
| Vinyl (Sectional) | $600–$1,200 |
| Aluminum (Seamless) | $1,200–$2,500 |
| Steel | $2,000–$3,500 |
| Copper | $4,000–$9,000+ |
Most homes fall somewhere in the $1,000–$3,000 range.
Staying Ahead of Gutter Leaks
Preventive maintenance is the best way to avoid surprise leaks:
- Clean gutters at least twice a year (more if you have trees nearby)
- Check for sagging, rust, and loose fasteners
- Ensure downspouts are clear and draining properly
- Re-seal or replace joints as needed
A small investment in maintenance can save you from much bigger issues down the line.
Keeping Your Foundation Strong
Gutter leaks might seem like a minor annoyance, but they can lead to major problems if ignored. By choosing the right gutter system and keeping it in shape, you’re not just protecting your roof—you’re defending your entire home from the ground up. A leak-free gutter is more than peace of mind—it’s protection for your most valuable investment.