Author: Michelle Gannon
Table of Contents
How to Start Composting at Home with Almost No Supplies: Beginner-Friendly Tips for Low-Cost Composting
Composting doesn’t have to be complicated—or expensive. If you want to reduce food waste, enrich your soil, and do your part for the environment, you can start composting right at home with very little setup. No fancy bins, no garden tools, no problem.
Why Compost?
When you toss food scraps in the trash, they end up in landfills where they can’t break down properly. Composting turns those scraps into rich, nutritious soil that helps plants thrive.
Benefits include:
- Less household waste
- Lower trash bills (if you pay by the bag)
- Better soil for gardens or potted plants
- Reduced need for chemical fertilizers
And best of all, you can get started with what you already have at home.
What You Actually Need to Begin
Forget the fancy tumblers or three-bin systems. Here’s the bare minimum you need to start composting:
| Must-Have Item | Budget Option |
|---|---|
| A container | Old bucket, plastic bin, storage tub |
| A place to dump or store scraps | Backyard corner, bucket with lid |
| Kitchen scraps | Fruit and veggie peels, coffee grounds |
| Some brown material | Leaves, cardboard, newspaper |
If you’re composting outside, you don’t even need a bin—just a small area to pile your compost will work.
Start Collecting Scraps
Begin saving your compostable food waste in a bowl, old coffee can, or container under the sink. You don’t need anything special—just make sure you empty it every day or two to avoid smells.
What to Compost:
Greens (Wet Stuff)
- Fruit and veggie scraps
- Coffee grounds and filters
- Tea bags (without staples)
- Eggshells
Browns (Dry Stuff)
- Shredded paper or cardboard
- Dead leaves or twigs
- Paper towel rolls
- Sawdust (from untreated wood)
The trick is to balance greens and browns. Aim for 2 parts brown for every 1 part green to prevent your compost from getting slimy or smelly.
Where to Put It
If you don’t have a yard, you can still compost on a small scale.
Outdoor Options:
- Pile scraps in a shady corner of your yard
- Dig a hole and add scraps, covering with dirt
- Use an old storage tub with holes drilled in the bottom
Indoor Options:
- Store scraps in a container until you drop them at a local compost center
- Freeze scraps to avoid smells and drop off weekly
- Try countertop compost bins or worm bins if you’re up for a small investment later
Many communities offer compost drop-off sites for people without outdoor space.
Turn It Occasionally (Optional)
If you’re composting in a bin or pile, turning it every few weeks helps speed up the breakdown process. Use a shovel or stick to mix the materials.
- Turning helps add air, which speeds decomposition
- If you’re not turning, it’ll still break down—it just takes longer
- Make sure your pile stays moist but not soaked (like a wrung-out sponge)
No yard tools? Just stir it with a stick or old spatula. It doesn’t need to be perfect.
Watch It Break Down
Over time, your pile will turn into dark, crumbly compost that smells like fresh earth. This process can take anywhere from a few weeks to a few months, depending on conditions.
| Composting Stage | What You’ll Notice |
|---|---|
| Fresh | Recognizable food scraps |
| Mid-stage | Materials break down, heat builds |
| Finished | Dark, crumbly, earthy smell |
Once it’s done, use it in potted plants, garden beds, or spread it around your yard. It’s totally free fertilizer.
Avoid These Composting Mistakes
To keep your compost healthy and smell-free, steer clear of these common issues:
- Too much “green” waste = stinky pile
- No airflow = slow or smelly compost
- Adding the wrong items = pests or mold
Never Compost:
- Meat or bones
- Dairy or greasy foods
- Pet waste
- Glossy paper or stickers
- Diseased plants
Keeping it simple and plant-based will give you the best results with the least hassle.
Make It a Daily Habit
The key to composting success is consistency. Set up a simple routine to make it part of your everyday life:
- Keep a container near your prep area for scraps
- Empty it regularly to your outdoor pile or collection bin
- If you’re not composting daily, store scraps in the freezer
Even small efforts make a big impact over time.
Low Effort, High Impact
You don’t need a Pinterest-worthy compost bin or high-end tools to reduce waste and build healthy soil. With just a few scraps, a bucket, and a little patience, you can start composting right now—without spending a dime.
Whether you’re in a tiny apartment or a house with a yard, composting is an easy way to help the planet and improve your plants. No pressure. No gear. Just progress.
DIY

Home Services

Weather & Maintenance

Table of Contents
- Water Early or Late in the Day
- Use Mulch to Retain Moisture
- Install a Rain Barrel
- Choose Drought-Tolerant Plants
- Group Plants by Water Needs
- Ditch the Sprinkler, Use a Soaker Hose
- Water Deeply, Not Frequently
- Keep Grass Taller for Less Watering
- Patch Bare Spots With Ground Cover
- Reuse Household Water (Safely)
- Make a Water-Wise Plan
- A Greener Yard Without the Waste
Budget Water-Saving Tips for Your Yard and Garden: Keep Your Landscape Lush Without Wasting Water or Money
Keeping your yard and garden healthy during hot months doesn’t have to mean sky-high water bills. With a few smart habits and budget-friendly strategies, you can reduce water waste while still enjoying a green, thriving outdoor space.
Water Early or Late in the Day
Timing matters more than you think when it comes to watering. Midday sun causes much of the water to evaporate before it even hits the roots.
Best Times to Water:
- Early morning (before 10 a.m.): Cool temps allow water to soak in
- Evening (after 6 p.m.): Less evaporation, more absorption
Avoid watering late at night, which can promote mold or mildew on grass and leaves.
Use Mulch to Retain Moisture
Mulch isn’t just for looks—it’s a powerful water saver. A 2–3 inch layer helps soil hold moisture longer and reduces how often you need to water.
| Mulch Material | Benefits | Budget-Friendly? |
|---|---|---|
| Shredded bark | Long-lasting, weed-blocking | ✅ |
| Grass clippings | Free, enriches soil | ✅✅ |
| Straw or hay | Great for veggie gardens | ✅ |
| Leaves or wood chips | Naturally break down over time | ✅ |
Spread mulch around trees, flower beds, and garden rows to keep moisture where it belongs—at the roots.
Install a Rain Barrel
Why pay for water when you can collect it for free? Rain barrels capture runoff from your roof and store it for later use in your garden.
- Attach to a downspout with a diverter
- Use a screen to keep out debris and mosquitoes
- Dip a watering can or connect a hose to use the collected water
Many cities offer rebates or discounts on rain barrel kits, and DIY versions cost as little as $30–$50.
Choose Drought-Tolerant Plants
Some plants are naturally built to survive with less water. Swapping out thirsty varieties for drought-resistant options can cut your outdoor water use significantly.
Great Low-Water Choices:
- Lavender
- Sedum and succulents
- Russian sage
- Coneflower
- Rosemary
- Yarrow
Look for native plants suited to your region—they’ll need less help adjusting and thrive with minimal watering once established.
Group Plants by Water Needs
Mixing high- and low-water plants in the same bed often leads to overwatering. Instead, group plants with similar moisture needs together.
- Keep drought-tolerant varieties in one zone
- Place thirstier plants closer to your water source
- Use containers for herbs or flowers that dry out quickly
This zoning approach helps you water smarter—not harder.
Ditch the Sprinkler, Use a Soaker Hose
Sprinklers are easy, but they’re not the most efficient option. A soaker hose or drip irrigation system delivers water slowly at the ground level, right where plants need it most.
| Watering Method | Efficiency | Cost |
|---|---|---|
| Sprinkler | Low | $20–$60 |
| Soaker hose | Medium | $15–$30 |
| Drip irrigation | High | $25–$50 DIY |
A basic soaker hose costs less than a tank of gas and can save gallons of water per week.
Water Deeply, Not Frequently
Giving your garden a deep soak every few days is more effective than daily light watering. Deeper watering encourages roots to grow stronger and deeper—making your plants more drought-resistant.
- Water until the soil is moist 6–8 inches down
- Use a soil moisture meter (or your finger) to test
- Adjust based on recent rainfall or temperature
Set a reminder or mark a calendar to help you stay consistent.
Keep Grass Taller for Less Watering
Mowing your lawn super short might look neat, but it actually hurts water retention. Longer blades provide shade for the roots and reduce evaporation.
Lawn Tips:
- Set mower blades to 3–4 inches
- Leave grass clippings on the lawn as natural mulch
- Water less often but more deeply
You’ll water less—and your lawn will be healthier for it.
Patch Bare Spots With Ground Cover
Bald spots in your yard dry out quickly and can create hot zones that waste water. Fill those areas with low-maintenance ground covers instead.
Budget-Friendly Ground Covers:
- Creeping thyme
- Clover
- Liriope
- Moss (in shaded areas)
These plants help retain soil moisture, reduce runoff, and often require less water than grass.
Reuse Household Water (Safely)
You don’t have to pour leftover water down the drain. Some water used indoors can safely be reused outside.
- Collect water from rinsing fruits and veggies
- Reuse pet water bowls when refreshing
- Save water from cooking (cooled, no salt or grease) for garden beds
Just be sure not to reuse soapy or chemical-laden water unless you’re using greywater systems designed for that purpose.
Make a Water-Wise Plan
Taking a little time to plan your watering routine can reduce waste and increase effectiveness.
| Day | Watering Task |
|---|---|
| Monday | Deep water veggies |
| Wednesday | Check rain barrel + water pots |
| Friday | Water flower beds + lawn if needed |
| Weekend | Refill mulch, weed, check soil moisture |
Even a basic schedule helps prevent overwatering and ensures your plants get what they need—no more, no less.
A Greener Yard Without the Waste
Saving water in your yard doesn’t mean sacrificing beauty. With a few tweaks to your watering habits and some smart planting strategies, you can keep your outdoor space lush, green, and thriving—while lowering your bill and reducing environmental impact.
DIY
Home Services
Weather & Maintenance
Table of Contents
How to Reduce Plastic Waste at Home Without Going Zero-Waste: Simple Swaps That Make a Big Difference
You don’t need to go fully zero-waste to start cutting back on plastic. Even small changes in your daily routine can help reduce plastic waste at home without feeling like an all-or-nothing lifestyle overhaul.
Why Plastic Reduction Matters
Plastic waste doesn’t just pile up in landfills—it ends up in oceans, breaks down into microplastics, and sticks around for hundreds of years. Reducing your household plastic use helps:
- Cut down on pollution
- Lower your environmental footprint
- Simplify your space and habits
You don’t have to eliminate plastic completely. Just start where you are—with what you have.
Start With the Kitchen
The kitchen is often the biggest source of single-use plastics in the home. Thankfully, it’s also one of the easiest places to make low-effort swaps.
| Plastic Item | Swap With |
|---|---|
| Zip-top bags | Reusable silicone bags or containers |
| Plastic wrap | Beeswax wraps or plate covers |
| Water bottles | Refillable bottles (glass, stainless, or BPA-free) |
| Grocery produce bags | Mesh or cloth produce bags |
| Disposable utensils | Reusable cutlery kits |
You don’t need to toss out what you already have—just replace plastic with reusable alternatives as things run out.
Buy in Bulk (When It Makes Sense)
Buying in bulk reduces packaging and usually saves money too. Even if you can’t access a bulk store, choosing the larger size of an item usually means less plastic per use.
Bulk-Friendly Products:
- Pasta, rice, and grains
- Spices and dried herbs
- Cleaning supplies (powdered detergent, refills)
- Snack foods in larger packages instead of single servings
Use glass jars or repurposed containers to store items at home—no need for a fancy pantry setup.
Cut Down on Plastic Bottles in the Bathroom
From shampoo to hand soap, your bathroom may be hiding more plastic than you think. Luckily, some simple swaps can reduce waste without giving up your favorites.
Easy Bathroom Swaps:
- Switch to bar soap for hands and body
- Try shampoo and conditioner bars
- Refill liquid soap and cleaning sprays using concentrates
- Use reusable cotton rounds instead of disposable ones
These swaps are often more affordable over time and just as effective as the bottled versions.
Reuse What You Can
You don’t need to purge every plastic item in your home—reuse is a big part of reducing waste.
- Rinse and reuse takeout containers for leftovers
- Turn yogurt tubs into storage bins or craft containers
- Keep sturdy plastic bags to reuse as trash liners or lunch bags
Reusing extends the life of the plastic you already have, which is a huge win for reducing overall waste.
Rethink How You Shop
One of the best ways to reduce plastic is by adjusting how (and where) you shop.
| Shopping Habit | Plastic-Saving Swap |
|---|---|
| Grabbing plastic bags | Keep reusable bags in your car/purse |
| Buying prepackaged produce | Choose loose fruits and veggies |
| Opting for plastic-packaged products | Look for cardboard, metal, or glass alternatives |
| Online shopping | Combine orders to reduce packaging waste |
Becoming more mindful of packaging doesn’t mean changing everything—just choose plastic-free when it’s easy and available.
Simplify Cleaning Supplies
Many cleaning products come in plastic bottles—but most are just a small amount of active ingredient diluted in water.
Low-Plastic Cleaning Ideas:
- Use cleaning tablets or concentrates in refillable bottles
- Make your own spray with vinegar and water
- Try powdered detergent in cardboard boxes instead of liquid
- Use microfiber cloths instead of paper towels
You’ll reduce plastic and save cabinet space, too.
Reduce Takeout Plastic
Takeout is convenient, but it often comes with a pile of unnecessary plastic.
Smart Takeout Habits:
- Ask restaurants to skip utensils, napkins, and straws
- Bring your own reusable containers or mugs if allowed
- Choose places that use compostable or minimal packaging
- Keep a “takeout kit” in your car: utensils, straw, and a napkin
Even if you only remember half the time, it still adds up to less waste.
Get the Household on Board
Plastic reduction works best when it’s a team effort. Get everyone in your home involved with easy-to-follow systems.
- Place a bin or basket for reusable grocery bags
- Label containers to make organizing simple
- Keep a “use it up” zone in the fridge or pantry
- Let kids help pick out fun reusable lunch containers or water bottles
Reducing plastic should feel simple—not stressful.
Don’t Aim for Perfect
You’ll still buy plastic sometimes—and that’s okay. The goal is progress, not perfection. Every plastic-free swap and reused item makes a difference.
Try this approach:
- Replace disposable plastic one category at a time
- Don’t toss out usable items—use them up first
- Choose easy wins (like reusable bags or soap refills) to build momentum
The less pressure you put on yourself, the more likely you’ll stick with it.
Small Steps, Big Impact
You don’t need to be zero-waste to make a difference. By rethinking how you shop, what you reuse, and how you manage daily habits, you can cut down plastic waste significantly—without overhauling your life. These small, affordable changes are sustainable, simple, and surprisingly satisfying.
DIY
Home Services
Weather & Maintenance
Table of Contents
How to Create a Cozy Reading Nook Using What You Already Have: Turn Any Corner Into a Relaxing Book Retreat
You don’t need a home library, fancy furniture, or a big budget to create the perfect reading nook. In fact, with a little creativity, you can carve out a cozy, inviting space using things you already have at home.
Find Your Perfect Spot
The best reading nooks aren’t about square footage—they’re about comfort and quiet. Start by scouting out small, underused areas in your home.
Great Places to Consider:
- A corner of your bedroom
- An empty space under a window
- The end of a hallway or landing
- A rarely used closet or nook
- A spot near a bookshelf or side table
Look for a place that feels calm, gets good light (natural or artificial), and isn’t high-traffic.
Start With Comfy Seating
You don’t need a designer chair to build a reading retreat. Use what you have and make it as plush and inviting as possible.
Easy Seating Options:
- Pull a chair from another room and add a cushion or throw
- Stack floor pillows or folded blankets for a DIY floor seat
- Use a bench, ottoman, or even a folded duvet on the floor
Add a blanket for softness and a few pillows for back support, and you’re good to go.
Layer In Warm Lighting
Good lighting makes or breaks a reading nook. If you don’t have access to a window, grab a lamp or repurpose one from elsewhere in the house.
| Lighting Option | What You Can Use | Cozy Factor |
|---|---|---|
| Table lamp | Bedside or desk lamp | ✅✅✅ |
| String lights | Holiday lights or patio lights | ✅✅ |
| Floor lamp | Living room or bedroom | ✅✅✅ |
| Clip-on reading light | Small but focused | ✅✅ |
Soft, warm light (instead of harsh white bulbs) helps set a relaxing mood.
Add a Side Table or Tray
You’ll want a spot for your book, coffee, or a small snack. You don’t need a brand-new side table—anything stable will work.
- Repurpose a step stool, crate, or stack of books
- Use a serving tray on an ottoman or chair
- Pull in a kitchen or plant stand
As long as you have space for a drink and your current read, it’s functional.
Use Textiles to Set the Mood
Layering textures helps your nook feel cozy and inviting. Bring in extra throws, rugs, or cushions from other rooms.
Quick Tips:
- Drape a blanket over the chair or back wall
- Toss an old rug or folded quilt underfoot
- Stack mismatched pillows—it just adds charm
This is where you can get personal—pick fabrics and colors that make you feel calm and content.
Decorate With Intention
Even a tiny reading nook deserves a little style. Use items you already have to add personality and warmth.
| Item to Add | What to Look For | Adds What? |
|---|---|---|
| Framed photo or art | Something small or meaningful | Visual interest |
| Potted plant | Real or faux | Freshness and color |
| Candle or diffuser | Scented or flameless | Mood and aroma |
| Book stack | Favorite titles or to-read pile | Charm and convenience |
Don’t overdo it—just one or two accents will keep it from feeling cluttered.
Create Separation (Even in Shared Spaces)
If your nook is in a busy part of the house, use simple tricks to give it a sense of privacy.
- Hang a curtain or lightweight fabric as a divider
- Use a tall plant, bookshelf, or chair back as a partial wall
- Lay down a small rug to visually define the space
Even if you’re in a shared room, these little tweaks help create a boundary that says, “This is my quiet space.”
Make It Easy to Use Daily
The best reading nooks are the ones you actually use. Set yours up to be low-effort and easy to access.
- Keep a small basket nearby with your current reads
- Add a charger if you read on a device
- Store an extra blanket or sweater within reach
The more effortless it feels to sit down and read, the more likely you are to do it.
Nook Ideas for Small Spaces
Short on space? No problem. Here are some mini-nook ideas that work in almost any home:
| Space Available | Nook Solution |
|---|---|
| Just a corner | Armchair, blanket, and lamp combo |
| Tiny bedroom | Floor cushion and clip-on light |
| Closet or alcove | Bench seat with pillows and tray |
| Window sill space | Folded quilt and throw pillows |
| Shared living area | Chair and rug with divider curtain |
Reading nooks don’t have to be big to be cozy.
Relax, Read, Repeat
A cozy reading nook isn’t about perfection—it’s about comfort, quiet, and a place to unwind. Whether you’re working with a full room or just a sliver of space, you can create a book-lover’s retreat using only the things already in your home.
So grab your favorite blanket, pick a spot, and curl up with a good book—your new reading nook is waiting.
DIY
Home Services
Weather & Maintenance
Table of Contents
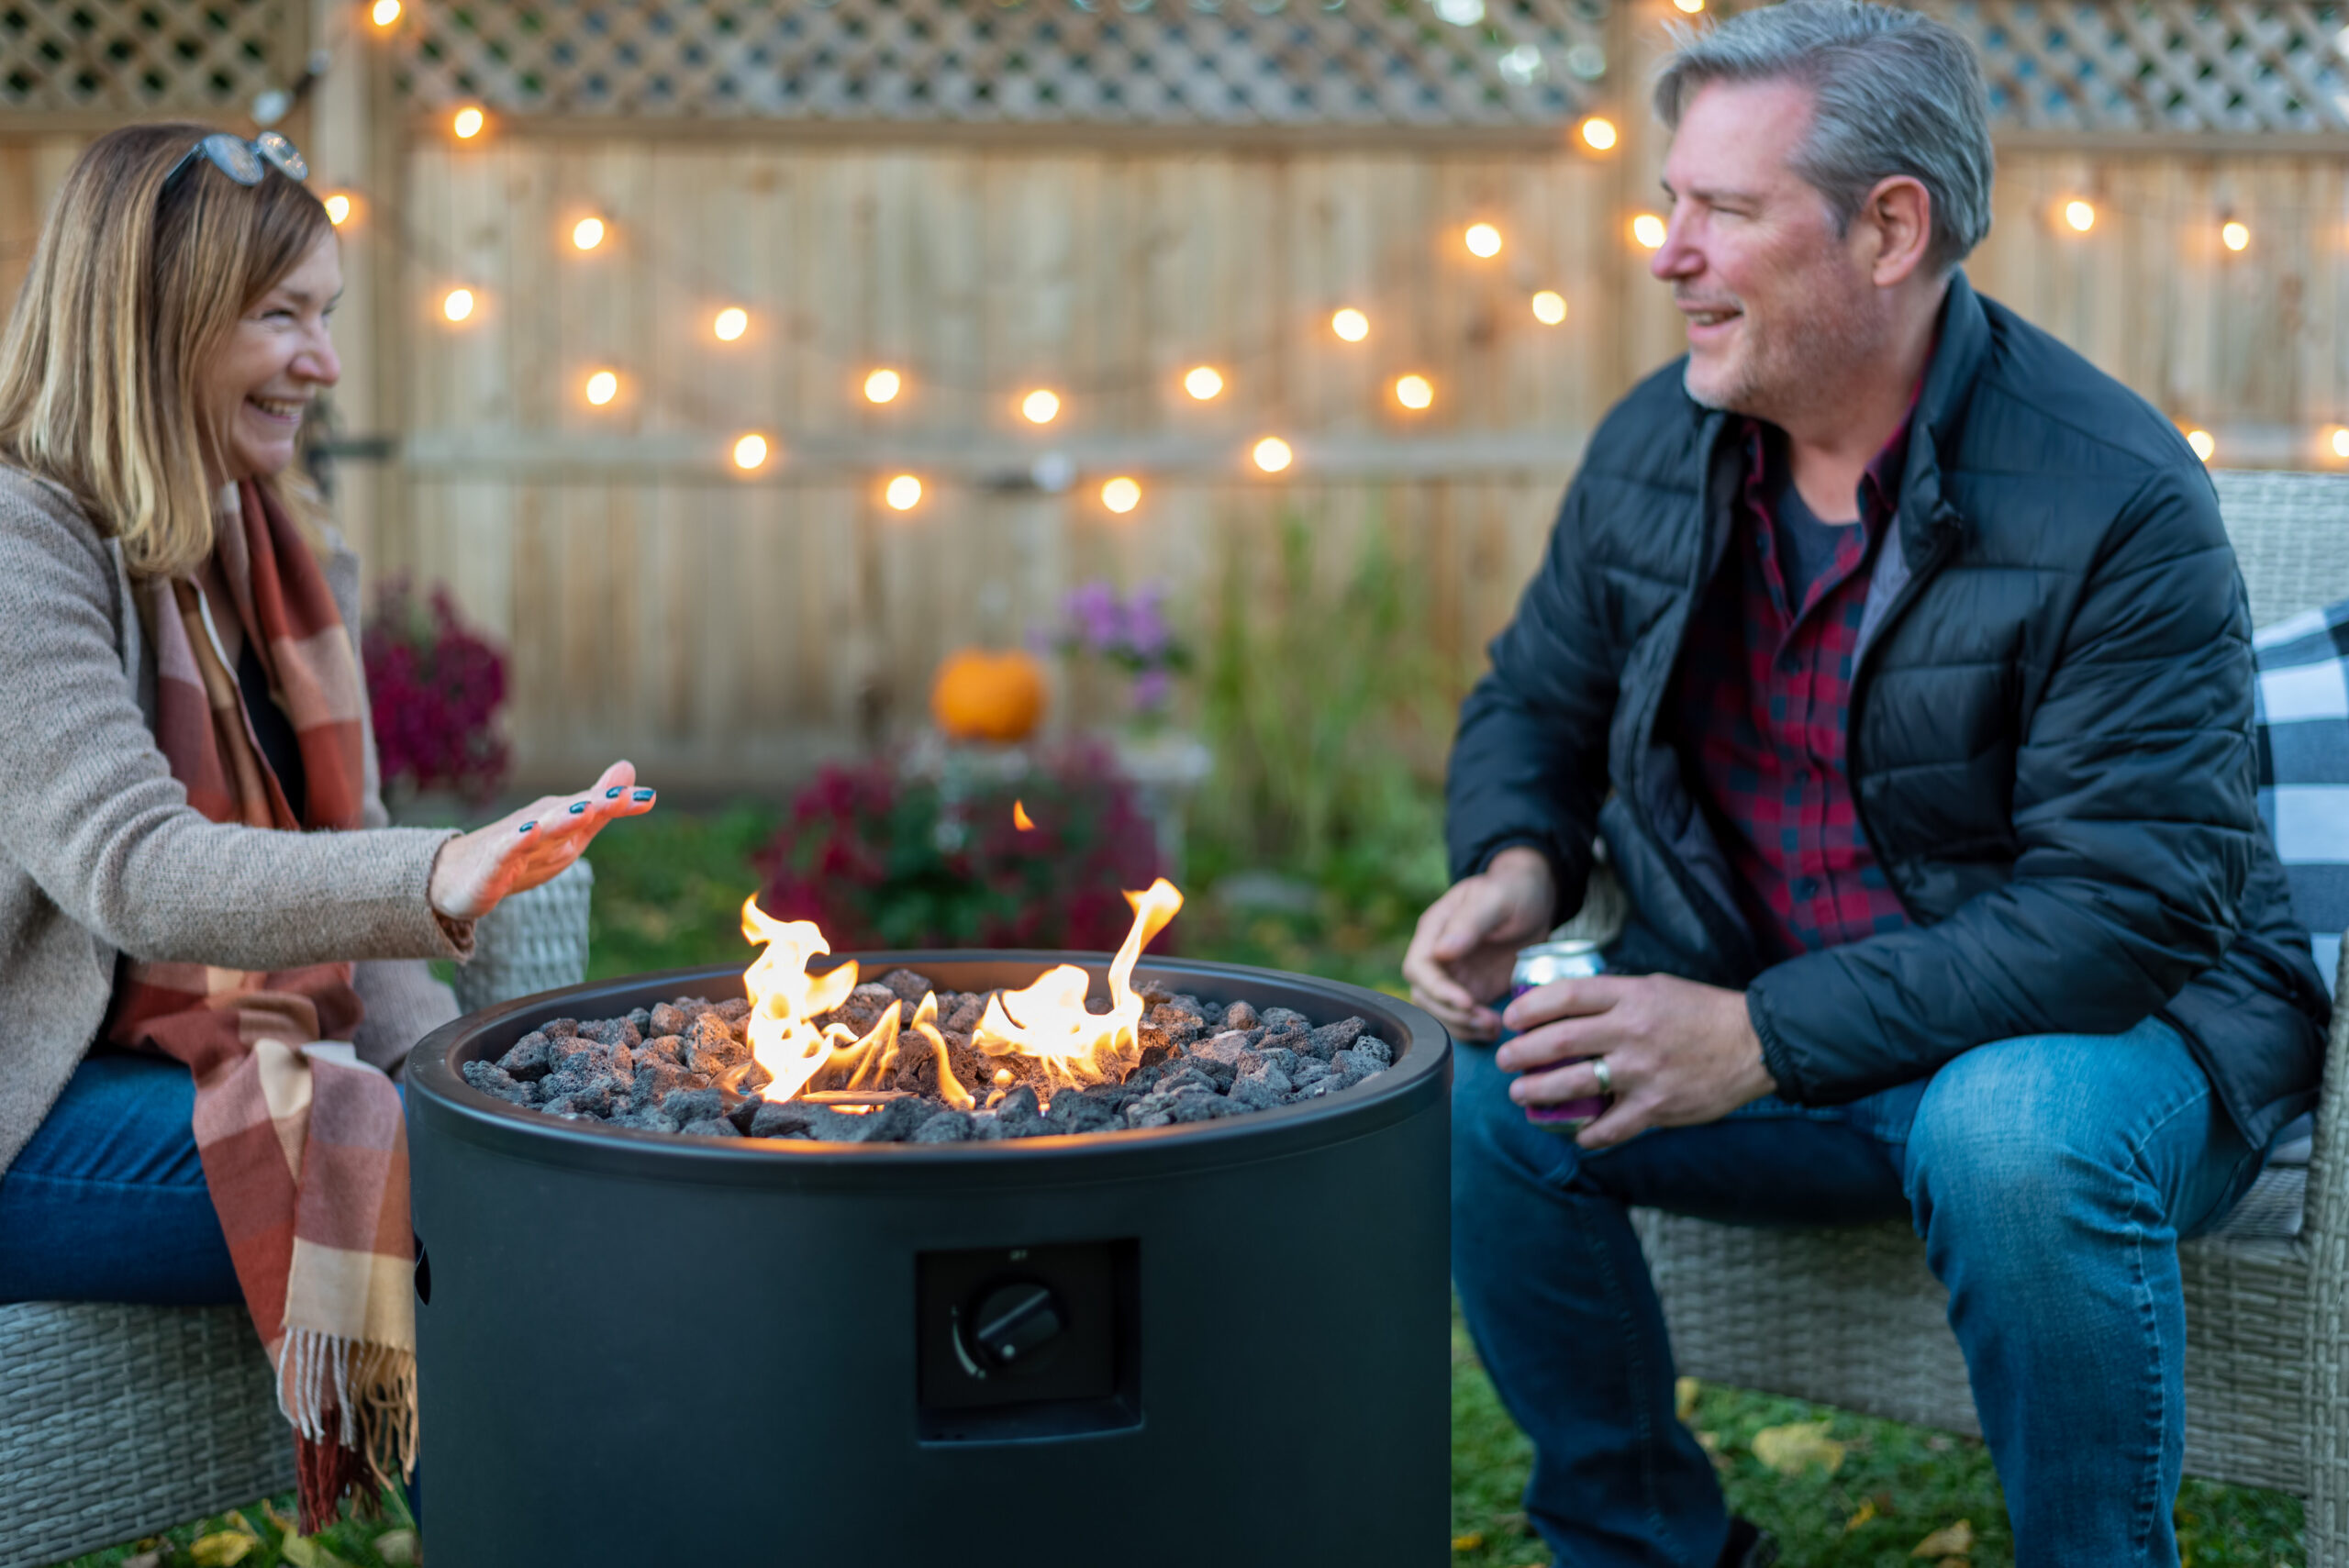
How to Host a Summer BBQ on a Tight Budget: Affordable Grilling Tips for Backyard Fun
A summer barbecue doesn’t have to drain your wallet. With some clever planning and a few low-cost tricks, you can throw a delicious and festive backyard cookout without overspending.
Keep the Guest List Manageable
More guests mean more food, drinks, and supplies. Keep your BBQ affordable by limiting the headcount to close friends or family. A smaller gathering makes for a more relaxed vibe and a lighter load on your grocery bill.
Make It a Potluck BBQ
Asking guests to bring a side dish, drink, or dessert is a simple way to cut costs while adding variety to the menu. Most people love contributing, especially when they know it helps make the event possible.
- You provide: The main protein (burgers, hot dogs, or chicken)
- Guests bring: Chips, salads, desserts, beverages
To keep things organized, consider creating a quick sign-up sheet or group message thread so there’s a mix of items and no duplicates.
Choose Budget-Friendly BBQ Foods
You don’t need steaks or gourmet sausages to impress. Classic, crowd-pleasing options are usually the cheapest—and often the tastiest.
| Food Item | Average Cost per Serving | Grilling Ease | Crowd Favorite |
|---|---|---|---|
| Hot dogs | $0.50–$1.00 | Very Easy | ✅ |
| Chicken drumsticks | $1.00–$1.50 | Easy | ✅ |
| Hamburgers | $1.50–$2.00 | Moderate | ✅ |
| Veggie skewers | $0.75–$1.25 | Easy | ✅ |
| Corn on the cob | $0.50–$0.75 | Very Easy | ✅ |
Stick to one or two main proteins and supplement with inexpensive, filling sides like baked beans, pasta salad, or grilled vegetables.
Shop Smart and Plan Ahead
Waiting until the day before the BBQ to buy supplies can lead to rushed decisions and higher prices. Give yourself time to shop sales, use coupons, and buy in bulk.
Budget Grocery Tips
- Use store apps: Look for digital coupons and weekly specials.
- Buy in bulk: Meat, buns, and drinks are usually cheaper in multipacks.
- Visit discount stores: Places like Aldi or Dollar Tree often have great prices on BBQ basics like condiments, paper goods, and snacks.
DIY Your Decor and Setup
Skip the expensive outdoor decorations and opt for simple, festive touches made from items you already own or can create for cheap.
- String lights: Use holiday lights to add evening ambiance.
- Tablecloths: Reusable or dollar-store versions work great.
- DIY centerpieces: Fill mason jars with wildflowers or utensils.
For seating, use folding chairs, blankets, or even ask guests to BYOC (bring your own chair).
Make Your Own Drinks
Buying bottled sodas, beer, or individual drinks can get pricey fast. A more affordable (and eco-friendly) option is to make a few large-batch beverages.
Budget Drink Ideas
- Iced tea or lemonade: Brew in bulk and serve in pitchers.
- Fruit-infused water: Add sliced citrus or berries to cold water for a refreshing touch.
- DIY punch: Mix fruit juice with soda or sparkling water for a fizzy party drink.
If you’re serving alcohol, limit options to a single signature cocktail or encourage BYOB.
Simple Entertainment That Costs Nothing
You don’t need to hire a DJ or rent a bounce house to keep guests entertained. Some of the best backyard fun is free.
- Music playlist: Create a fun summer mix and stream it from your phone or speaker.
- Lawn games: Cornhole, frisbee, or even a water balloon toss keeps both kids and adults busy.
- Trivia or BBQ bingo: Print out simple game cards for some added laughs.
Grill Once, Eat Twice
Make your money go further by grilling extra food that can be repurposed for leftovers.
- Grill extra corn: Use leftovers in salads or salsas.
- Cook all the burgers: Leftovers make easy lunches the next day.
- Extra chicken: Shred and use for tacos, wraps, or pasta.
Clean-Up with Less Waste
Disposable plates and utensils are convenient, but they add up in cost and trash. Consider using washable items if you have enough or ask guests to bring their own reusable cups or plates.
For disposables:
- Buy in bulk to save
- Choose compostable or recyclable options when possible
- Set out clearly marked bins to encourage recycling
Hosting Can Be Fun and Frugal
Throwing a great summer BBQ isn’t about fancy food or decorations—it’s about good company, great flavors, and a laid-back atmosphere. By making thoughtful choices and leaning into DIY solutions, you can enjoy all the summer fun without the financial stress.
DIY
Home Services
Weather & Maintenance
Table of Contents
- How Heat Affects the Body
- Keep Your Home Cool Without Breaking the Bank
- Hydration Habits for Hot Days
- Safe Spaces Inside the Home
- Heatproofing for Kids and Pets
- Warning Signs to Watch Out For
- Emergency Planning for Extreme Heat
- Summer-Ready Home Upgrades
- Stay Informed With Local Alerts
- Small Changes, Big Difference
Summer Safety at Home: Prevent Heatstroke, Save Energy, and Stay Hydrated Indoors
When temperatures soar, the comfort of home can quickly turn into a health hazard. From heatstroke to dehydration, hot weather poses real risks—especially indoors without proper precautions.
How Heat Affects the Body
Excessive heat causes the body to work overtime to maintain a safe internal temperature. When this balance breaks down, it can lead to heat exhaustion or even heatstroke, both of which are medical emergencies. Common signs include dizziness, headache, nausea, and confusion.
Certain groups—like older adults, young children, and people with chronic illnesses—are especially vulnerable to heat-related problems. That’s why having a summer heat safety plan at home is essential.
Keep Your Home Cool Without Breaking the Bank
Staying cool doesn’t always require blasting the air conditioning all day. There are cost-effective ways to beat the heat while managing your energy bill.
Energy-Smart Cooling Tips
- Use fans strategically: Place box fans in windows to push hot air out and ceiling fans to circulate cool air inside.
- Close curtains and blinds: Block out direct sunlight during the hottest parts of the day to reduce indoor heat gain.
- Cook smart: Avoid using ovens or stoves—opt for microwaves, outdoor grilling, or cold meals.
| Cooling Method | Energy Usage | Cost Efficiency | Effectiveness |
|---|---|---|---|
| Central A/C | High | Low | Very High |
| Window Fans | Low | High | Moderate |
| Blackout Curtains | None | Very High | High |
| Ceiling Fans | Low | High | Moderate |
Hydration Habits for Hot Days
Water is your first line of defense against heat exhaustion. But many people don’t drink enough, especially when indoors where the heat can sneak up on you.
Simple Hydration Tips
- Set reminders: Use alarms or apps to prompt regular water intake throughout the day.
- Infuse flavor: Add lemon, cucumber, or mint to make water more appealing.
- Eat water-rich foods: Cucumbers, watermelon, and strawberries help boost hydration levels naturally.
Aim for at least 8 glasses of water a day—and more if you’re active or sweating a lot indoors.
Safe Spaces Inside the Home
Not every room in your home cools the same way. Knowing which areas are naturally cooler can help you plan your day more comfortably.
- Basements or lower levels tend to stay cooler than upper floors.
- Rooms without direct sunlight are better for mid-day activities or napping.
- Bathrooms with tile floors can offer quick relief when overheated.
Set up cooling stations with a fan, a cold-water bottle, and light snacks to encourage regular breaks from the heat.
Heatproofing for Kids and Pets
Children and pets can’t regulate their body temperature as efficiently as adults. That’s why they need special care during hot weather.
Tips for Keeping Them Safe
- Never leave them in parked cars: Even with the windows cracked, interior temperatures can skyrocket within minutes.
- Ensure shaded play areas: If playing outdoors, use umbrellas or tents and bring them inside often.
- Keep water bowls full: For pets, place multiple bowls around the house, and consider a cooling mat or frozen treats.
Warning Signs to Watch Out For
Recognizing early signs of heat-related illness is crucial. Quick action can prevent a minor issue from turning into a medical emergency.
| Symptom | Possible Condition | What to Do |
|---|---|---|
| Heavy sweating, fatigue | Heat exhaustion | Rest, hydrate, cool down |
| Confusion, no sweating | Heatstroke | Call 911, use ice packs, move to cool area |
| Muscle cramps | Heat cramps | Stretch, hydrate with electrolytes |
| Nausea or headache | Dehydration/Overheating | Sip water, rest in shade or cool room |
Emergency Planning for Extreme Heat
Power outages during heatwaves can be dangerous. Having an emergency plan ensures your household stays safe even if cooling systems go offline.
- Create a backup cooling plan: Have battery-operated fans, ice packs, and access to a cooling shelter if needed.
- Stock water and shelf-stable food: Include enough for each family member for at least 72 hours.
- Check on neighbors: Especially those who are elderly or living alone.
Summer-Ready Home Upgrades
Some small home improvements can make a big difference during heatwaves—and may even increase your home’s energy efficiency.
- Install insulation or weather stripping: Keeps the cool air in and the hot air out.
- Use smart thermostats: Automatically adjust cooling when you’re not home to save energy.
- Upgrade to energy-efficient windows: Reduce heat transfer and lower cooling costs.
Stay Informed With Local Alerts
Many cities offer heat advisories or emergency updates via text or email. Signing up helps you prepare ahead of time.
Also consider:
- Installing a weather app with push notifications
- Keeping a battery-powered radio for updates during outages
Small Changes, Big Difference
Summer safety starts with everyday habits. By combining smart cooling strategies, good hydration, and a few home tweaks, you can create a safe, comfortable environment all season long.
DIY
Home Services
Weather & Maintenance
Table of Contents
How to Start a Vegetable Garden for Under $50: Beginner Tips for Growing Food on a Budget
Think starting a vegetable garden has to be expensive? Think again. With a little creativity, a strict budget, and some basic know-how, you can grow your own fresh produce without spending more than $50.
Discover beginner-friendly tips to start a garden that saves you money and puts food on your table.
Start Small and Simple
You don’t need a huge backyard or fancy tools to grow vegetables. Focus on what you can manage and expand later.
- Use Containers or Small Plots: Start with 2–3 large containers or a 4×4-foot patch of ground. You can even use repurposed buckets, storage bins, or milk crates.
- Grow What You Eat: Stick to easy, high-yield veggies like lettuce, green beans, tomatoes, radishes, or zucchini. These grow quickly and offer multiple harvests.
- Sun is Free: Pick the sunniest spot in your yard, patio, or balcony—most veggies need 6–8 hours of sunlight a day.
Keeping it small and focused helps stretch your dollars while you learn what works.
Find Free or Cheap Containers
You don’t need to buy brand-new pots or raised beds.
- Repurpose What You Have: Buckets, crates, or storage bins with holes drilled in the bottom work great for most veggies.
- Ask Around: Friends, family, or neighbors may have old pots or planters they’re not using.
- Check Online: Look on Craigslist, Facebook Marketplace, or Buy Nothing groups for free gardening supplies.
You’d be surprised how many containers you can collect for zero cost.
Buy Budget Seeds, Not Seedlings
Seeds are much cheaper than buying starter plants—and they go a lot further.
- $1 Seed Packets: Many dollar stores and garden centers offer vegetable seeds for under $2 per pack.
- Seed Swaps: Join a local gardening group or check community centers for free seed exchange events.
- Start Indoors or Direct Sow: Some veggies (like beans or radishes) can be planted straight in the soil, saving you time and effort.
You can get multiple garden seasons from one packet of seeds, making this one of the best budget buys.
Use Homemade or Free Soil Boosters
Good soil is key—but you don’t need to buy fancy bags of it.
- Compost Kitchen Scraps: Start a small compost bin with food scraps and yard waste to enrich your soil.
- Ask for Free Compost or Mulch: Some cities offer free compost or mulch to residents—check your local public works department.
- Mix Your Own: Combine one part soil, one part compost, and one part sand or perlite for a basic potting mix.
If you’re buying bagged soil, stick to the essentials and buy just enough to fill your containers.
Water Smarter, Not Harder
Water is free, but keeping your plants hydrated without waste helps your garden thrive.
- Water in the Morning: It reduces evaporation and helps plants deal with daytime heat.
- Use a Watering Can or Jug: Repurpose milk jugs or pitchers to control how much water you use.
- Collect Rainwater: Set out a bucket or barrel to catch rain for free, eco-friendly watering.
Smart watering keeps your plants healthy and your budget intact.
DIY Support and Protection
Instead of buying garden gadgets, get creative with what you already have.
- Tomato Cages from Wire Hangers: Use old hangers or scrap wood to build plant supports.
- DIY Row Markers: Label plants with painted rocks, popsicle sticks, or reused spoons.
- Natural Pest Control: Sprinkle crushed eggshells around plants to keep slugs away or plant marigolds to deter bugs.
Small touches like these help your garden thrive without extra costs.
Final Insights
Starting a vegetable garden on a $50 budget is totally doable—even for beginners. By keeping things simple, using what you have, and making smart purchases, you’ll grow healthy, homegrown food and learn valuable skills in the process.
Look into these budget tips and plant your first garden with confidence—your wallet and your plate will thank you.
DIY
Home Services
Weather & Maintenance
Table of Contents
How to Set Up a Home Recycling Station That’s Easy, Organized, and Actually Works
If your good intentions to recycle keep getting derailed by clutter, confusion, or inconvenience, you’re not alone. The key to successful recycling at home is creating a setup that’s easy to use, organized, and fits your space and lifestyle.
Check out these simple and functional tips for setting up a recycling station that helps your household stay consistent and waste-smart.
Choose the Right Spot
Your recycling station doesn’t have to be fancy, but it should be convenient.
- Kitchen is Key: Most recyclables come from the kitchen, so placing bins near your trash can or under the sink makes it easier to separate items right away.
- Garage or Mudroom: If space is tight indoors, consider a spot near your entryway, laundry area, or garage door.
- Multiple Mini Stations: Set up smaller recycling spots in places like the office or bathroom to catch paper, plastic, and cans that would otherwise get tossed.
Location is everything—if it’s not easy to access, no one will use it.
Use Separate, Clearly Labeled Bins
Sorting makes recycling more effective—and less of a headache later.
- Bin for Each Type: Use one container each for paper, plastic, metal, and glass, depending on what your local recycling center accepts.
- Label Clearly: Use large, bold labels or icons (e.g., ♻️) so everyone in the house knows what goes where.
- Color Code: Consider using different colored bins or lids for an extra visual cue.
You can use plastic tubs, repurposed storage bins, or even old laundry baskets—whatever fits your budget and space.
Include a Trash and “Not Sure” Bin
Sometimes it’s hard to know if something is recyclable—and having a place to pause and check helps.
- Trash Nearby: Keep a small garbage bin next to your recycling to catch non-recyclables. This keeps people from tossing everything into the wrong bin.
- “Question Bin”: Have a small bin or box for items you’re unsure about. Research them later and adjust your system accordingly.
This small addition helps you learn while avoiding contamination in your recycling.
Make It Easy to Clean
Recyclables can get messy fast, so make it simple to keep your station clean and odor-free.
- Line the Bins: Use bags or newspaper at the bottom to catch spills and make cleanup easier.
- Rinse Before Tossing: Encourage everyone to rinse food containers like yogurt cups or sauce jars before tossing them in.
- Wipe Down Weekly: A quick weekly wipe-down keeps your station from becoming a sticky mess.
Clean bins also make the process more pleasant and encourage consistent use.
Educate the Household
Even the best setup won’t work if no one knows how to use it.
- Post Guidelines: Hang a simple cheat sheet or chart nearby with your local recycling rules.
- Lead by Example: Show kids and guests how to sort correctly.
- Keep It Simple: Avoid overcomplicating—stick to the basics of what’s recyclable in your area and add more categories only if your household is ready.
When everyone’s on the same page, recycling becomes second nature.
Store and Transport Smartly
Once the bins are full, you’ll need a plan to get them to the curb or recycling center.
- Larger Storage in Garage or Porch: Transfer sorted items to larger bins or bags if you only have small containers inside.
- Collapsible Bins or Bags: These can save space and make hauling easier.
- Create a Weekly Routine: Set a reminder to take out recycling the same day as trash so it doesn’t pile up.
A simple plan helps keep your recycling station from becoming a clutter zone.
Add Extras If You’re Ready
Once you’ve mastered the basics, you can level up your setup.
- Composting: Add a bin for food scraps to reduce kitchen waste.
- Battery or Electronics Drop Box: Create a small collection spot for hard-to-recycle items.
- Reuse Zone: Set aside a bin for jars, bags, or containers that can be used again around the house.
These bonus bins take your recycling game from good to great with just a little extra effort.
Parting Advice
Creating a home recycling station that actually works is all about making it functional, accessible, and easy for everyone in the house to use. With a little organization and some simple tools, you can reduce waste and build better habits that last.
Consider setting up a recycling station that fits your space and lifestyle—it’s one of the easiest ways to live greener without spending much.
DIY
Home Services
Weather & Maintenance
Table of Contents
Eco-Friendly Laundry Tips That Save You Money and Reduce Waste
Doing laundry is part of everyday life, but it can also be a hidden source of wasted energy, water, and money. The good news? With a few simple changes, you can make your laundry routine more eco-friendly while cutting down on costs. From washing in cold water to making your own detergent, these tips will help you save money, reduce waste, and keep your clothes looking great.
Wash with Cold Water
One of the easiest ways to make your laundry more eco-friendly is to switch to cold water washing.
Why It Matters: Heating water takes up about 90% of the energy used in a washing machine. Washing in cold can cut your energy use and lower your utility bill.
Benefits:
- Saves energy and money
- Protects colors and fabrics from fading or shrinking
- Works with most modern detergents
Pro Tip: Use a detergent labeled for cold water, and only run full loads to make each cycle count.
Line Dry Your Clothes
Skip the dryer and let nature do the work. Line drying is not only free—it’s also gentle on your clothes.
Why It Matters: Dryers use a lot of electricity and wear out your clothes faster. Air drying extends the life of your garments and cuts energy use.
How to Do It:
- Use a clothesline or drying rack indoors or outdoors
- Hang clothes in direct sunlight for faster drying and natural disinfecting
- Shake out wrinkles before hanging to reduce ironing
Pro Tip: If you don’t have outdoor space, a foldable rack in a sunny room works just as well.
Make Your Own Laundry Detergent
DIY laundry detergent is affordable, effective, and cuts back on plastic packaging.
Why It Matters: Many store-bought detergents come in large plastic containers and include harsh chemicals that aren’t good for your health or the planet.
Simple DIY Recipe:
- 1 bar of unscented soap (grated)
- 1 cup washing soda
- 1 cup borax
Mix all ingredients and store in a sealed container. Use 1–2 tablespoons per load.
Pro Tip: For a scent boost, add a few drops of essential oil like lavender or lemon to each load.
Use Eco-Friendly Dryer Alternatives
If you do use a dryer, you can still make the process more sustainable.
Wool Dryer Balls: These reusable balls speed up drying time, soften clothes naturally, and reduce static without the chemicals in dryer sheets.
Dryer Sheet Alternatives: Use reusable dryer sheets or make your own with fabric scraps sprayed with vinegar and essential oils.
Clean the Lint Trap: A clean lint trap improves airflow, helping your dryer work more efficiently and use less energy.
Choose Sustainable Laundry Products
When you buy laundry supplies, opt for products that are better for the environment.
Look For:
- Plant-based, biodegradable detergents
- Concentrated formulas (less packaging and waste)
- Products packaged in cardboard or refillable containers
Pro Tip: Many eco-friendly brands offer subscription or bulk-buy options to save even more.
Upgrade to Energy-Efficient Machines
If you’re in the market for a new washer or dryer, choose energy-efficient models.
Why It Matters: ENERGY STAR-rated machines use less water and electricity, which means lower bills and a smaller environmental impact.
Bonus: Front-loading washers typically use less water and energy than top-loaders.
Wash Only When Needed
Cut down on laundry loads by wearing clothes more than once when possible.
Tips:
- Jeans, sweaters, and jackets can often be worn multiple times before washing
- Use a spot cleaner for small stains instead of washing the whole item
- Teach kids and teens to only put dirty clothes in the hamper
Use Less Water and Detergent
Using too much soap or water doesn’t get clothes cleaner—it just wastes resources.
Tips:
- Follow the detergent instructions—more isn’t always better
- Choose the correct load size setting to avoid using extra water
- Use the high-spin cycle to remove more water before drying
Final Insights
Making your laundry routine more eco-friendly doesn’t mean giving up clean clothes or convenience. With a few simple swaps—like washing in cold water, air drying, and using homemade detergent—you can save money, reduce waste, and help protect the planet. Start small and build on these habits to create a laundry routine that’s better for your budget and the environment.
DIY
Home Services
Weather & Maintenance
Table of Contents
Spring to Summer Decor Swaps That Don’t Cost a Fortune
As the seasons shift from spring to summer, a few simple tweaks can refresh your home and make it feel in sync with the sunny days ahead. The best part? You don’t need to buy a whole new set of decorations to make it happen.
Find out how to rotate seasonal decor using what you already have and a few affordable touches.
Lighten Up Your Color Palette
Summer is all about bright, breezy colors. You can create that vibe with a few easy swaps:
- Switch Out Throw Pillows: Trade pastel or floral spring pillows for bold solids or fun tropical prints. If buying new covers isn’t in the budget, flip them over or cover them with inexpensive fabric.
- Change Up Blankets and Throws: Put away heavy knits and swap in lightweight cotton or linen throws in lighter colors.
- Use What You’ve Got: Repurpose anything in summer tones—tablecloths, scarves, or even old beach towels—as covers or accents.
Lightening your color scheme gives your space that fresh, summery feeling with zero stress.
Bring the Outdoors In
Warmer months call for a little extra nature indoors.
- Fresh or Faux Greenery: Replace spring flowers like tulips and daffodils with greenery, palms, or sunflowers.
- Decorate with Fruit: Lemons, limes, or oranges in a bowl make a colorful, summery centerpiece that you can eat later.
- DIY Herb Vases: Snip herbs like mint or rosemary from your garden and pop them into small jars or bottles for instant green freshness.
You likely have all the materials you need already—just pull from what’s in season and what’s in your pantry or backyard.
Update Your Wall Decor
Wall art doesn’t have to stay the same all year.
- Swap Printables: Print free summer-themed art and rotate it into existing frames. Think beaches, sunshine, or botanical prints.
- Hang Lightweight Baskets or Woven Art: Trade out heavy spring wreaths for simple wall baskets or straw hats for a breezy look.
- Photo Refresh: Print a few new summer-themed family photos or vacation snapshots to display.
These small swaps keep your walls fresh and fun without spending a cent.
Refresh Table and Shelf Displays
Your shelves, coffee table, and mantel can tell a seasonal story without buying new decor.
- Change Decorative Accents: Swap out spring items like bunnies or eggs for seashells, beach stones, or summer candles.
- Use Everyday Items Creatively: Display colorful books, beach hats, or even a pair of cute sunglasses as part of your summer setup.
- Group Items by Theme: Create little summer-themed vignettes using items you already own—anything from glass bottles to woven trays to floral teacups.
With just a few tweaks, your shelves and surfaces can shift from spring fresh to summer sunny.
Bring Summer Vibes to the Entryway
Your entry sets the tone for your home, and it’s easy to make it feel seasonal on a budget.
- Wreath Swap: Switch out spring florals for a wreath made of twine, shells, or faux greenery.
- Welcome Mat Refresh: Flip over or shake out your current mat, or paint a DIY summer message on the back side.
- Add a Pop of Color: A small potted plant or a cheerful summer sign adds a bright touch to your porch or entry space.
Just a couple of updates make a big impact—and you can often use what you already have on hand.
Don’t Forget the Scents
A seasonal scent can change how your home feels almost instantly.
- Swap Out Candles: Trade heavy spring florals for citrus, coconut, or fresh linen scents.
- Simmer Pot or Diffuser: Add lemon slices and mint to a pot of simmering water, or use essential oils like grapefruit and peppermint for that summer freshness.
- DIY Room Spray: Mix water, witch hazel, and a few drops of essential oils in a spray bottle for a homemade scent boost.
Scents help create that “ahh, summer” vibe without lifting a finger on decor.
Final Thoughts
You don’t need to spend money to make your home feel like summer. By rotating a few items, using what you already own, and focusing on fresh colors and natural elements, your space can feel brand-new for the season.
Consider these easy swaps to move from spring to summer style without overspending.